



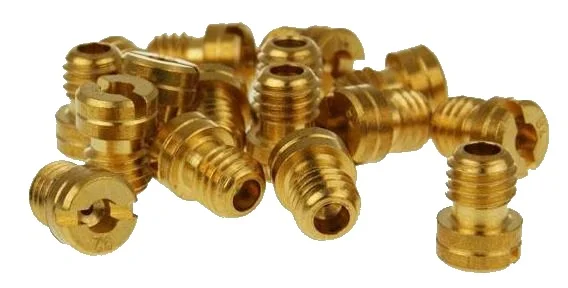
"I have a Tyga air box top, the Tyga exhausts and the wire splice mod. I have researched your site and others for a base jet setting and get contradicting results? As the parts are yours I have opted for 148 mains, standard power jets and slows? The needles are standard but have a washer to raise slightly? The original setup was the same except for a drilled air box lid, he had 130 mains and said it ran ok?"
For the jetting, your setting looks about right for starting. I have set up quite a few MC21’s and they always seem to settle around #145 to #148 mains, with everything else stock. Check float heights and set to 13mm of they’re not already. I just did a set of carbs for someone recently and upon opening the bowls, the float heights were about 15mm! This is quite an important step as incorrect float heights can really make a mess of trying to set things up.
To be honest, drilling holes in the airbox lid is a cheap and easy way to improve flow, but due to the sharp edged holes (from simple drilling) the additional airflow is never as much as you’d suspect due to the vortices these drilled holes create. Our airbox lid with the properly designed intake funnel keeps intake flow at a high velocity without restricting flow.
As for setting up the carbs, plug chops are your friend……..For street use, always err on the rich side, especially if setting up on a warm day, as a cool day or evening will run leaner, so you need to be prepared for this. Unless you want to be shuffling the brass every time you go out for a cruise 🙂
"We have a race mc18 and a track/road mc21 so the reassess are for both as in the order and all the rest is for the mc21 do you have any recommendations for the jetting?"
First of all, please let me be clear that following jetting specs are not ‘fixed in stone’, so be prepared to do some fettling. There’s so many things affecting the jetting that I can really only give you a ballpark figure, and you’ll need to plug chop to home in on the perfect setting.
So, for the MC21 with pipes & silencers, Hi-Flo reed valves, airbox lid (with filter) and most importantly the wire splice derestriction,

I would start off at sea level and 20°C with probably #152 mains. This should be safe, and possibly a tad rich. Over here in Thailand, at sea level with 25-30°C, we’re in the #148-#142 range. No leaner.
Needles; stock work well. If you feel a bit of a torque loss from ½ throttle up, then try a 0.5mm washer under the needle to help richen things up.
Power Jets; leave stock.
Pilot jets; leave stock #38 in there. Very often people like to fit #40’s thinking it’s the way to go but with the airbox and filter fitted (even if the lid if high flowing) it’s almost always best to leave the stock pilots in or you’ll be chasing low end rpm/throttle problems. Only with pod filter, open carbs, or if you pre-mix will you need to go bigger on the pilots.
Air screw; 1 ½ – 2 turns out.
Float heights are very important. Start with 13mm. If you get any low rpm stumbling that you can’t dial out then try 13.5mm. Don’t go outside the 12.5-13.5mm range or it’ll never run right.
Note that the above settings require that the air solenoids are all hooked up correctly.
"We are racing an mc21 nsr and need some advice. It has Tyga air box lid, reeds and stuffers, exhausts and flanges, wire splice. We dyno it at 64hp. our problem is we don't know what the air correction system does, but want to know if you have a kit to remove it. last week at phillip island we blow a cylinder and found the 'X' jet blocked for the second time.
It also feels lean at 8000rpm as you just come back on the throttle leaving corners. so I guess the question is, do you have a kit or information to delete the air correction system, and are you able to source the correct adjustable needles and needle jets or jet kit?
I do not have to much time to experiment, so if you are able to source the parts that work I would be happy to purchase them from you."
Sorry, we don’t have a kit for replacing the air solenoid hoses.
It’s a little strange that you get a seizure from a blocked joint, as these solenoids actually control the air flow to the emulsion tube, not fuel, so a blockage would limit air and make the engine run rich.
To give you an idea as to how the air solenoid system works, one solenoid is activated by throttle position, and the other by rpm. They switch on and off depending on these parameters.
I have in the past eliminated the solenoids and hoses by removing all but the two hoses actually connected to the carburetors, and then plugging these hoses with main jets to meter the air flow to the emulsion tubes.
I chose #140 main jets, and then played with the jetting to get a clean rev range. My choice of #140 main came from the fact that the old HRC F3 carb setup has no solenoids or holes, but I found that the internal orifice of the carbs was 1.4mm.
Hence my decision to use #140 mains to replicate this. It all worked fine, without the need for any HRC bits inside the carbs.
I also used a similar setup on an MC18 with a 300 kit, which was being particularly difficult to set up. Can’t recall what jets I used, but it cleared it up, and ran like a dream. Sorry that I don’t have a definitive answer for you, but I hope that this helps.
"I have a fuelling problem on my mc18 1988 . When running the front cylinder is running very rich and causing misfire until I switch the fuel of and when the engine leans out through lack of fuel the cylinder kicks in again. I've have the carbs in pieces several times chech floats and heights and all seems ok the jetting is standard. Could This be a crank seal? I hope not also I cannot find a definitive setting for float heights for this 88 model so I set them to 13 MM. Before they where much higher at around 24mm not that this has made any difference to the problem I have . I have replaced rings cylinder gaskets plugs and caps. Help!"
The TA carburetor range (MC16 through to MC21) should have a float height of 13mm, so you are correct there.
If the crank seal is an issue then the bike will be generally hard to start and run very rough at low rpm, but tend to clear at higher rpm.
First little test (for component elimination) is to swap plugs, plug caps and coils from left to right and see if the problem switches sides. Unlikely, but can save many hours of head scratching.
When the bike first start (from cold), does it run correctly, and then start missing as it warms up? If so, then this would lead to loose connections on the coils. This seems to be a problem that most NSR’s will suffer at some point. Pull off the spade connectors from the coils and look for evidence of burning. Try giving the spades on the coils a bit of a clean, and also squash the female connector (on the harness) a tad so that you get a firmer connection. This has solved many an NSR misfiring issue in the past.
Failing that, check to see if the float valve on the carb is leaking. If the valve cannot close fully then this could cause your problem.
Typical issues here are the rubber end of the valve having a hard lacquer. This can be cleaned with acetone (Nail polish remover). Wear gloves and don’t breath that stuff in!!
Also, the valve seat can become pitted over time from corrosion. Sometimes this can be carefully dressed up by using a cotton bud with metal polish, spun in a drill. This is actually quite a good plan even if they’re not leaking.
Check the small tang on the end of the float valve. This should be spring loaded. So press it in a little and it should pop back out. I’ve had loads where it sticks in and the float valve doesn’t seat properly. A few squirts of carb cleaner usually does the trick and dissolves any crud inside.
Moving on, how about the reed valves? Are they in good condition and sealing properly? No chips or crack? You probably don’t need to remove the whole assembly to see any glaring problems. With the carbs off just shine a torch down the inlet and have a look.
Let me know how you go with that as it’s mostly pretty easy stuff to check. If it doesn’t help we’ll have to look a little deeper.
"I am installing your 300cc big bore kit and chambers on an MC21. Do you recommend a stock air box, or pods when venturing into 70hp land?"
The 300 can work very well in pretty much all configurations, but when looking for 70+hp you’ll want to be looking at doing some airbox mods, which should be done anyway on the NSR 😉
If you want to keep the airbox/filter setup, then the first recommendation is our airbox lid, which really helps the flow at the top end.
For a little more, cut out the center divider from the main airbox body. This effectively doubles the size of the airbox and increases flow potential.
Pod filters are always a good option, but go for the biggest filters you can possibly squeeze into the space available. I don’t have a preferred brand or part number, but I believe that K&N will have something that’ll fit. When I used pod filters I actually made my own from some locally available foam that I shaped to fit. Also, for Paul’s 75hp 300 we again made our own filter using locally available foam filters modified to fit around a handmade cage, within the ram air box. All a bit mechanical, but we tested on the dyno with and without the filter and it had no restrictions at all.
So anyway, the main thing is to make sure that you have good flow, so at the least you need to fit our lid, or modify the stock airbox.
And please do remember to keep an eye on the carburation, as each mod will have an effect on this and the brass will need changing to compensate.
"I am running pod air filters now, the jetting is at 40 pilot, 178 main, hrc "c" clip, clip set in middle position, pump gas, hrc wire loom, 010 or 020 or stock card I have, oil injection is in operation, I do not race it, it's only for the street. When it gets going, it's fine. But right off idle, it's bog city! And in neutral when you wack the throttle open, it just bogs. None of my 2 stroke race dirt bikes does this. I'm at sea level, with about 80o F. being normal. It does have the hrc air box. Oh, hrc lower head too. Beyond that, I have no clue. I just got the bike. Help! I'm frustrated. Please e mail me with some good news! Do you have the 030 card? Is VP red fuel good for the bike? It's 103 leaded."
I guess that the bike’s fitted with a full HRC jet kit, so the power jets are plugged. Is this correct?
You say you’re running pump gas. Leaded or unleaded?
The first thing I would try would be to fit a set of “B” needles with the clip in the middle position, as I have a feeling that the “C” needles fitted are too lean. Next you could try going to #42 pilots. It sounds like a lean bog to me.
Please let me know the number on the needles as you may be running leaded needles on unleaded fuel. Unleaded fuels generally require richer settings.
Have you tried running the bike with the choke on? Does it make a difference?
Have you plugged chopped it?
I wouldn’t worry about the VP fuel for now, but it’s definitely a consideration, seeing as you have leaded HRC cards. The VP Red is actually 105 (according to VP). This gives you a lot more potential for power when set up properly.
"My airbox lid is cutout and has a foam filter. major factor I forgot to point out. I figure plug up the PJs and use HRCs base settings for their kit. What do you think?"
You seem to be on the case. Do you have a jet kit? If not, then I’d recommend leaving the power jets in situ and going up to #155 mains as a start point and jet from there.
HRC’s jetting would be a touch rich if you keep your airbox (albeit modified) and run injected 2T oil. Their setting is for open carbs with premixed fuel/oil.
"The set up I am using now is the chambers, Daytona filter, modified airbox lid, and wire splice. I rode it around the block and checked the plugs and they were white. Can I just go up on the main jets and shim the needle? All the parts looked good and I was happy how quick I received them. Just let me know what I need to do on the jets."
Usually the stock jetting is not far off, until the airbox is modified. Due to the extra air available the mains need increasing substantially over the stock setting.
We settled on #148’s for our conditions (30+ deg. C, 70% humidity, 1015mb @ sea level). I’d recommend that you start with #155 mains, and maybe a 0.5mm shim under the needles and then go from there.
It’s a bit tricky to rely on plug colour just by riding around the block. A proper plug chop needs to be held flat out for a short time before the engine is killed to allow for a true colour on the plug. However, if your plugs were white from just riding around then this could be dangerously lean and needs immediate attention. Normally, just cruising about will show up as rich on the plugs.
"Going back to my problem as far as I'm aware the pilot jets are standard as are needles ( non adjustable) could the needles be worn 17000 km. over richness only occurs under 6000 rpm. the needles seem to have worn right by clip where it drops through carb body, is this normal? any help much appreciated many thanks"
It’s very possible that you’re spot on about the needles being worn. Does the stuttering occur at part or full throttle?
Most street bikes spend the majority of their lives toodling around at very small throttle openings. The needles are constantly being battered around by the incoming air and this can cause quite drastic wear on the straight portion of the needle. The MC18 suffers more than the newer models as their needles are brass, whereas the 21/28 use anodised aluminium needles (very hard surface finish).
It is quite easy to see if there’s any damage to the needles and no real need to take the carbs off the bike. Just remove the airbox, hold the throttle open (engine off obviously!) and shine a torch down the throat of the carbs. Worn areas will look polished compared to the stock ground finish. This may also be evident on the taper transitions.
You mention the wear on the top of the needle. No this is not normal, and could be causing the needle to jump around irregularly, upsetting the carburation.
Just as a quick test you could try removing the air filter and see if it cleans up the bottom end. Don’t be tempted to run it without the filter for any length of time, but it’ll give you a good indication of where you need to go.
"Took my 21 down to Laura's place this morning to try and help her sort out her 21. We put my bike on the dyno and ran it for a baseline bike. Iit revved out nicely showing 60 hp consistently then I was informed that the Dynojet 250 used when compared to several others that the teams bikes are run on through out the season at the track is usually down 3 to 5 hp in comparison which would average my bike out to 63ish . Sounds good on paper anyway...then we put her suspect PGM on my bike and it was still up there at 60 which of course means the PGM is not the reason her bike is only making 25 to 30 hp on the dyno. Removed her KISS box and saw no improvement front cyl had a wet plug suspect plug cap tried mine no improvement cyl. Shows 120 pounds of compression reeds checked out fine powervalve appears to open wide at 9000ish new battery jetting is at 160 with Darkfart pipes and stock air 180's yielded the same down to 150/140 tomorrow-(same as mine) I've yet to see jetting have this effect on either of my NSR's but it sure did on the Aprilia!!! suggestions welcome..."
Does the bike still have the power jets in situ?
If so then #160’s are way too rich. Your bike is closer to the truth. Our 21 with wire splice, pipes, modded airbox etc. made best power on #142’s. All other jets are as Honda intended. The bike made close to 64hp. If you want to test with the jetting as is, ,but with closed off power jets then try sticking a couple of rubber bungs up the tubing that leads to the power jet proper. The eraser off the end of a pencil would probably work here, at least for one test.
I remember one MC21 we had a couple of years ago. We ran it up the road and it made less power than a soggy fart. Pulled off the carbs and some bright spark had fitted #140’s to and otherwise stock machine. Fitted #128’s and the thing instantly doubled in ponies and was as good as expected.
Is the airbox still fitted? Modified? Clean filter? Even the stock airbox should show very high 50’s.
Do both plugs look to be in the same (wet) condition?
The compression sound good. I recently tested a freshly rebuilt and run in motor at 125psi, so no worries there.
Is the bike revving out? If not then it’s a good sign that it’s too rich. One point worth a quick check is the small filter that’s hidden under the front right hand side of the airbox. There’s a white plastic three way joint plugging into it. If this filter is not flowing as well as it should it can kill the power. Try unplugging it and having another go.
Try switching your air solenoids. I’ve never heard of these going wrong, but if they’re sticking closed then that could cause a rich condition. (Clutching at straws here!). Like Paul says, if you’ve got any graphs that you could send over then they may help for a diagnosis. 4th gear Roll on and all gear acceleration graphs would be very handy.
"I just installed the parts I ordered and have a question... I'm running a mc 28 with 010 HRC card with 93 octane... I'm using the mc 21 rear heads to lower compression and br10ecm plugs as your recommendation... I'm also running 190 main jets for now to break in the motor... my question is it take a long time to warm up and only hits 40-45 C should I go back to the br9ecms? or is this OK"
40~45 C seems a little low. You don’t really need to richen things up too much when running in as this just makes everything run cooler and slows the process down. What’s the ambient air temperature? Is your thermostat installed / working correctly?
The plugs have no effect on the temperature of the engine, but you might want to fit the 9’s until the engine is broken in so as not to foul up the 10’s with low rpm running.
The best plan for break in is to start the bike up on the stand, and then warm it up to about 40C, keeping the revs below 5,000 rpm (blip the throttle, don’t keep it constant). Now, increase revs to about 7~8,000 rpm until temperature reaches 70C. Switch off the engine and allow to cool down to room temperature. This is called a heat cycle and should be performed three times.
You should now be pretty much ready to go, but ride it steady for the first time, starting at a max rpm ceiling of 8,000 rpm, and building up 1,000 rpm every ten miles or so, up to max rpm. Don’t put the engine under heavy load during this period and try not to hold a constant throttle. Within an hour you’ll be done.
-

Carb Service Kit A, 10 pieces, Honda NT650
6 in stock -
Main Jet, KEIHIN, (99101), #105
8 in stock -
Main Jet, KEIHIN, (99101), #158
3 in stock -
Main Jet, KEIHIN, (99101), #180
8 in stock -
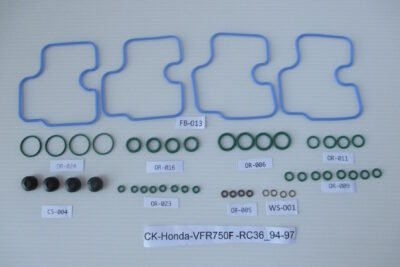
Carb Service Kit A, 48 pieces, Honda VFR750F RC36 (94-97)
3 in stock -
Main Jet, KEIHIN, (99101), #102
3 in stock -

Power Jet #0, for NSR250 MC18/21/28.
26 in stock -
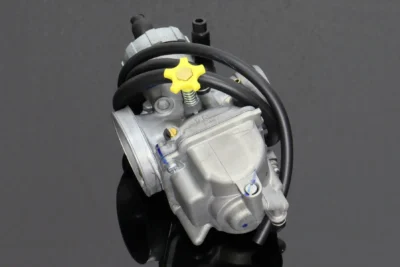
Carburetor Assy, Keihin, NSR150SP
7 in stock