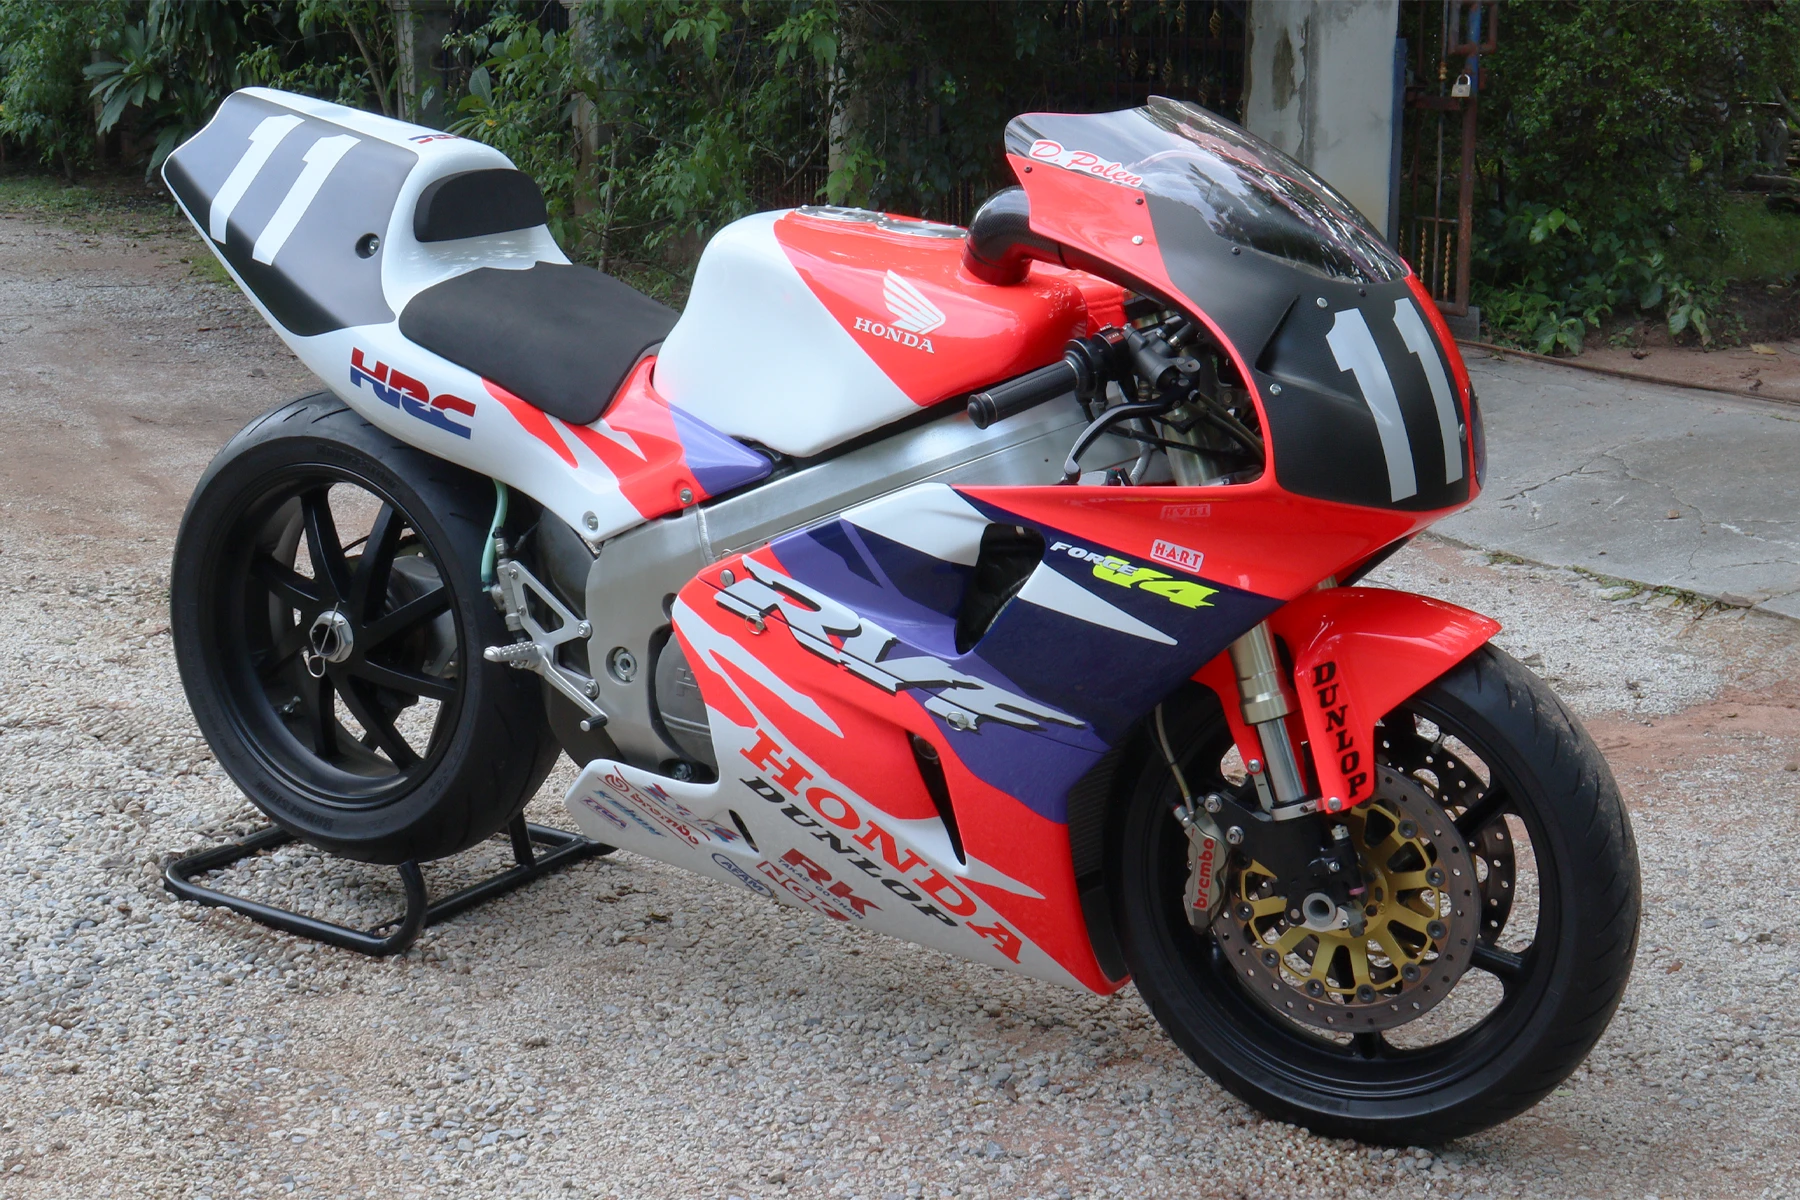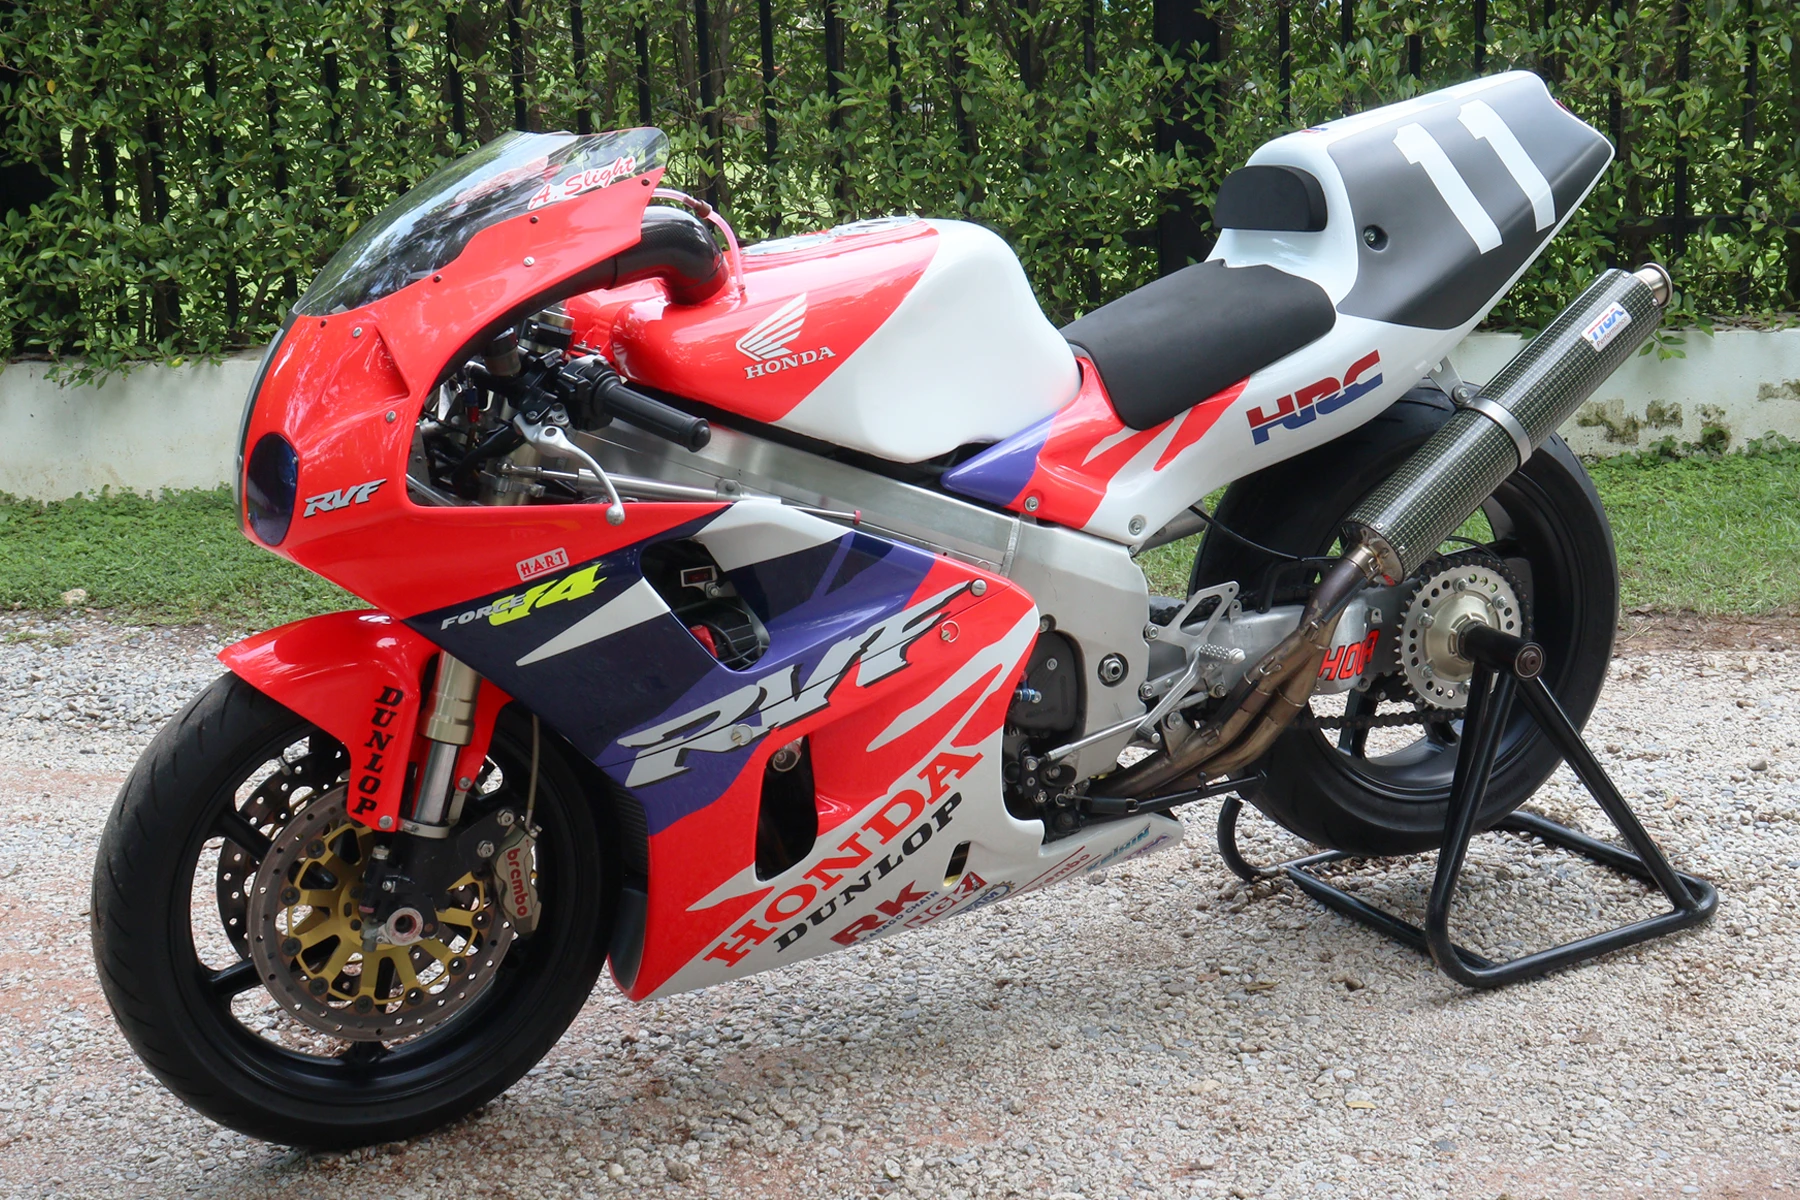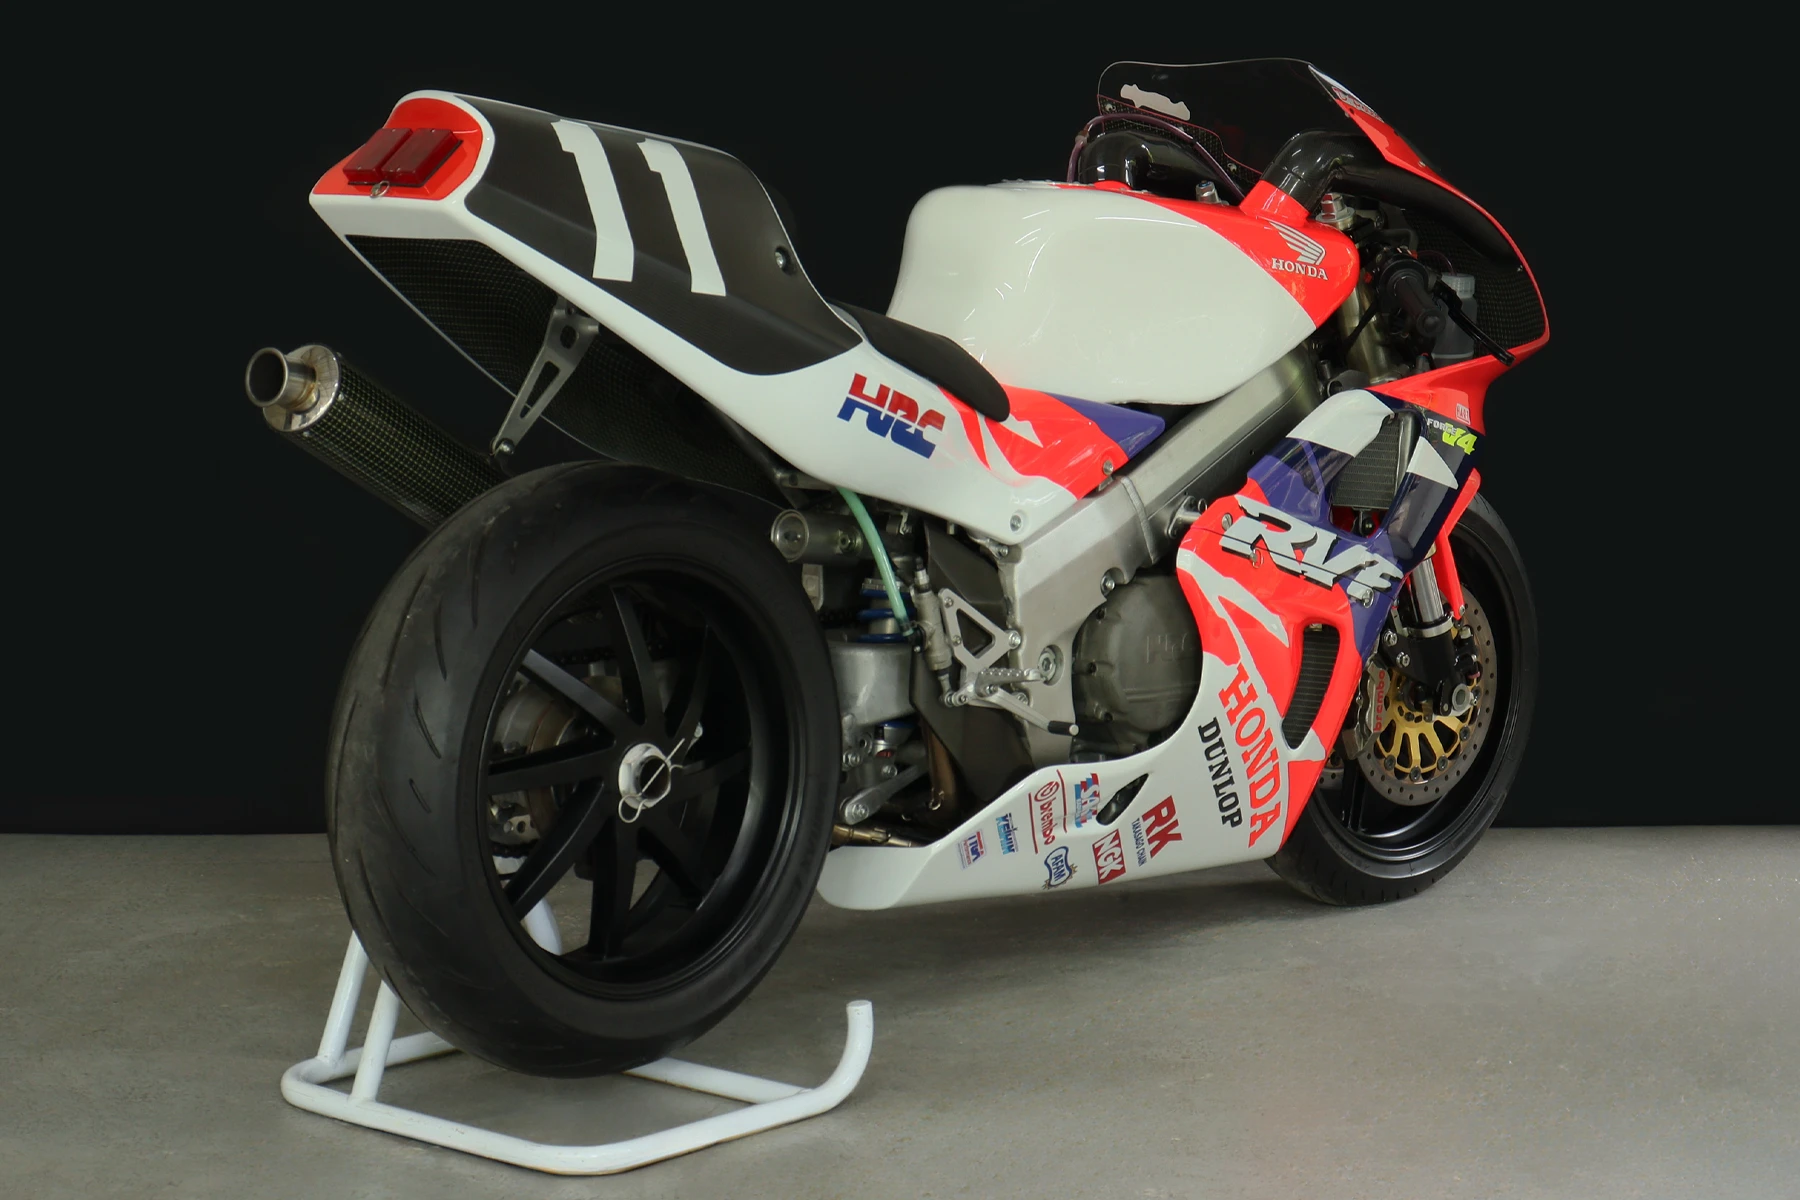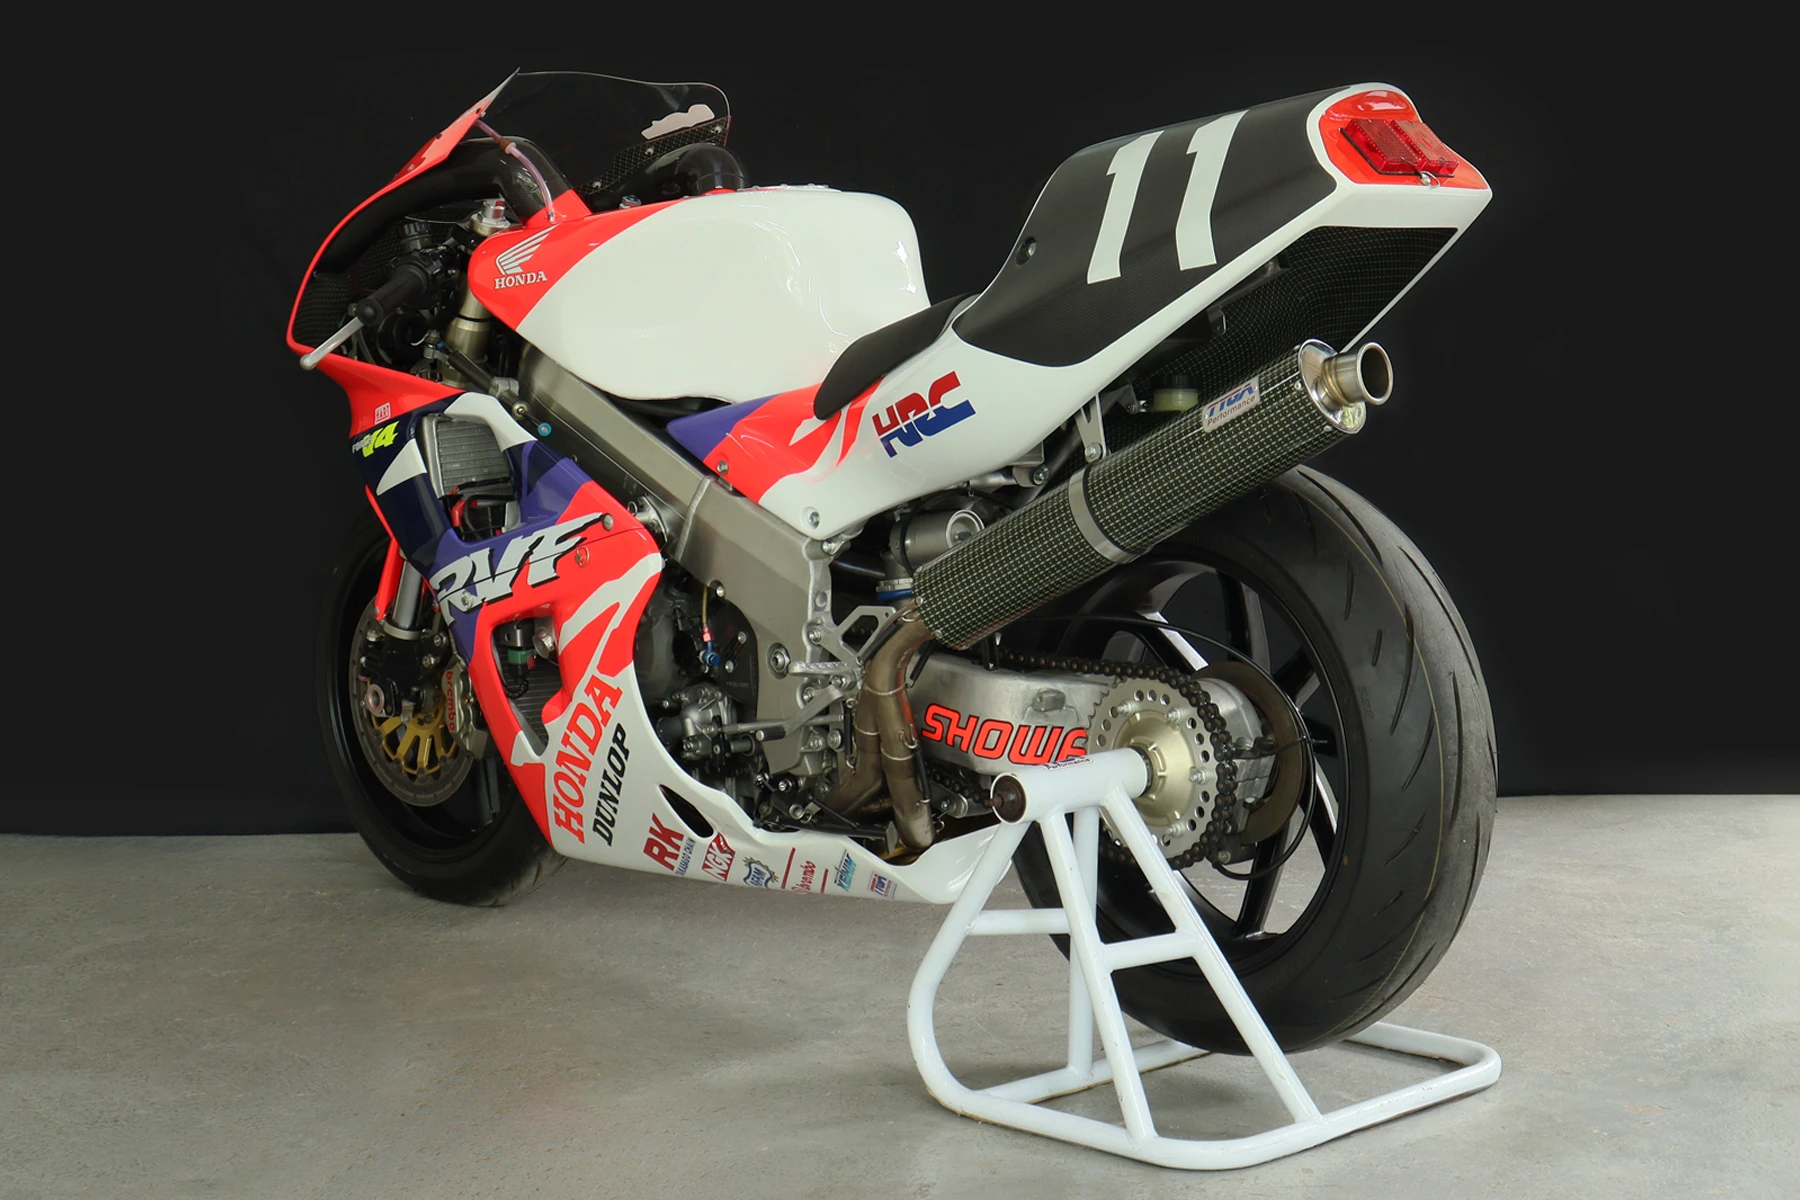



Honda RVF750R RC45 NL5
| Date: | October 2026 |
| Builder: | Tyga Performance |
| Motorcycle Model: | Honda RVF75R RC45 NL5 |
| Products Used: | Upper Cowling, Lower Cowling, Seat Cowling, Front Fender, Air Box, Air Ducts, Screen Clear, All TYGA products used listed below. |
Compared to our experience with the RC30—of which we have owned several over the years—the RC45 is a much more elusive beast, and the production numbers bear that out. Only 200 were made in the first year and maybe 70 in total though nobody seems to know exactly. I briefly owned a de-restricted JDM model in the late 1990s. “Ownership” is pushing the meaning of the word, though, because I bought it using the money of the person I was selling it to. I never really felt it was mine and only risked riding it once. Both Matt and I felt it was a bit overhyped and underwhelming. Part of that was because we had just owned an RC30 with an HRC exhaust and CDI, which was an absolute missile. Some of it was because the RC45 is a very different machine, with much larger and roomier ergonomics. Our RC30 felt vociferous, while the stock RC45 felt mild-mannered and—dare I say it—boring. So, we made our money on the deal, said goodbye to the RC45, and never really paid the model much attention for a decade or more.
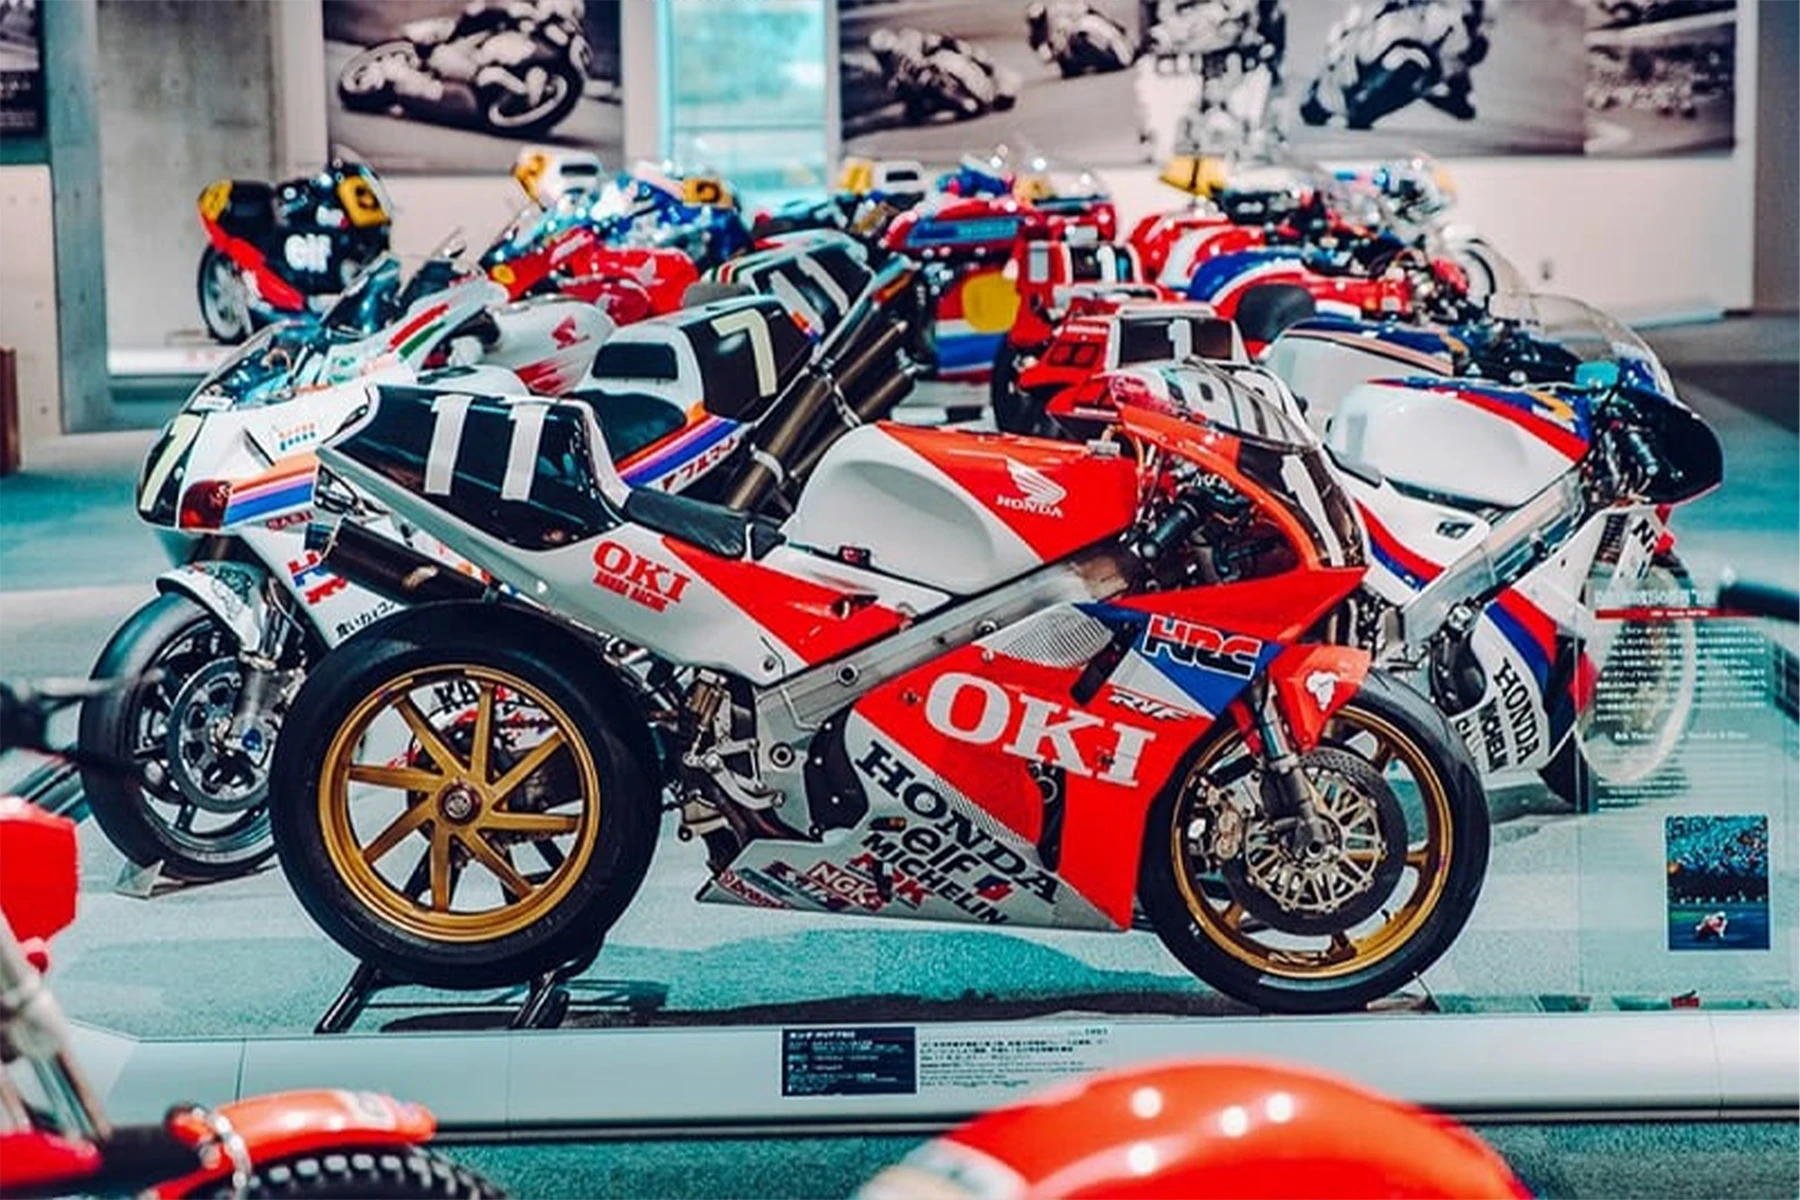
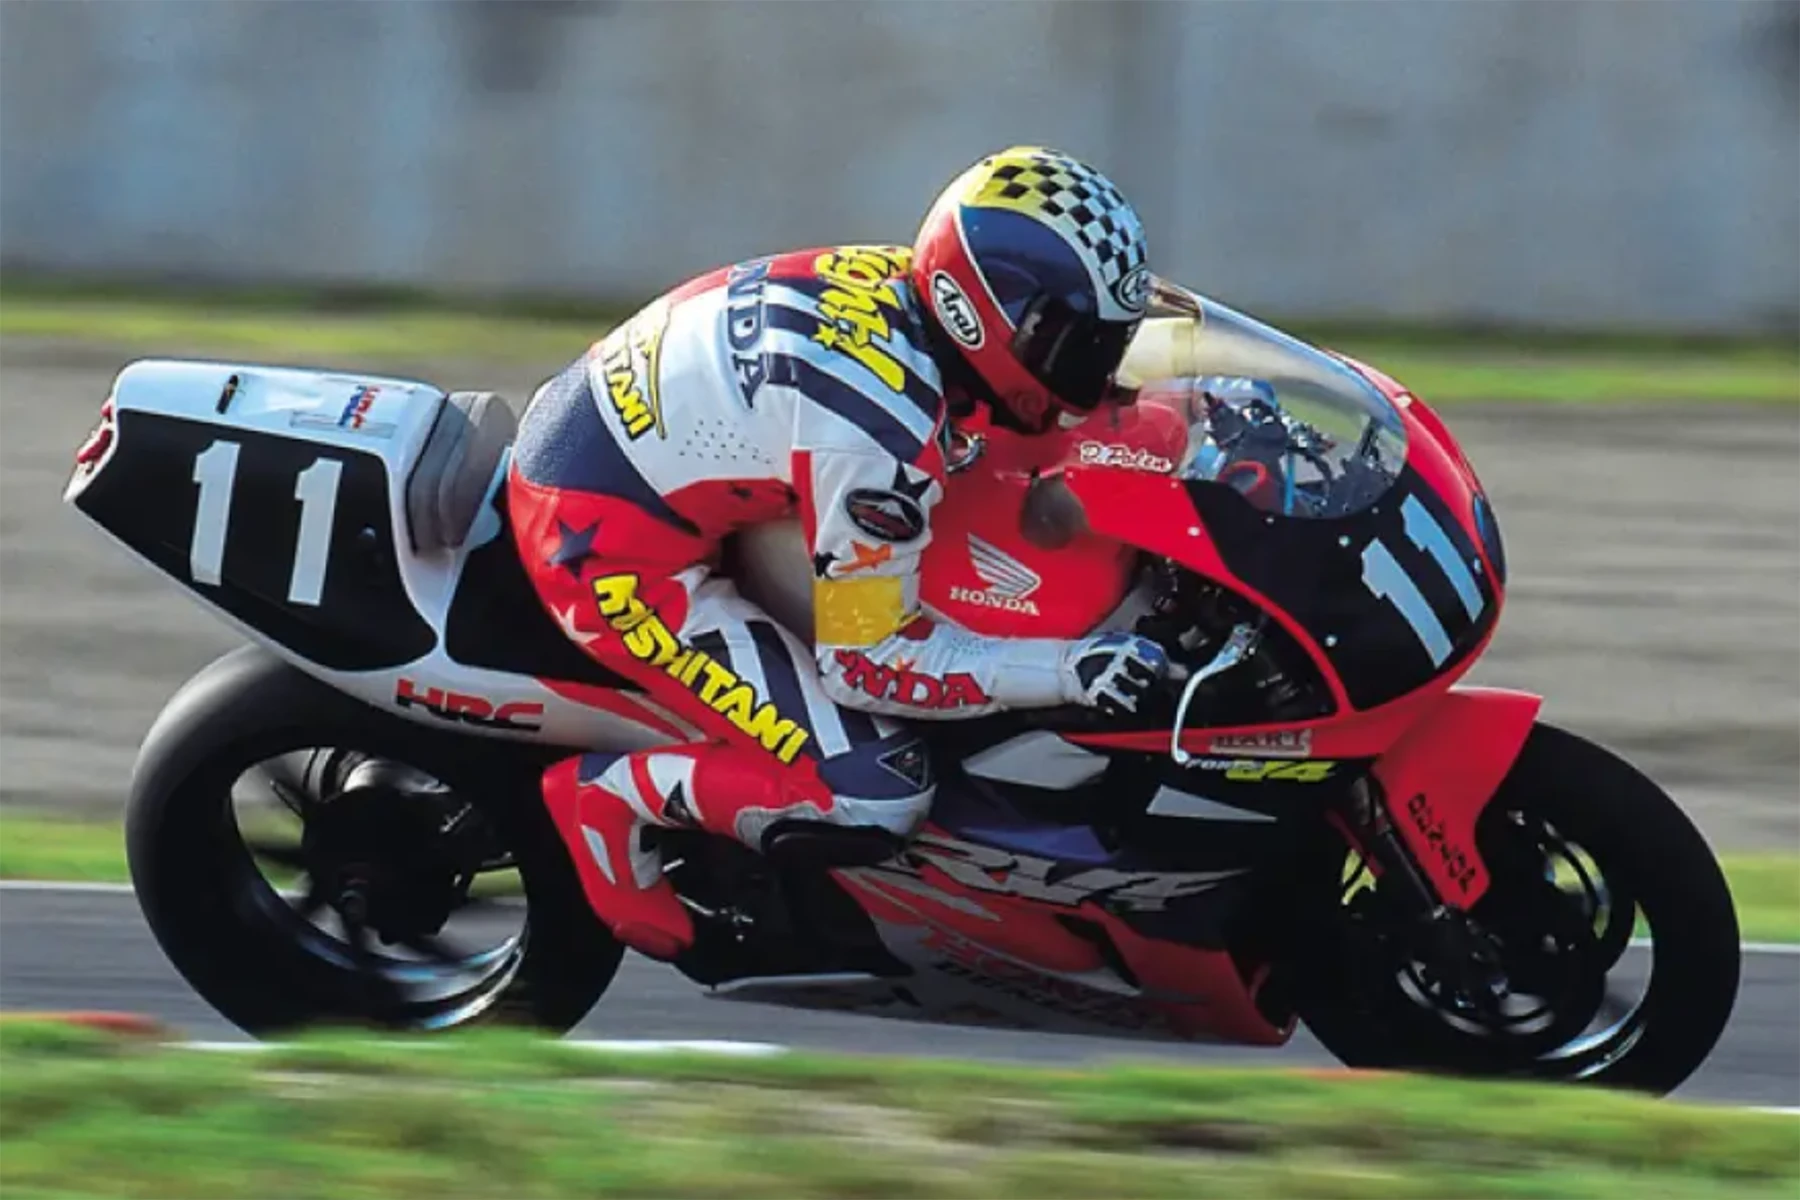
My interest in the RC45 was piqued again during TYGA’s first trip to the tabernacle of all things Honda: the Honda Collection Hall at Motegi in 2017. To be fair, it was the rows of two-stroke 250cc and 500cc racers that caught our attention the most. However, on the same floor, arranged in a long rectangle, were some of the finest and most exotic race bikes Honda had made up until the turn of the millennium. These magnificent, mighty machines were the RVF750s that Honda entered into the Suzuka 8 Hours race.
The 8 Hours was the most prestigious race on the calendar as far as Honda was concerned. They poured unlimited budgets into it and contracted their top GP racers to ride for them in this famous race, even when the riders didn’t want to (Mick D, I am looking at you). The Suzuka circuit is owned by Honda, and attendance in those days topped 200,000 people over the two days. A lot rested on victory, and Honda won it more than any other manufacturer.
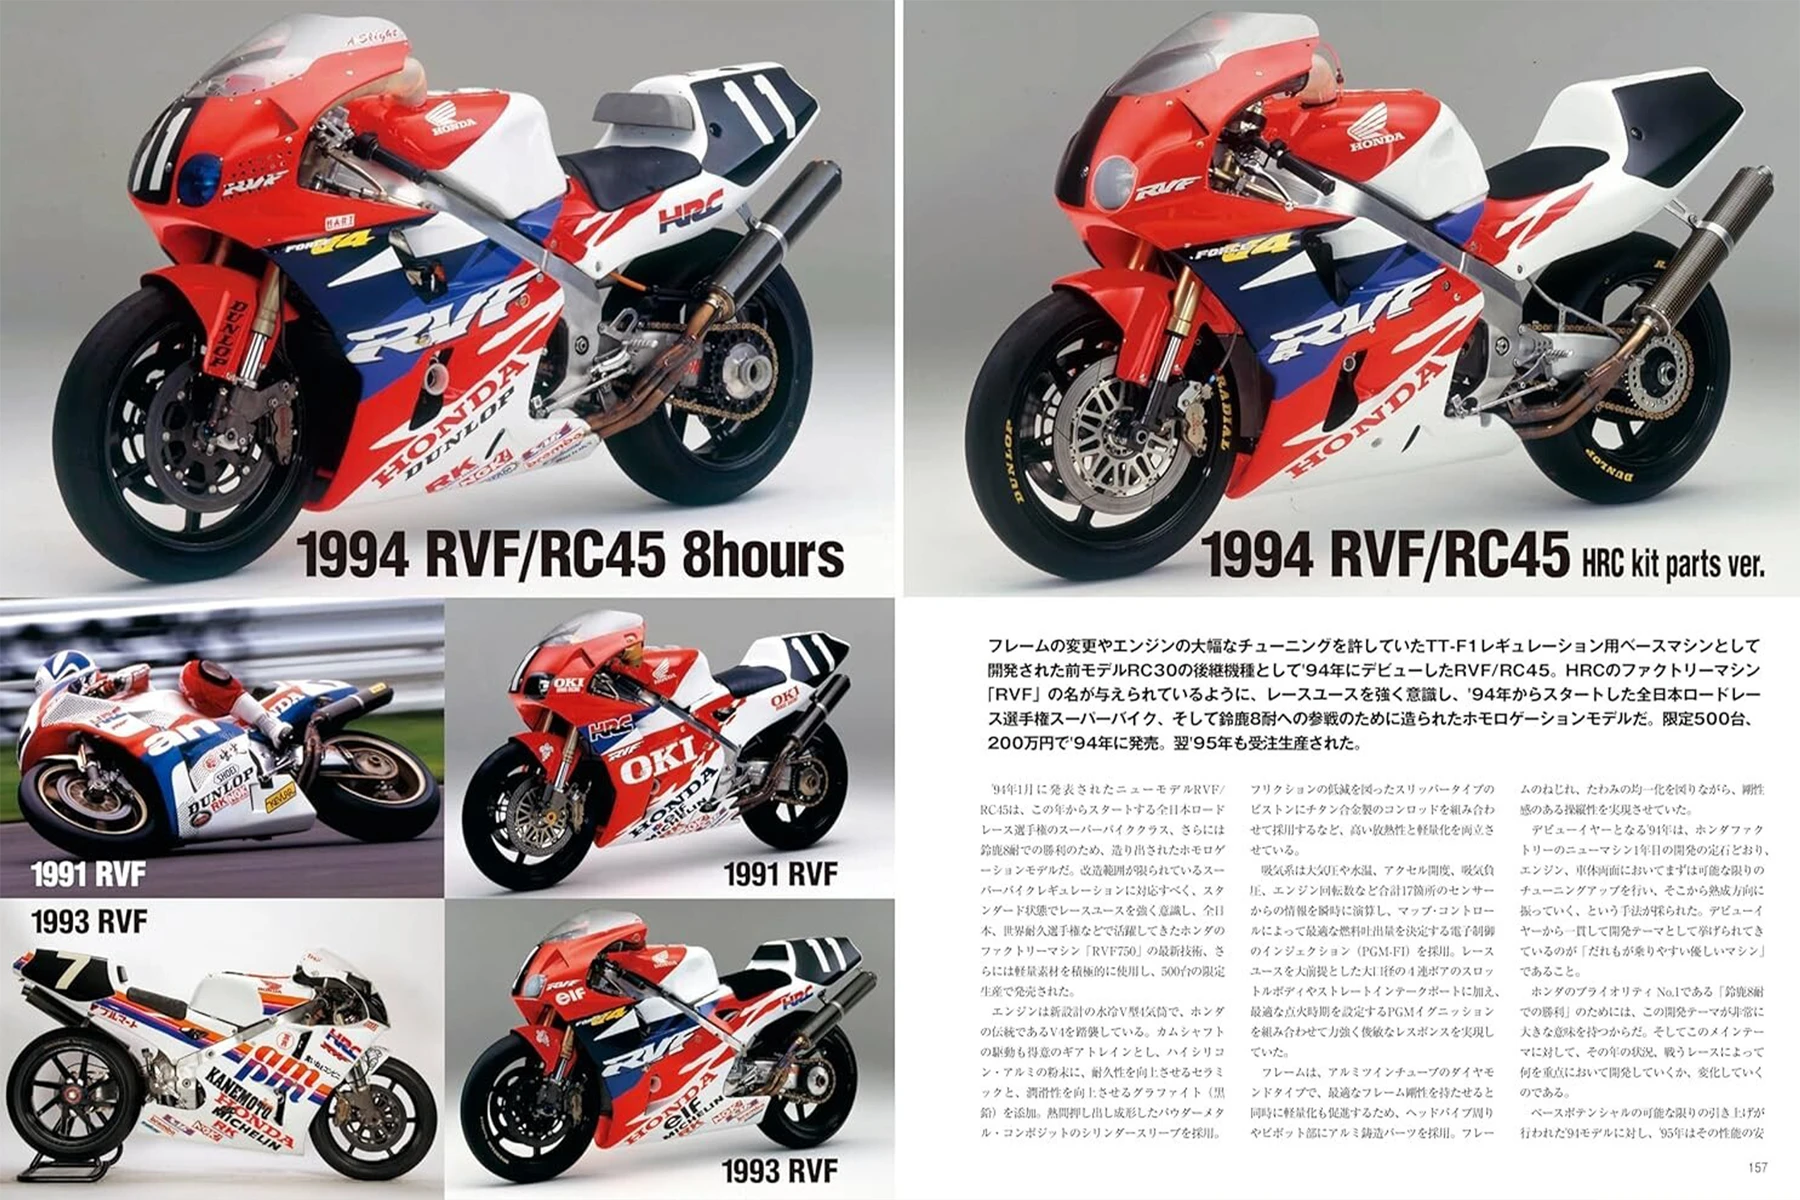
The earlier RVFs from 1985 to 1994 were prototypes, rumored to cost millions of dollars. They were more exotic, powerful, and expensive than any other bike up to that point, period. They were dripping in unobtainable parts and materials, and their performance was phenomenal. To level the playing field, rules were gradually tightened across various classes to make the bikes more reasonably priced and available to mere mortals. Prototypes were outlawed when Formula 1 was replaced by WSBK in 1987, and eventually, in 1994, the 8 Hours followed suit. The new rules stipulated that race bikes had to be based on production road bikes.
The minimum production number for homologation was 200 units, so that is exactly what Honda made in the first year—and a very high proportion of that number ended up being raced. It gets complicated, though. Being Honda, they wanted to win, and specifically with their factory team, so there was a strict hierarchy of parts supplied to teams. At the top were the NWA parts, which the Works team (such as Doohan et al.) received. Below them were the satellite teams, who received NWS parts. Finally, below that was the race kit that anybody who could afford it was allowed to buy: the NL5 kit parts.
Note that the way it worked was you paid more than double what a competitor’s superbike cost, threw away about half the bike, and then bought the complete NL5 kit. You couldn’t really expect to show up on a nearly stock bike and be competitive, as had been the case with the RC30. Anyway, I am getting a bit ahead of myself with all this background. Back at the Motegi Collection Hall, the vision of all these magnificent RVFs, resplendent in their period liveries of OKI, am/pm, Horipro, and Lucky Strike, left a lasting impression on me. Matt, being a die-hard two-stroke fan, was less convinced, but he supported my dreams nonetheless—bless him!
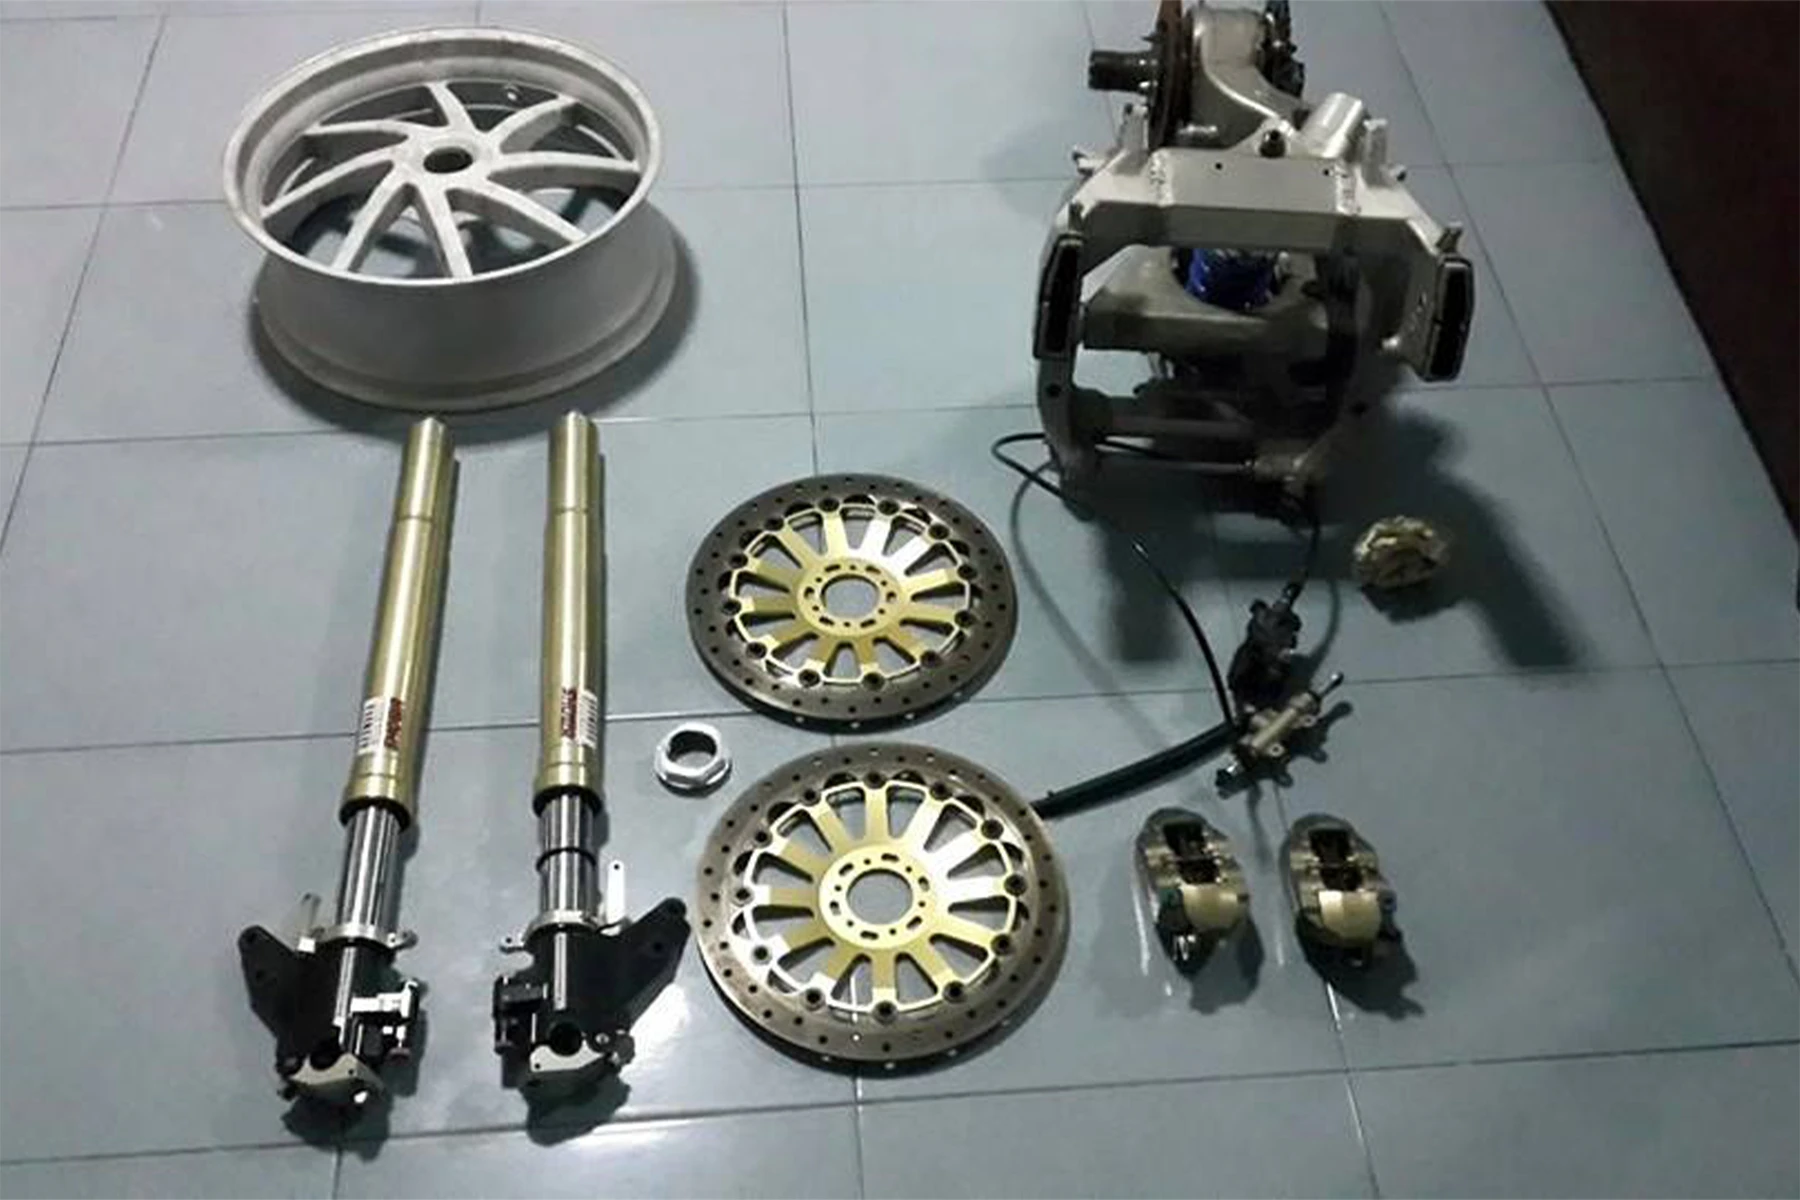
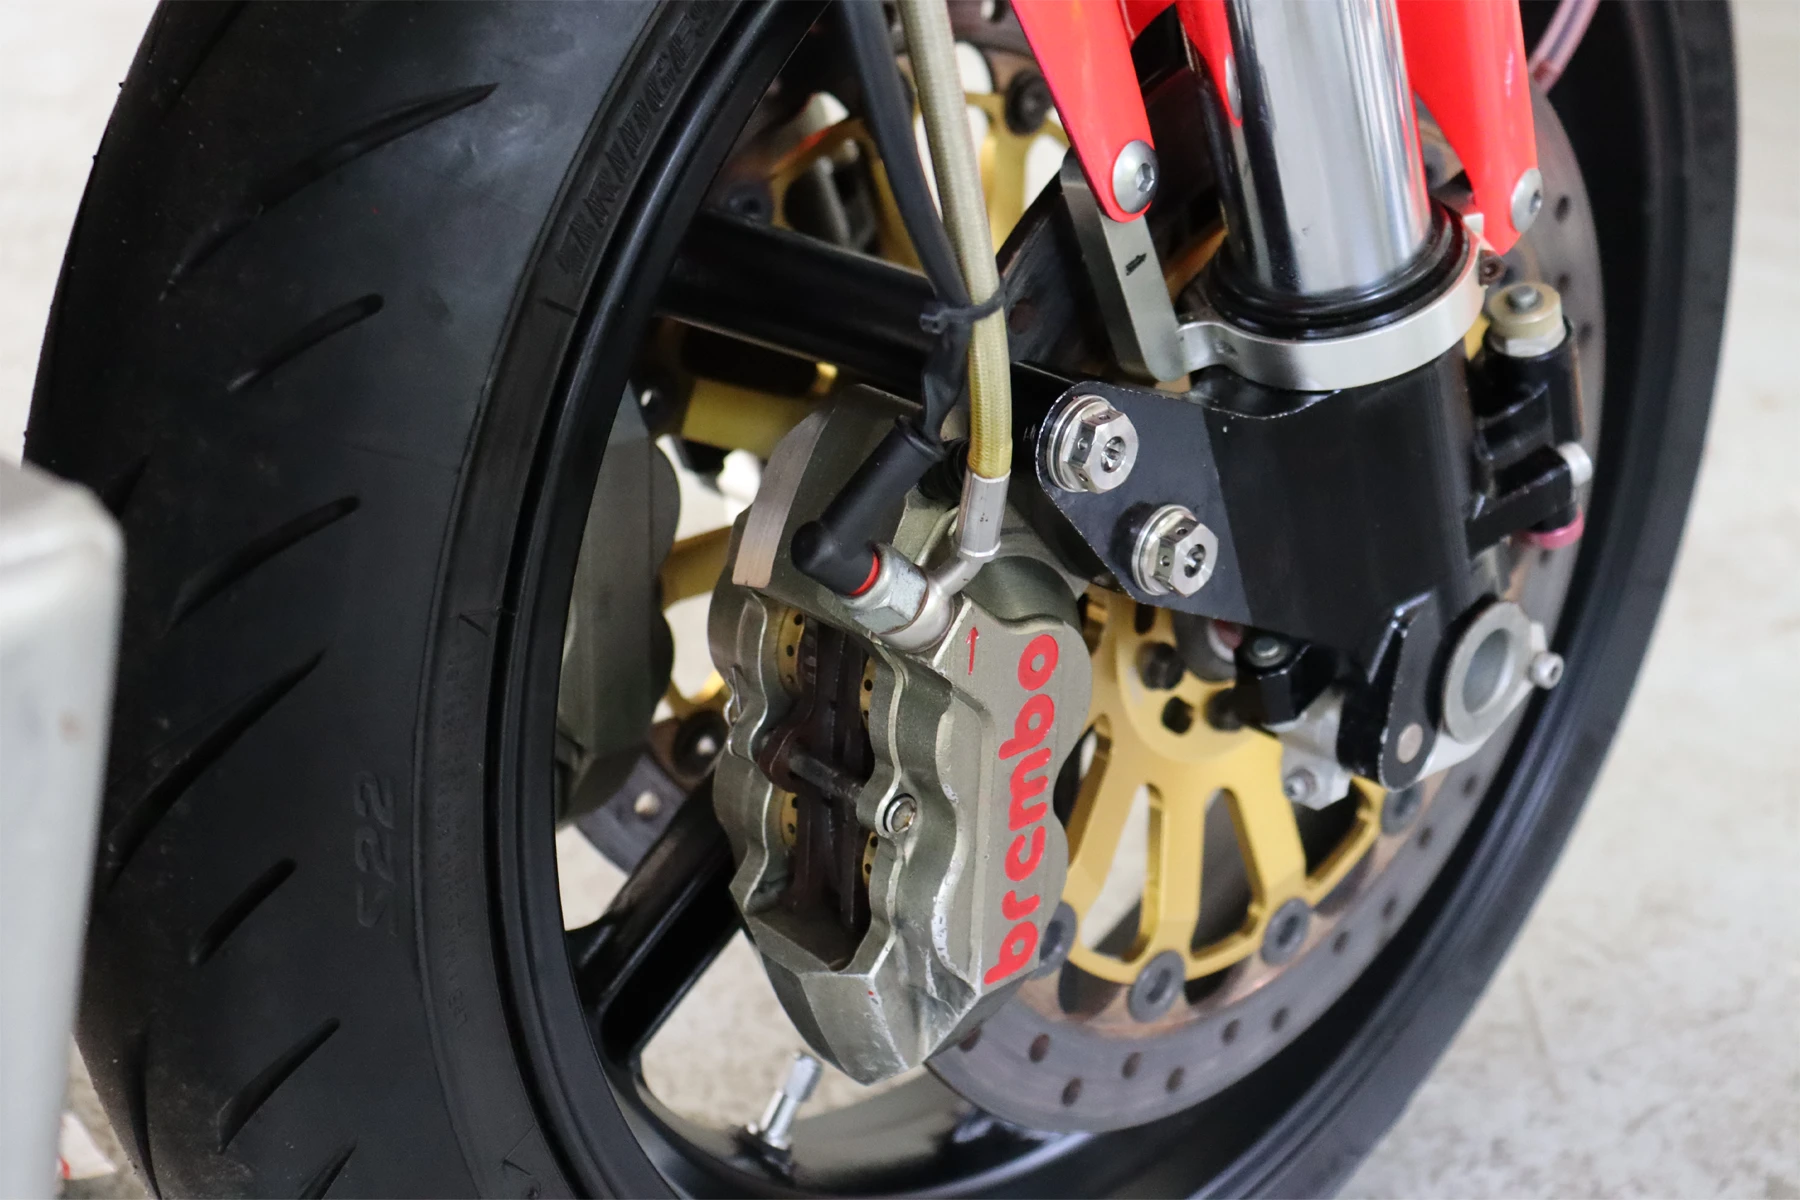
Rewind to March 2015. I was on one of my foraging missions in Bangkok looking for mundane parts for 250s and 400s, and visiting a dear friend who owned a small shop. He had previously sold me an NF5 RS250 at a killer price, and that day he obliged with another amazing deal. Somehow, the remains of a totalled endurance race RC45 had found its way into a shipping container to Thailand. He had front forks, a rear shock, and a swingarm with an NL5 hub and brake, as well as some Brembo rotors and calipers that I think he had collected previously. The swingarm was still attached to the rear half of the frame, the front having been ripped clean off. The deal also included a rear wheel that had seen better days, though he offered to straighten it for me. The hub featured a ventilated cast iron rotor and a trick-looking mini Brembo caliper, complete with a brake line and master cylinder. I wasn’t keen on using the rear wheel, but the other parts were in excellent condition, so a deal was struck.
The front end temporarily found its way onto our Horipro RVF400, while the rest went into storage. I had vague ideas of building an NR racer “bitsa,” but nothing came of it, and the swingarm stayed on the shelf.
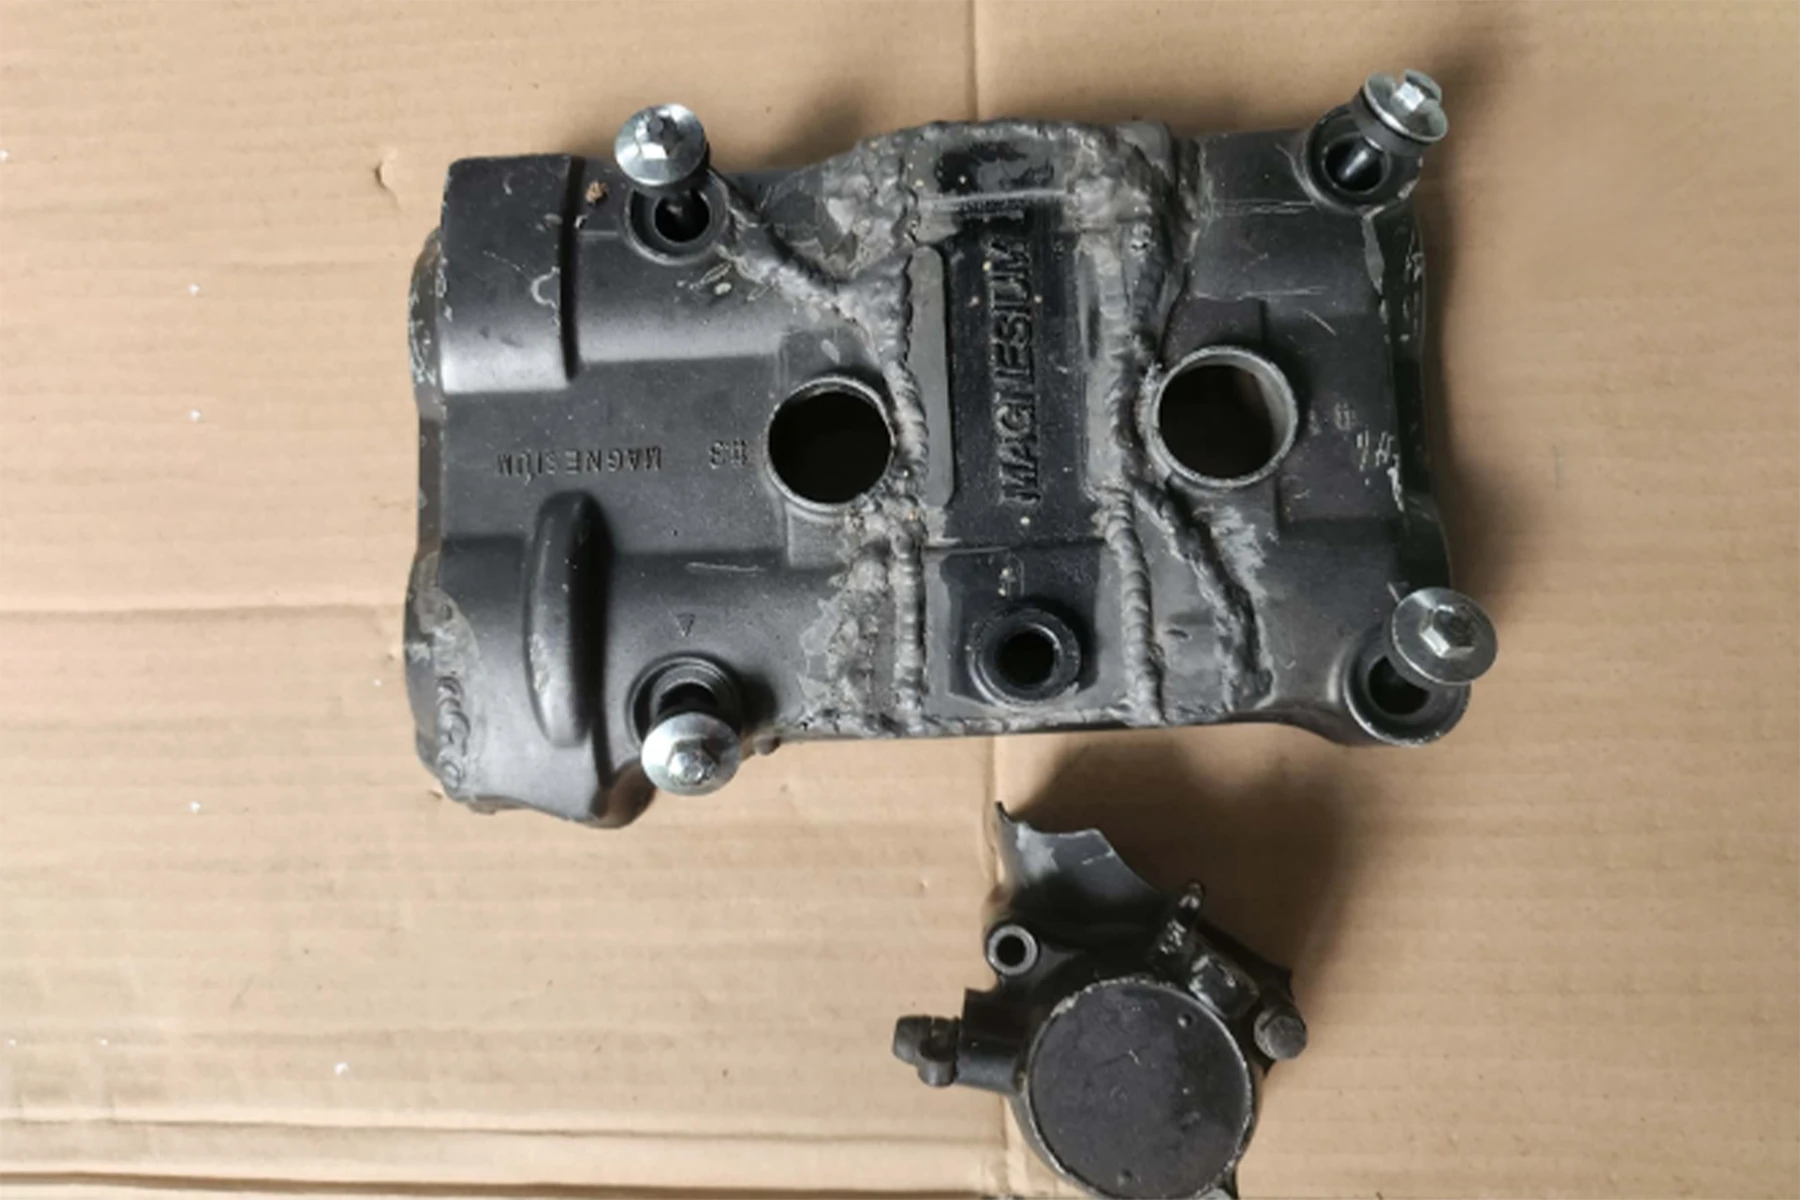
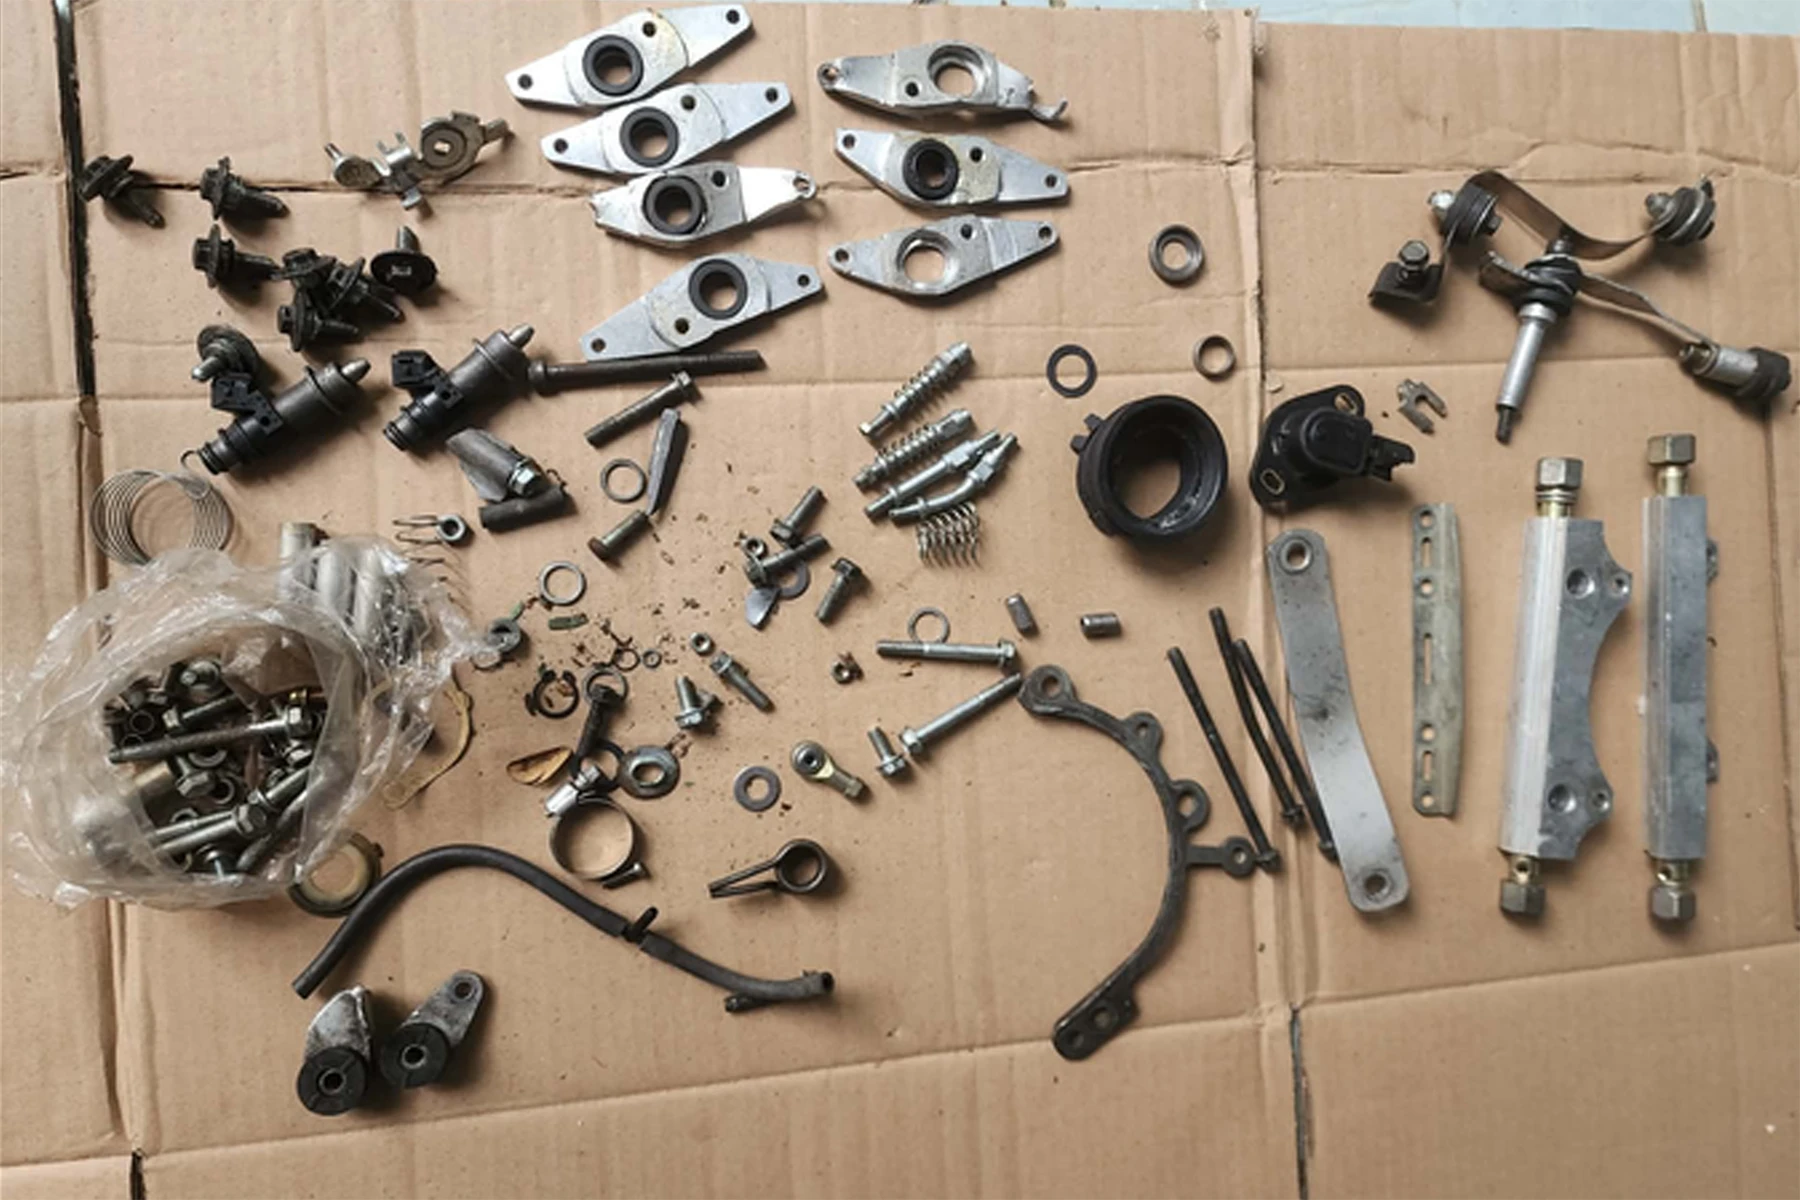
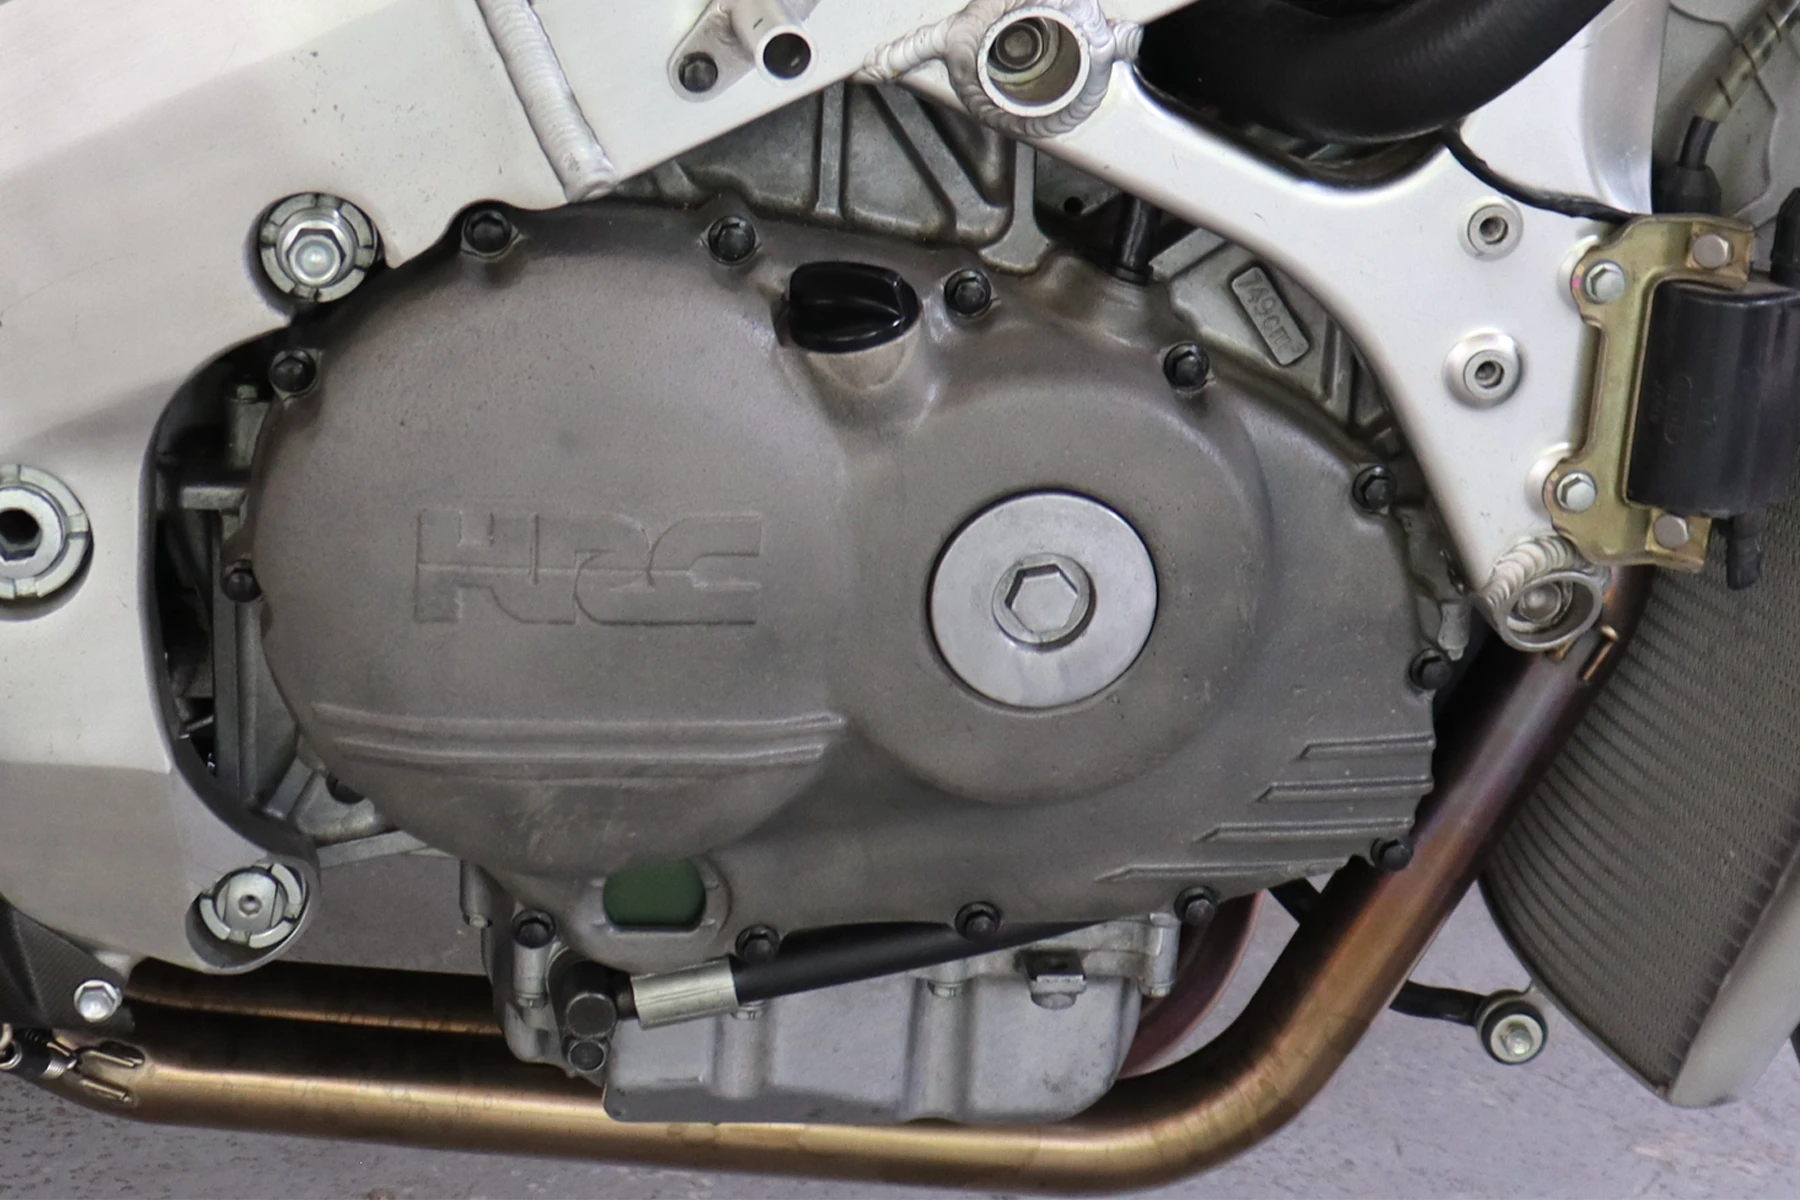
In the meantime, as is uncannily the case with these stories, another character popped up: our friend from Laos. He likes to call to compare finds, share sources, and look for swaps. On this occasion, he mentioned he had acquired a beat-up RC45 engine. His boys had done their best to repair it, but it was beyond their capabilities. I put two and two together, and sure enough, when I got to see it, it had HRC cases, racing pistons, and a very squashed, two-injector throttle body set that was beyond any kind of restoration. The rocker box covers were smashed, and a valiant attempt had been made to jigsaw the magnesium back together, but it was a hopeless task. Having no bike or clear path to using these exotic components, the obvious thing to do was to pass. But being me, I managed to wangle a decent deal, and the remains of the lump—along with a plastic bag filled with fragments of the throttle body—were handed over in exchange for folding.
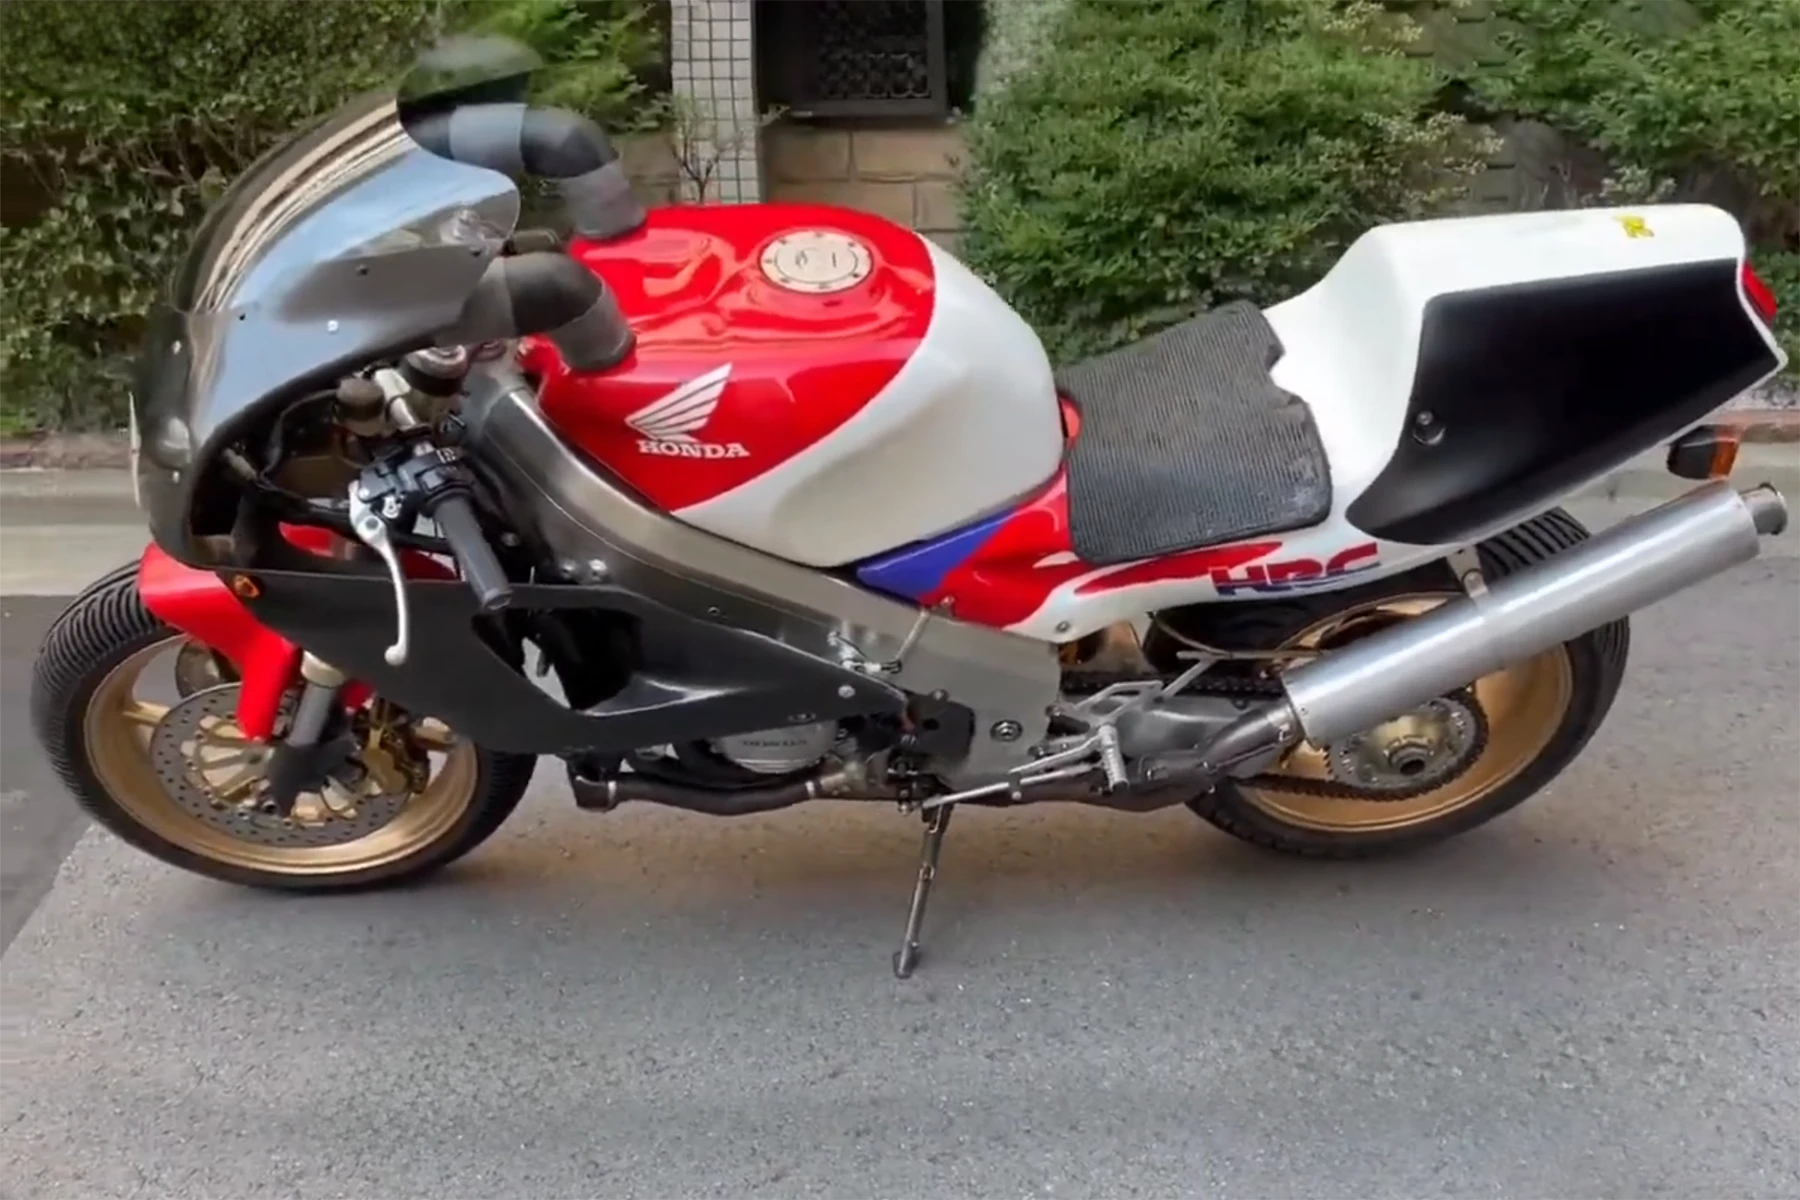
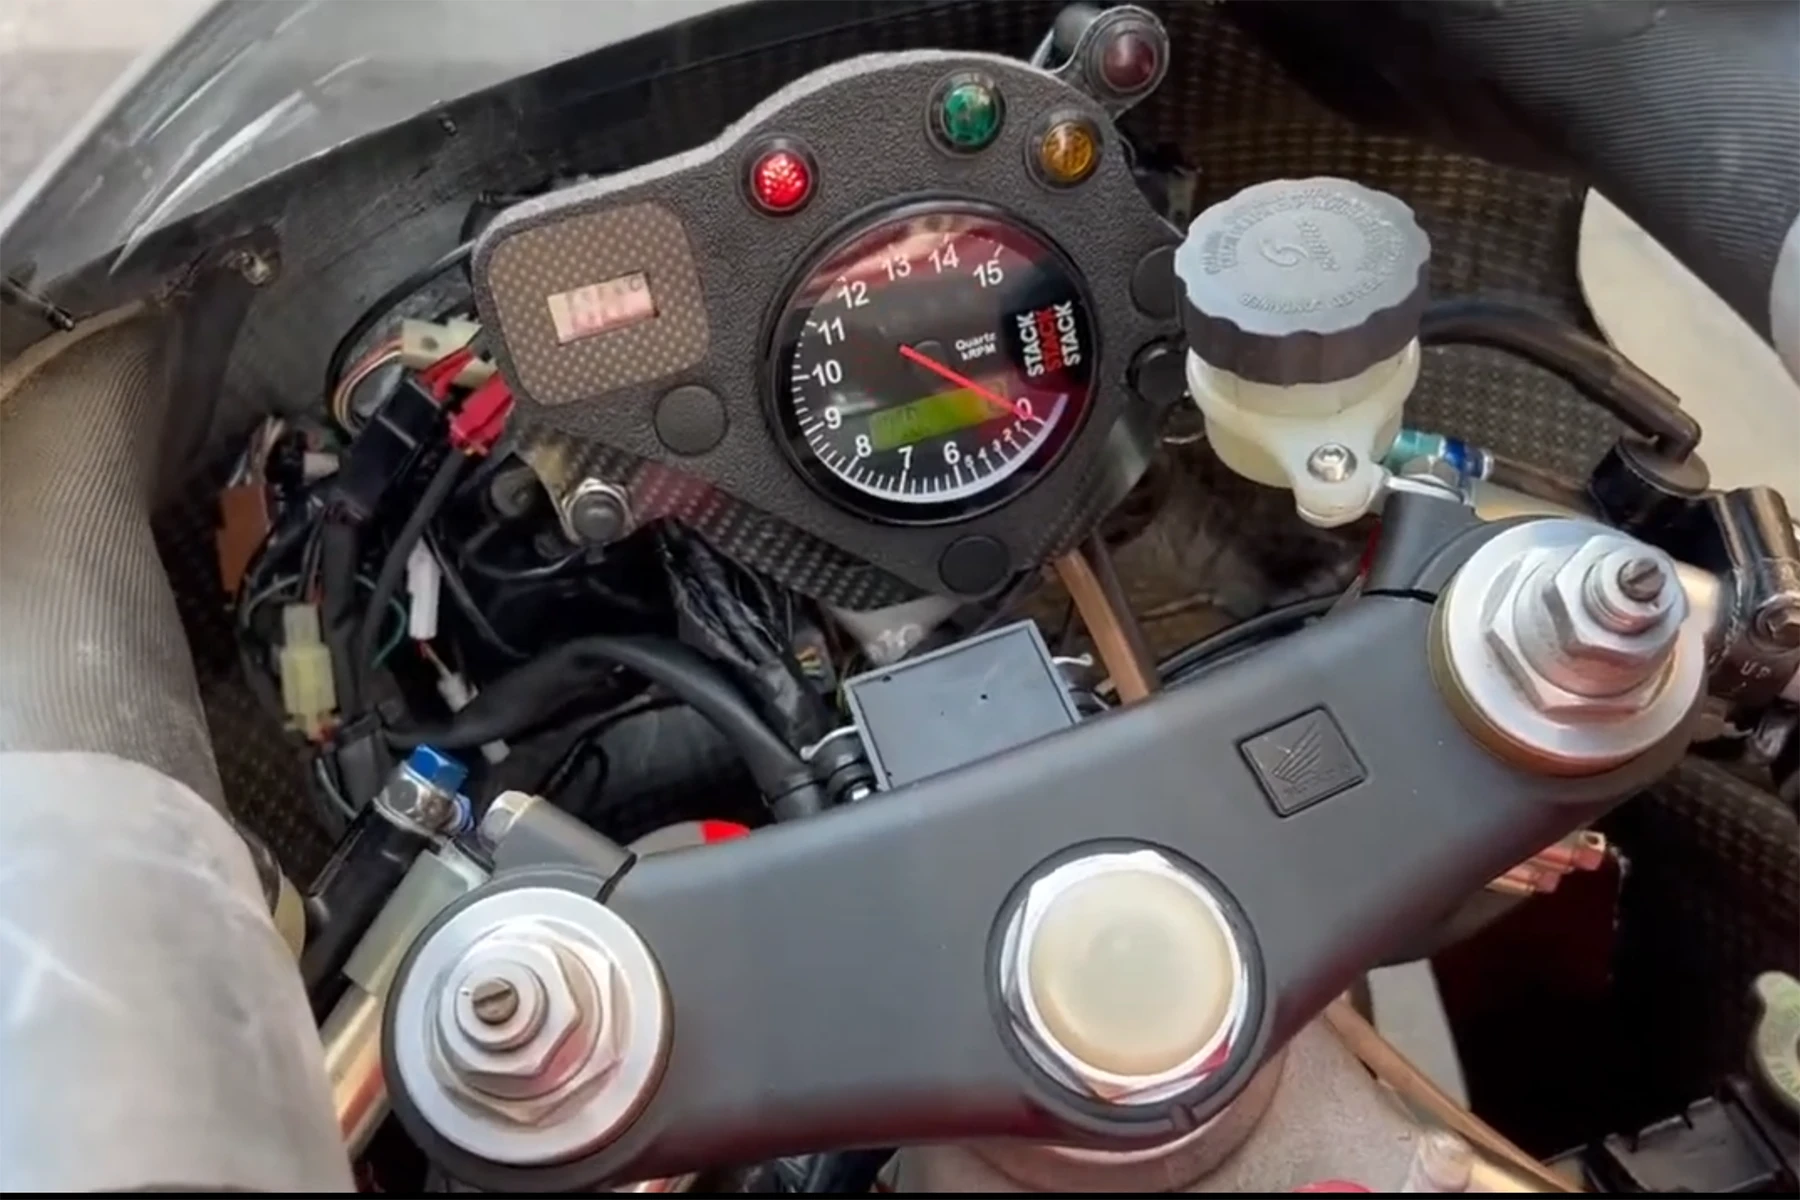
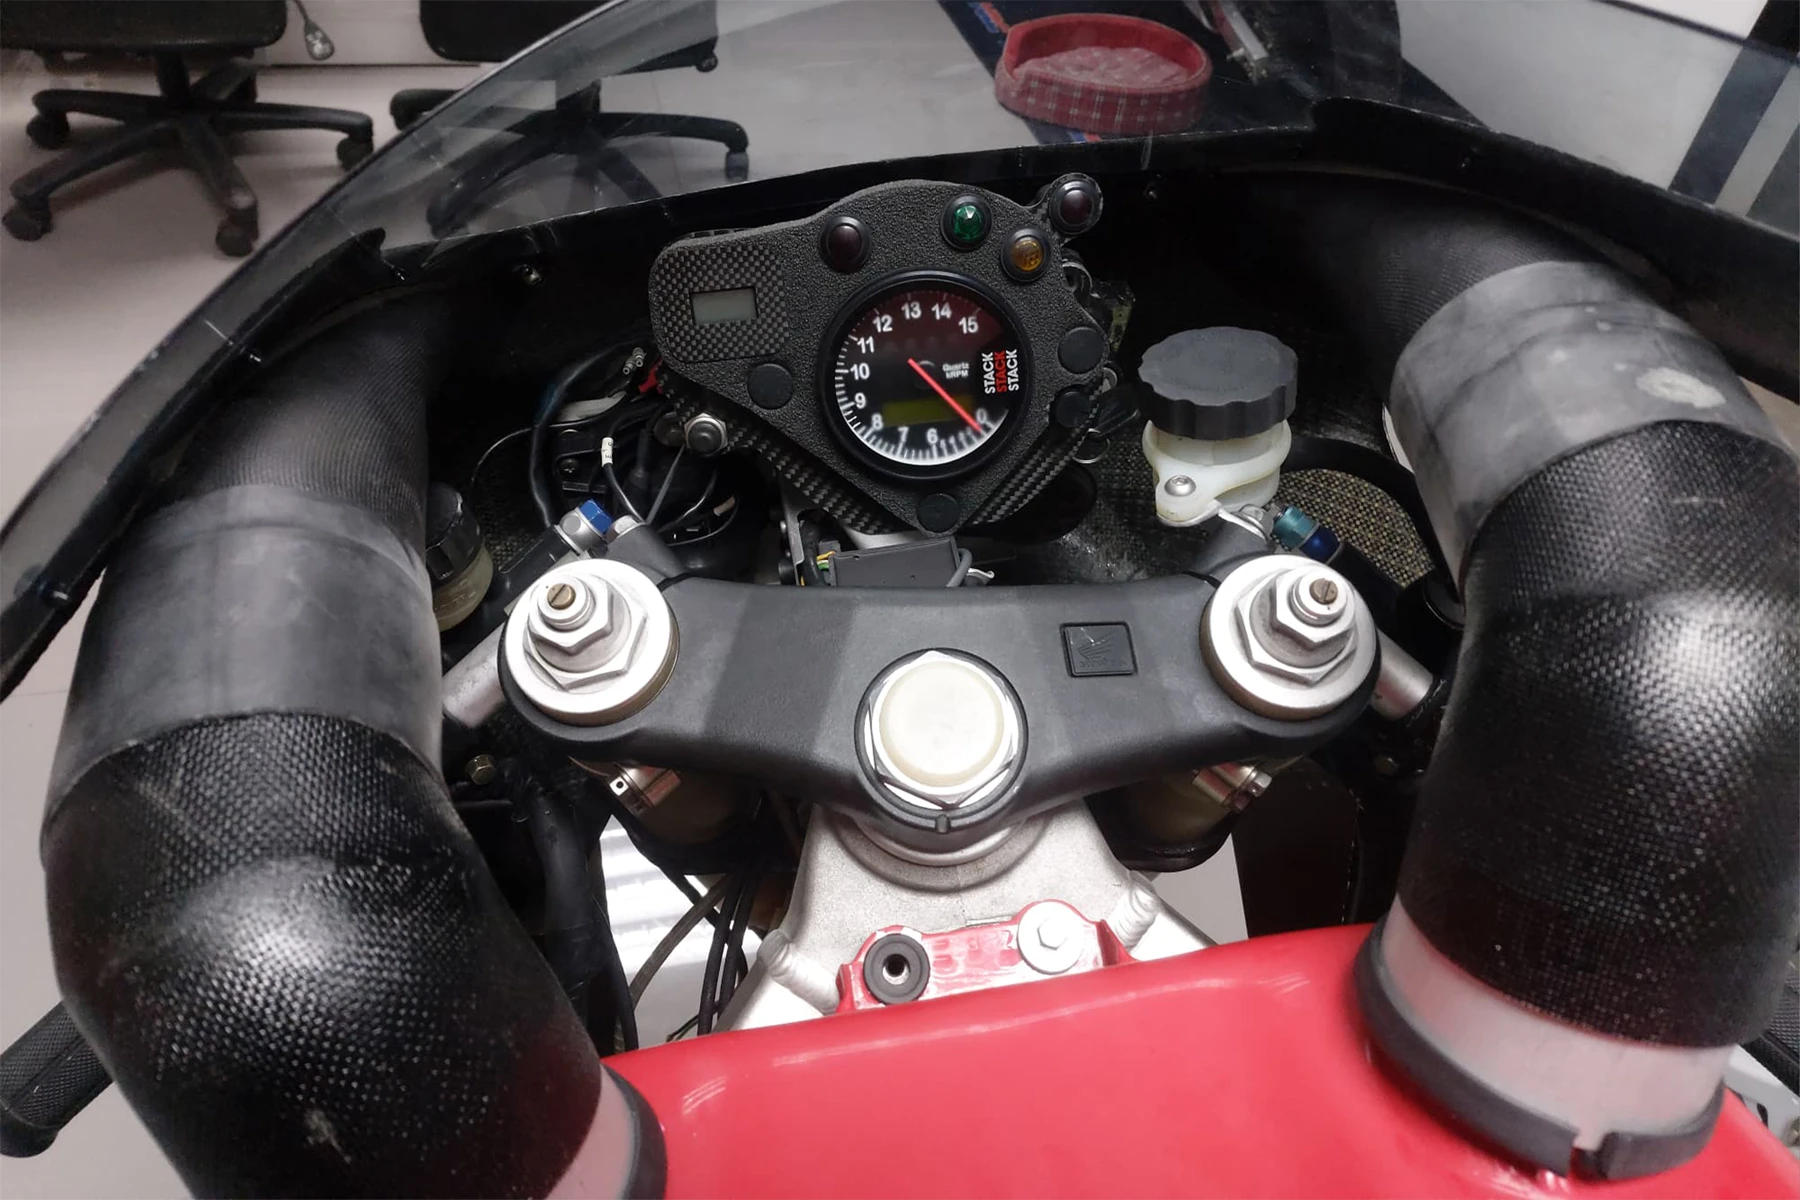
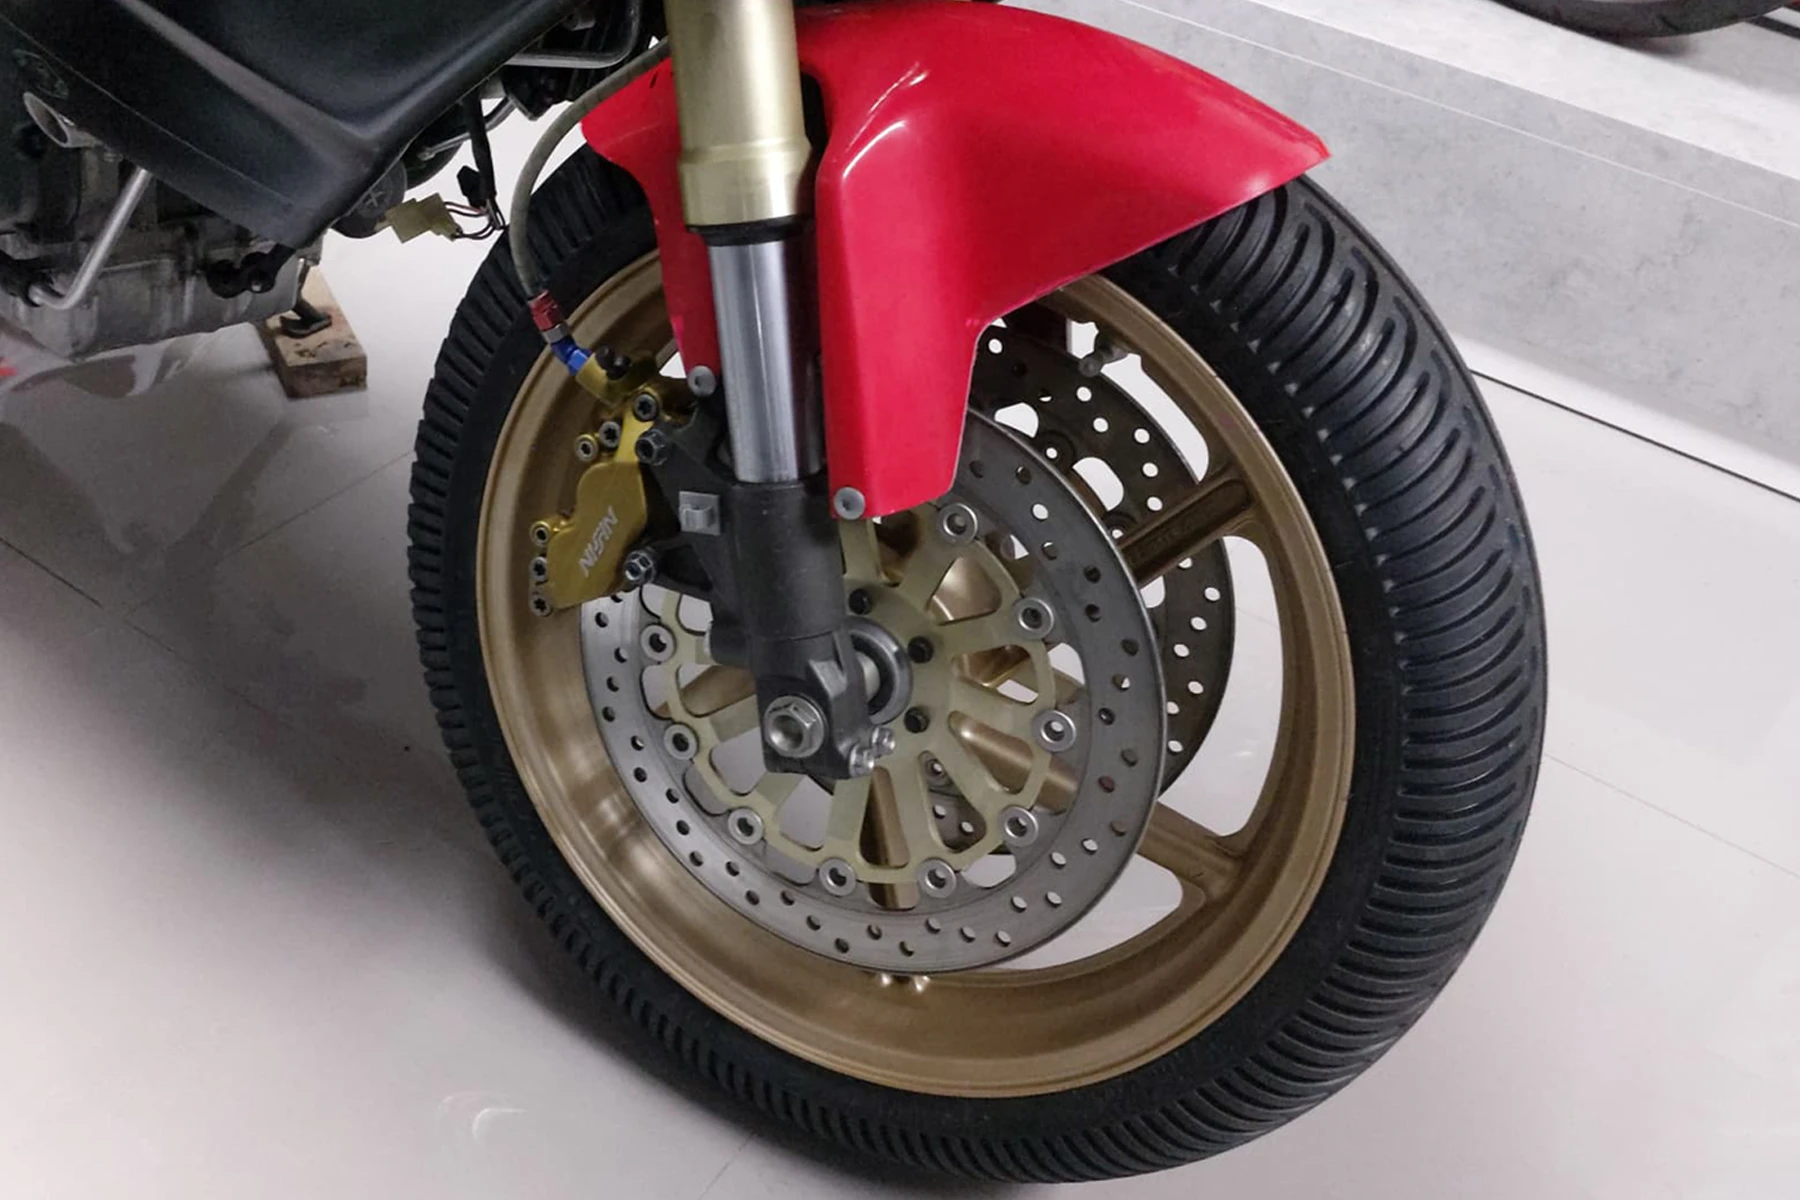
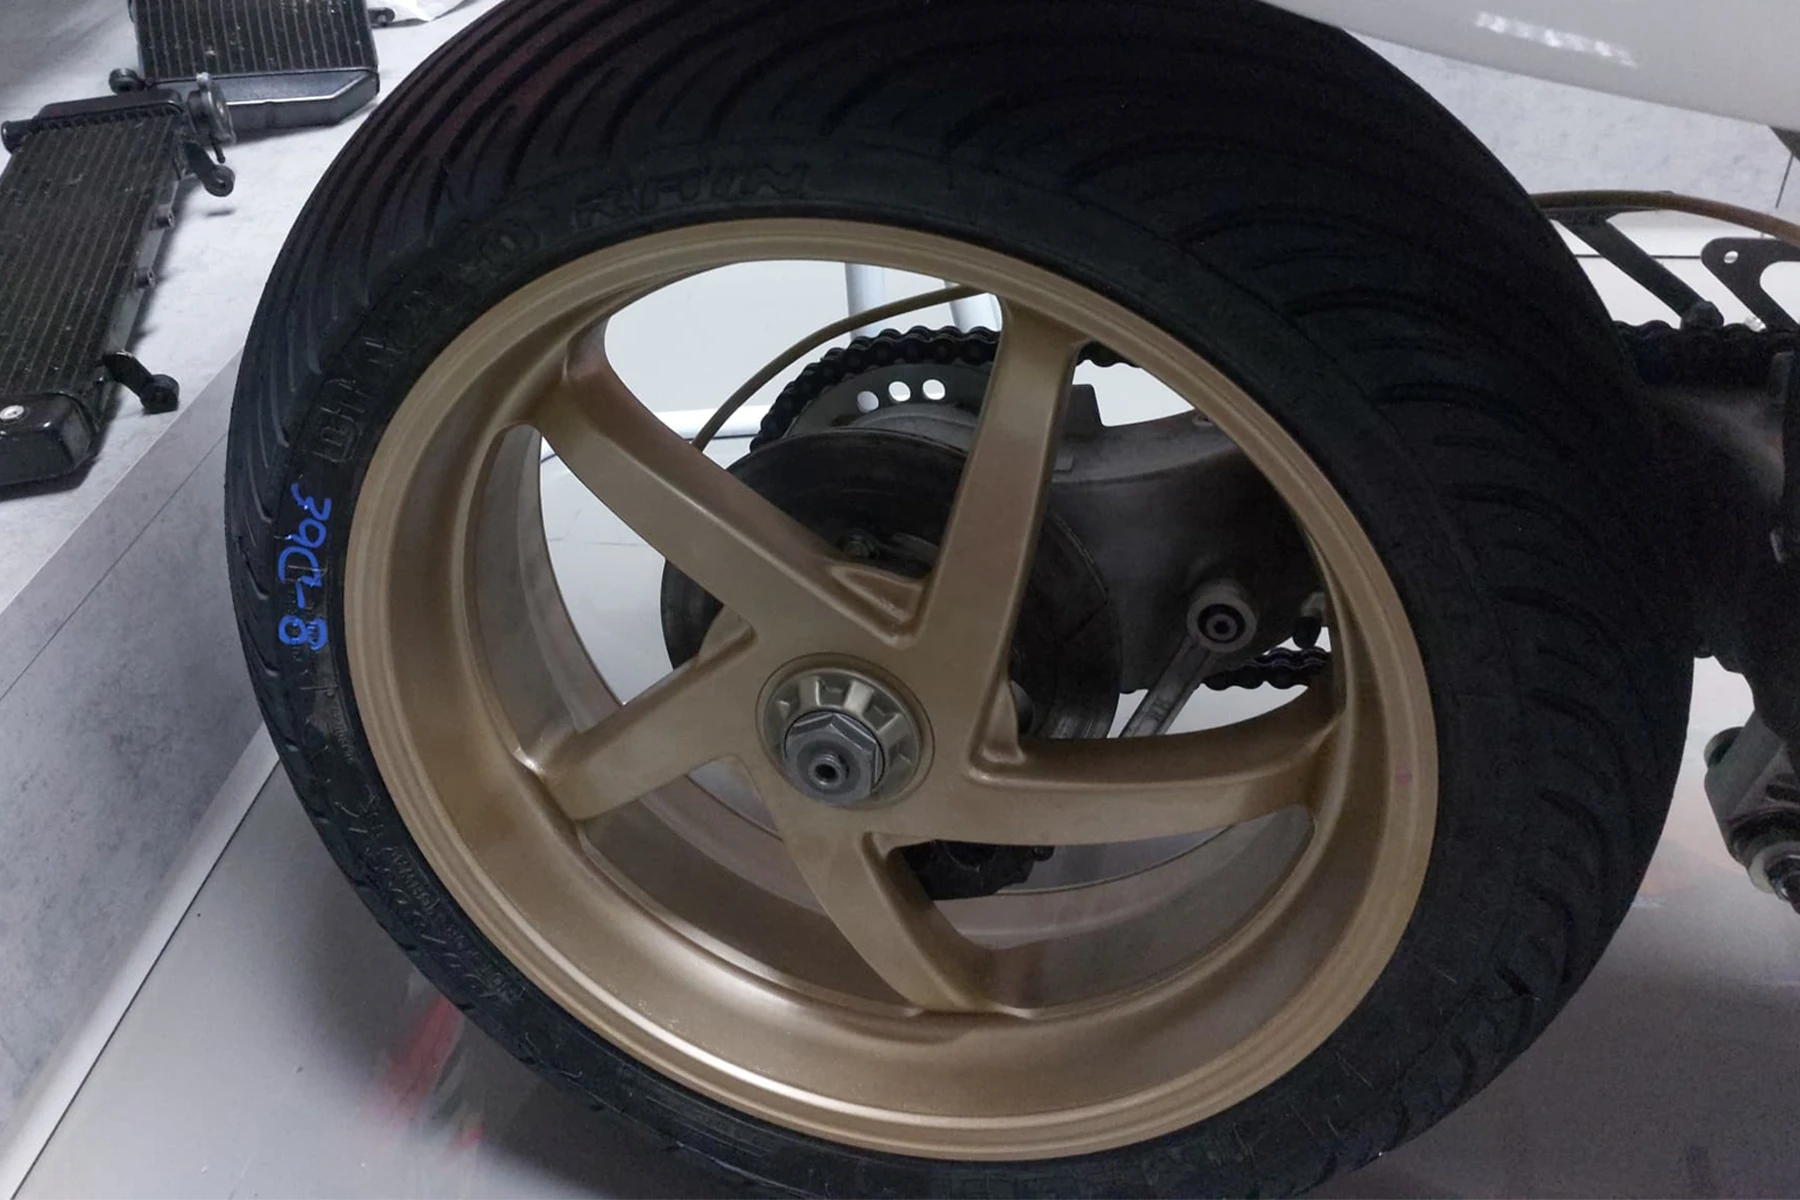
Fast forward to recent times. A dealer friend of mine offered an RC45 for sale. This bike had been imported from Japan and was a non-runner. It was neither a pure race bike nor a stocker. Story goes that the previous owner was trying to build it into a Suzuka replica. It was a mismatch of a stock fuel tank, engine, airbox, and chassis, but it featured an HRC upper fairing (no lower), a race seat unit, and HRC wiring and ignition—including the volume control panel and HRC dash. It had a gold painted NC30 front wheel and a 5 spoke Marchesini rear, both shod in wet tyres. Rear suspension was Ohlins, front stock
It had potential but needed a lot of work to get it over the line. Luckily—or you could say prudently—we had squirreled away quite a stash, and this was the perfect excuse to manufacture some TYGA Performance parts to finish it off. Full of confidence, we took the project on and expected it to be a fairly straightforward endeavour, somewhat similar to our other HRC two-stroke projects.
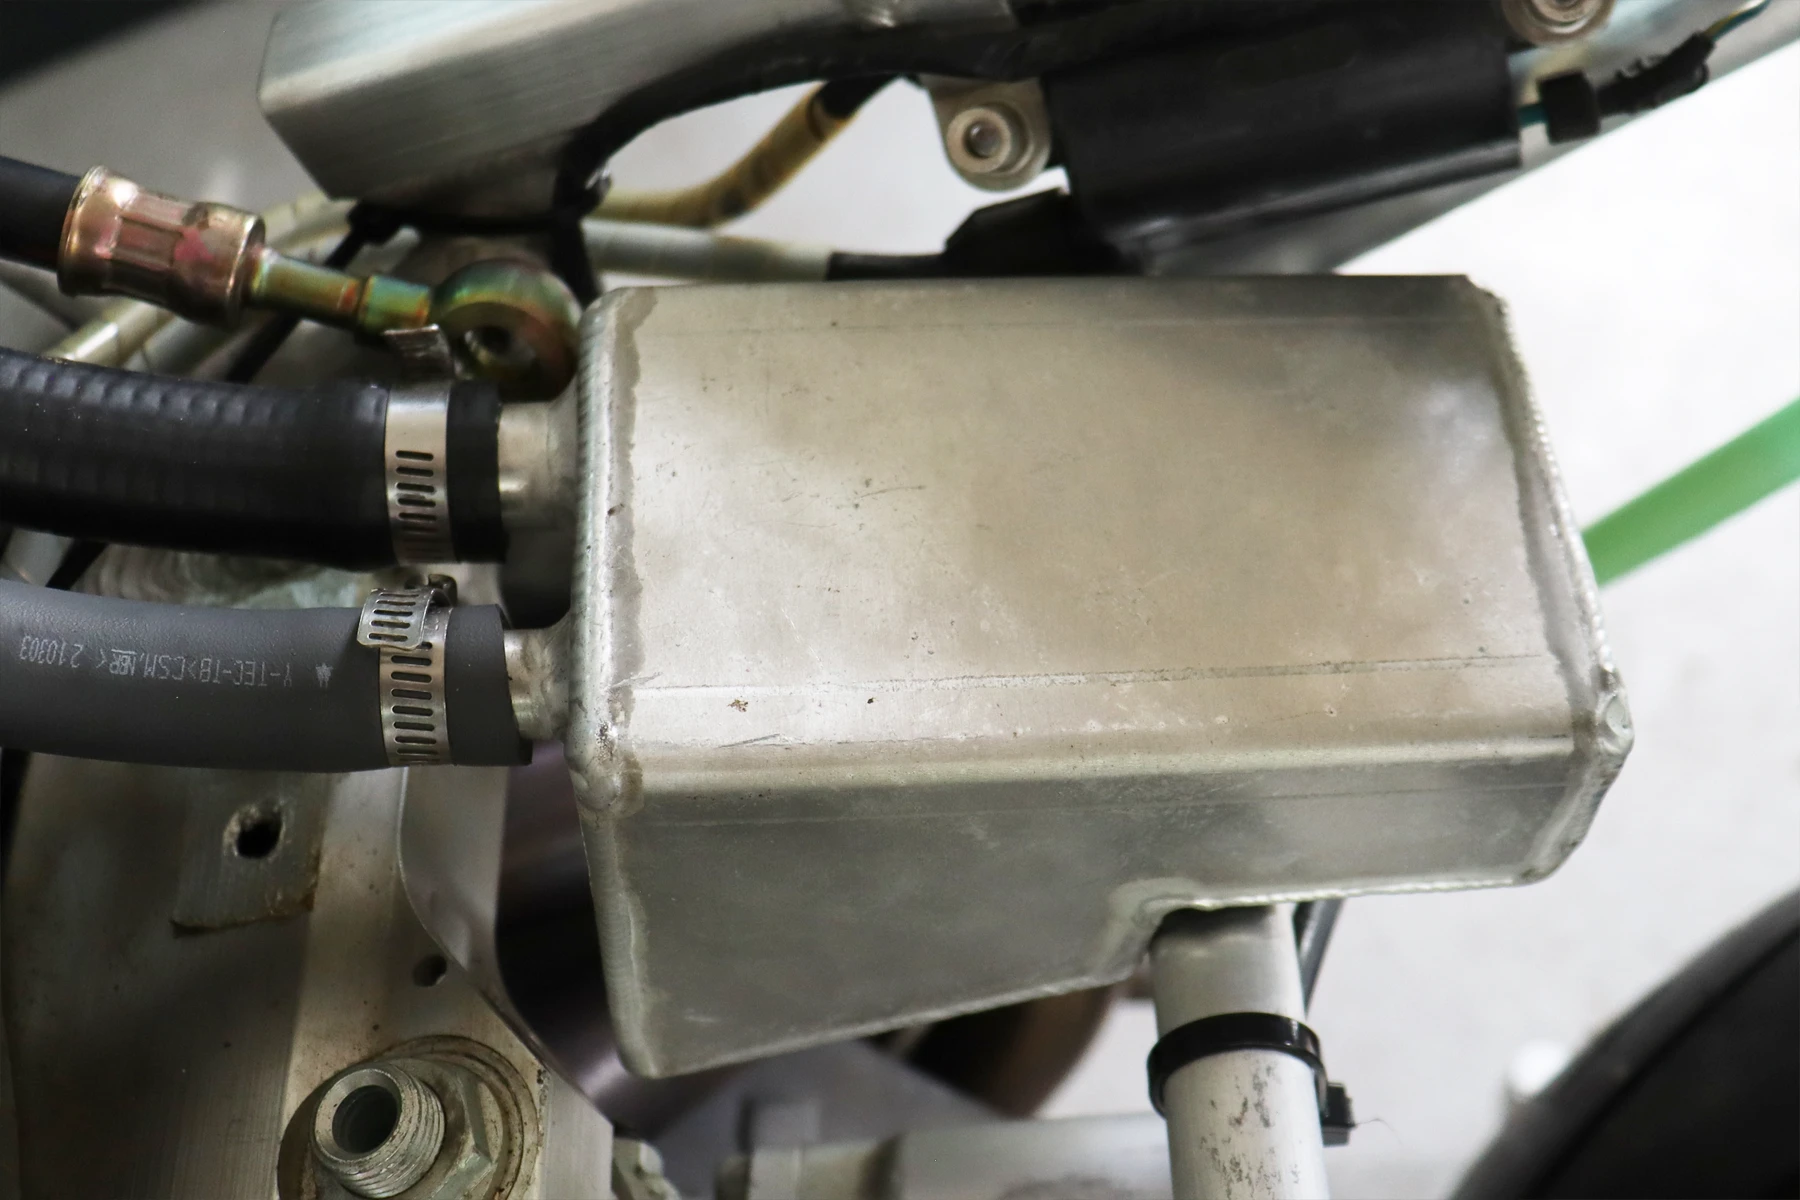
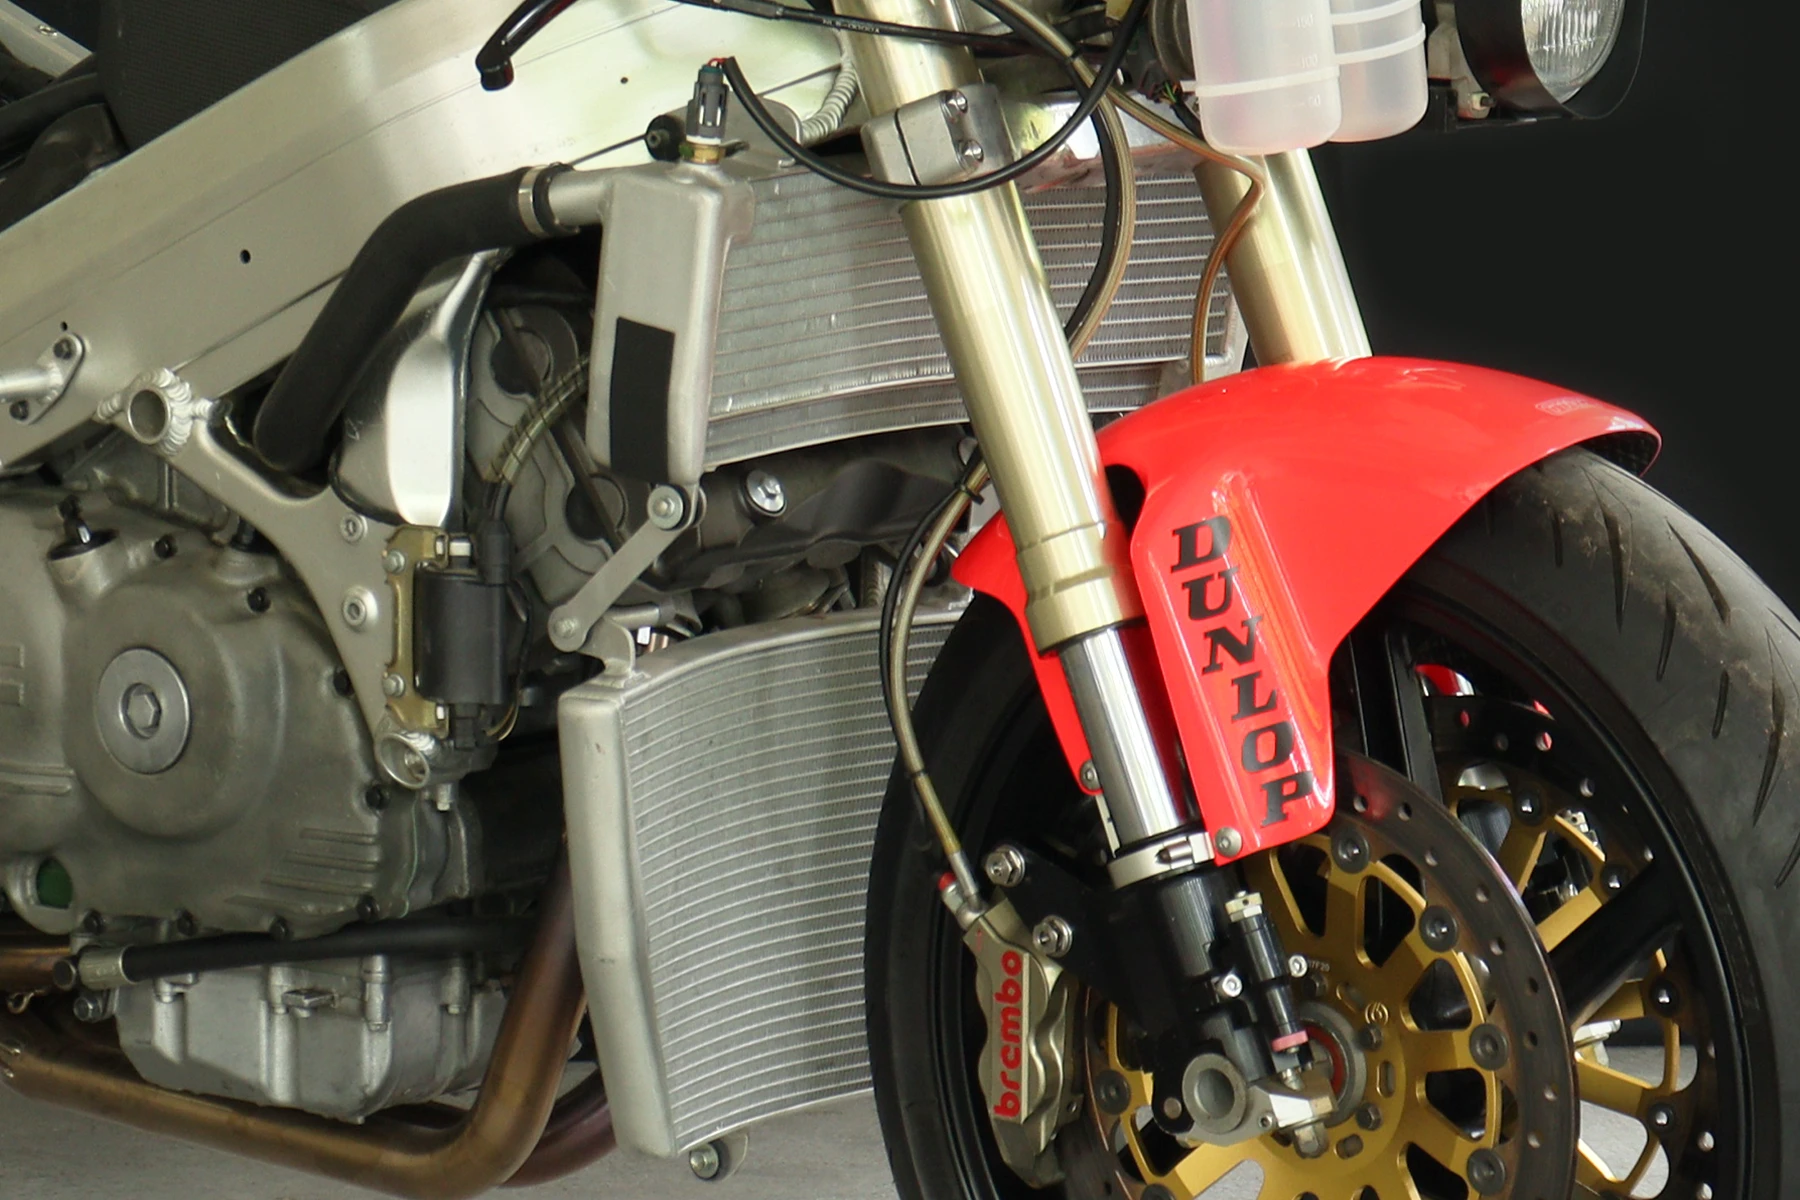
I went shopping with the few specialists who deal in such projects. Daniel at Gecko supplied us with an airbox, brake rotors, and parts books, as well as some beautiful HRC wheels. Steve at GT Performance provided a beautiful set of radiators and a crankcase breather box that he had fabricated, alongside an airbox lid, air ducts, and fairing lowers. In the meantime, I also sourced an HRC-shaped composite fuel tank from a long-time friend of TYGA Performance. The tank was sold cheap because it leaked, but at least it would be useful for jigging things up, like the air ducts, until a good one could be sourced. The front end was liberated from the Horipro project, and a stock RVF400 unit replaced it on that bike.
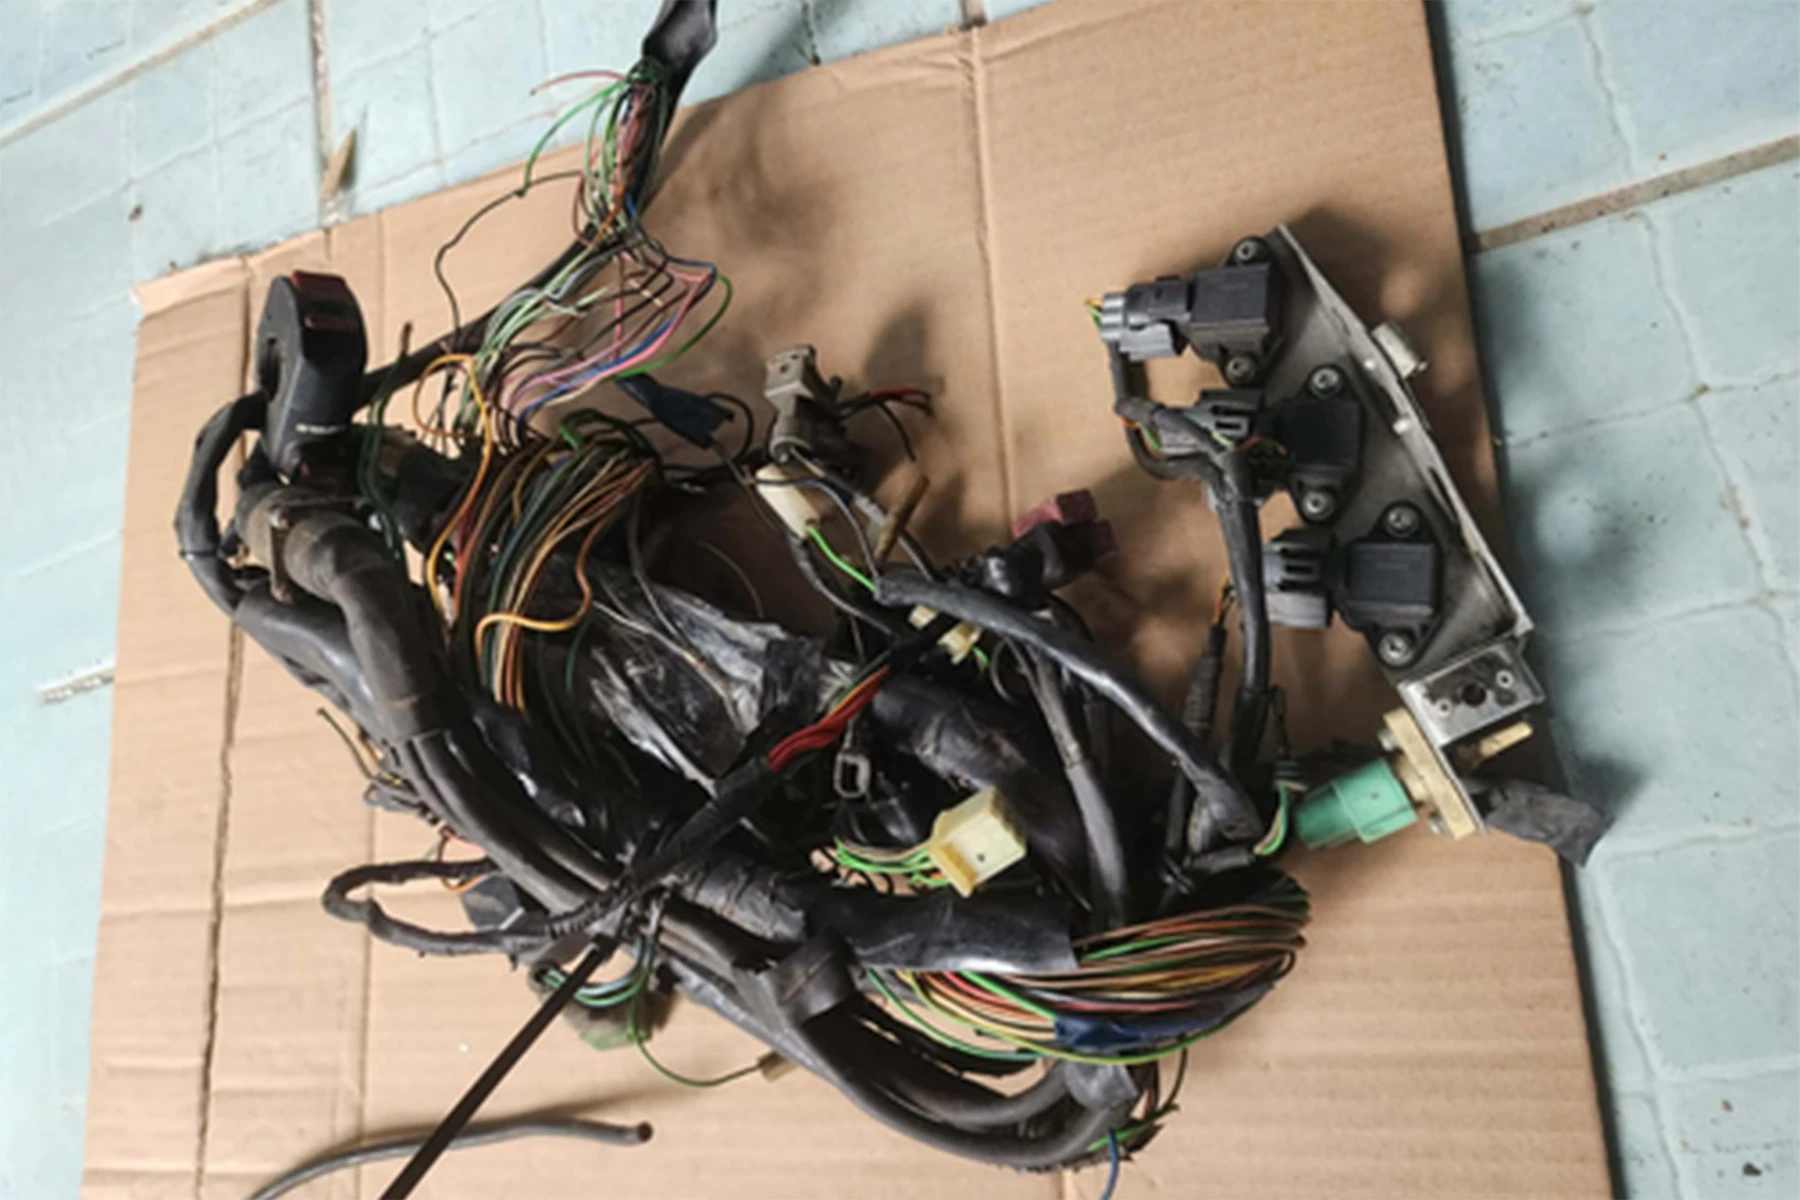
I thought the rest would be plain sailing, but it wasn’t. What we hadn’t banked on was a bewildering number of different versions of these HRC parts. Not only do you have the various tiers of hierarchy I previously mentioned, but numerous upgraded parts were issued even within the exact same year. It ended up getting very confusing, with mismatched air ducts to the fairing, and a mismatched airbox lid to the airbox itself. The wiring was all over the place, too, being a hybrid HRC/street setup.
Luckily for us, Steve from GT Performance visited us on a “busman’s holiday” and spent a few days snipping wires and tidying things up until we had a running, albeit static, bike. We were still struggling to find triple clamps for the front end. We could have machined them ourselves, but our CNC equipment was flat out making production parts at the time. We also had no ECU tray.
Fortunately, our contacts proved useful once again, and Mick Laughlin came to the rescue. We did a barter deal: he got the top end and the broken injectors out of the smashed engine we had bought from our friend in Laos, and in exchange, he sent us a top triple clamp, an ECU tray, and an exhaust guard.
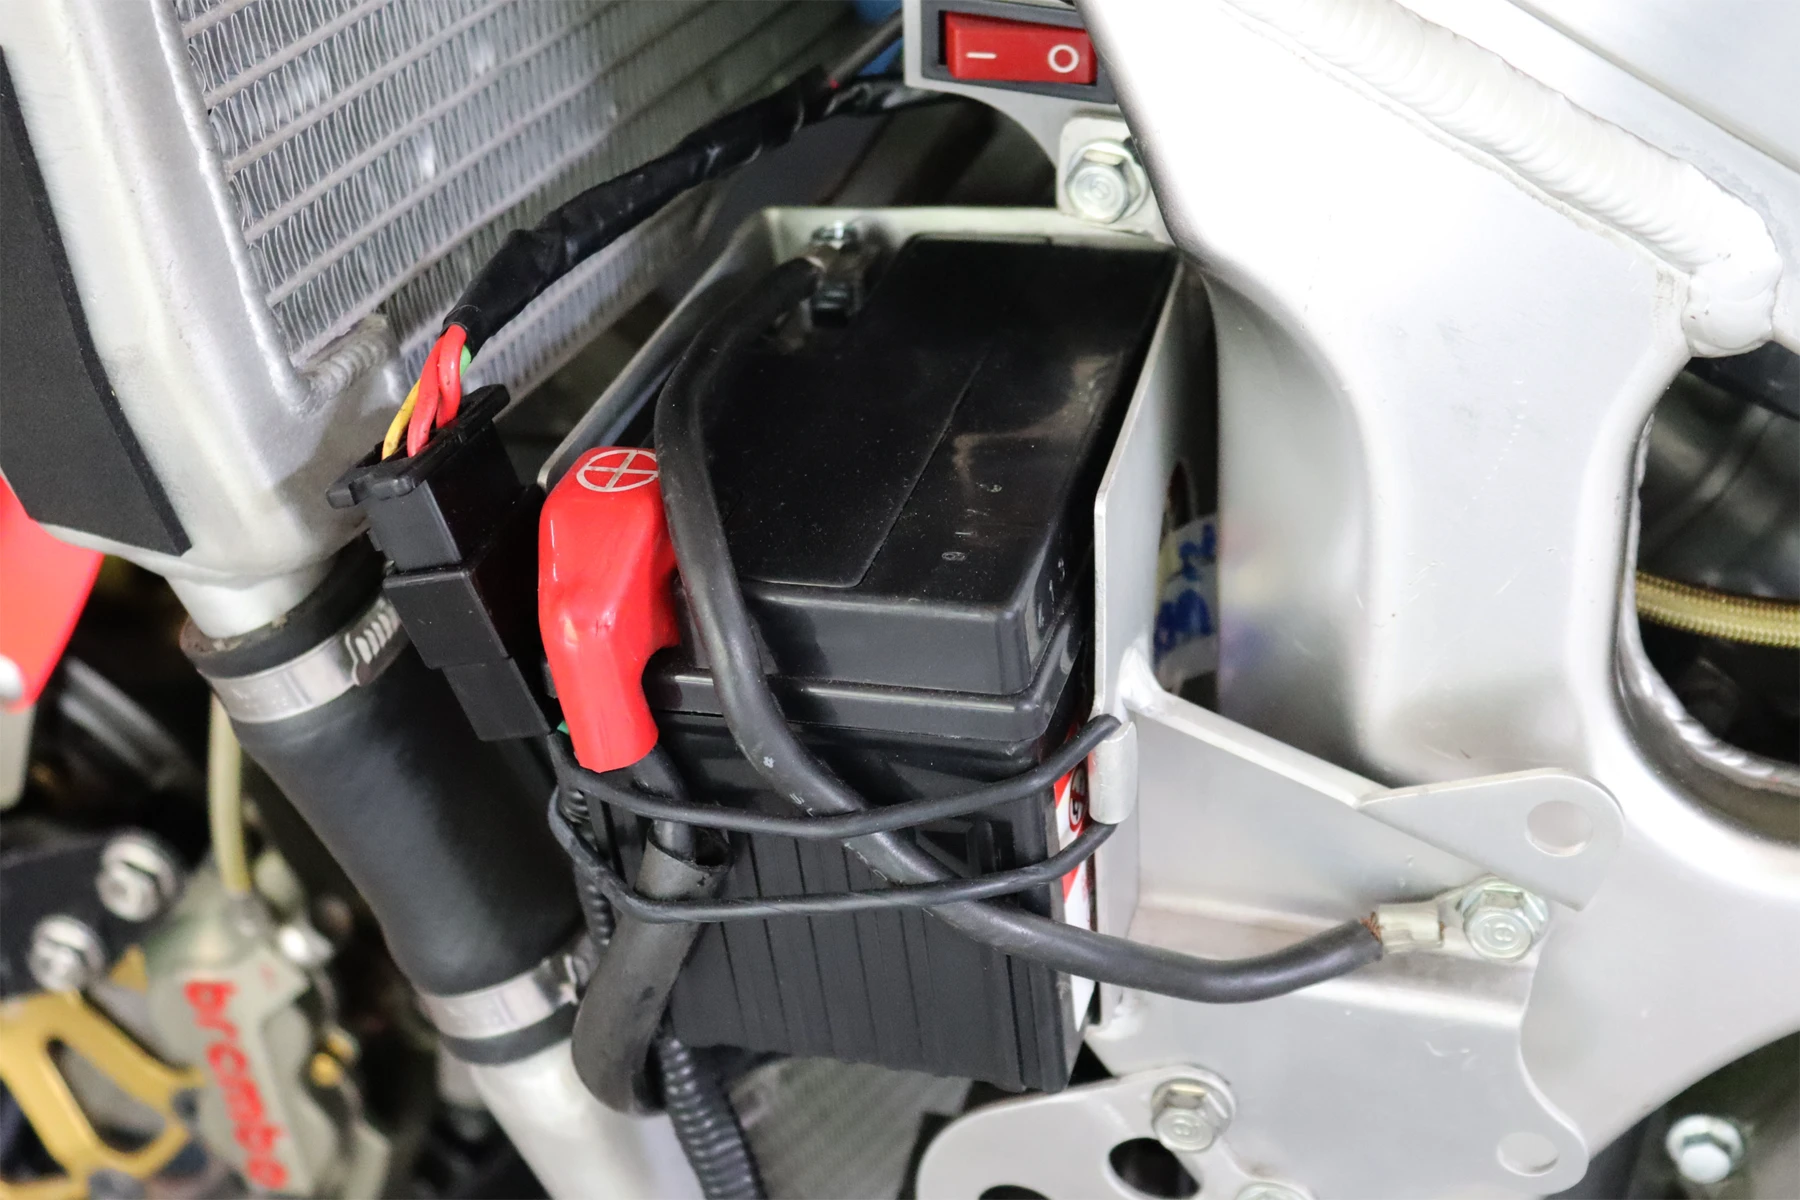
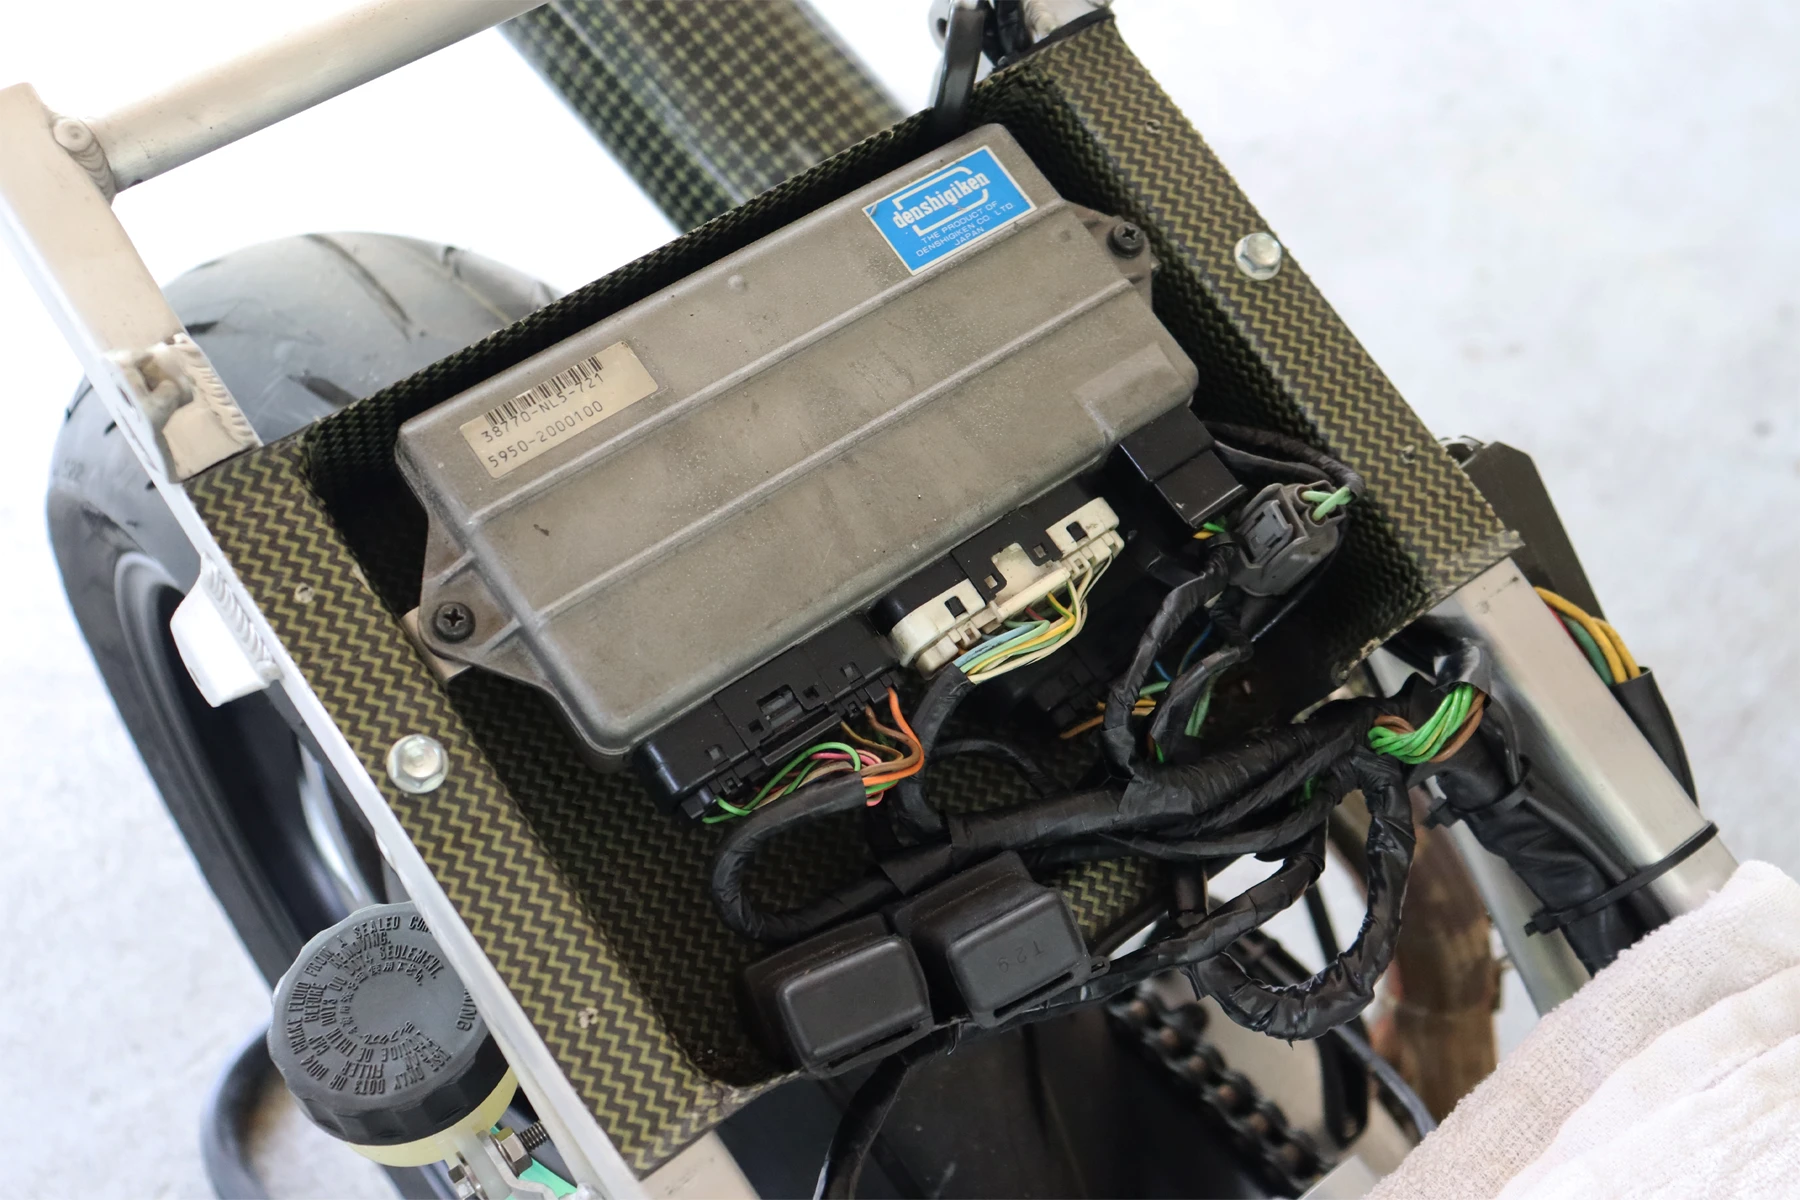
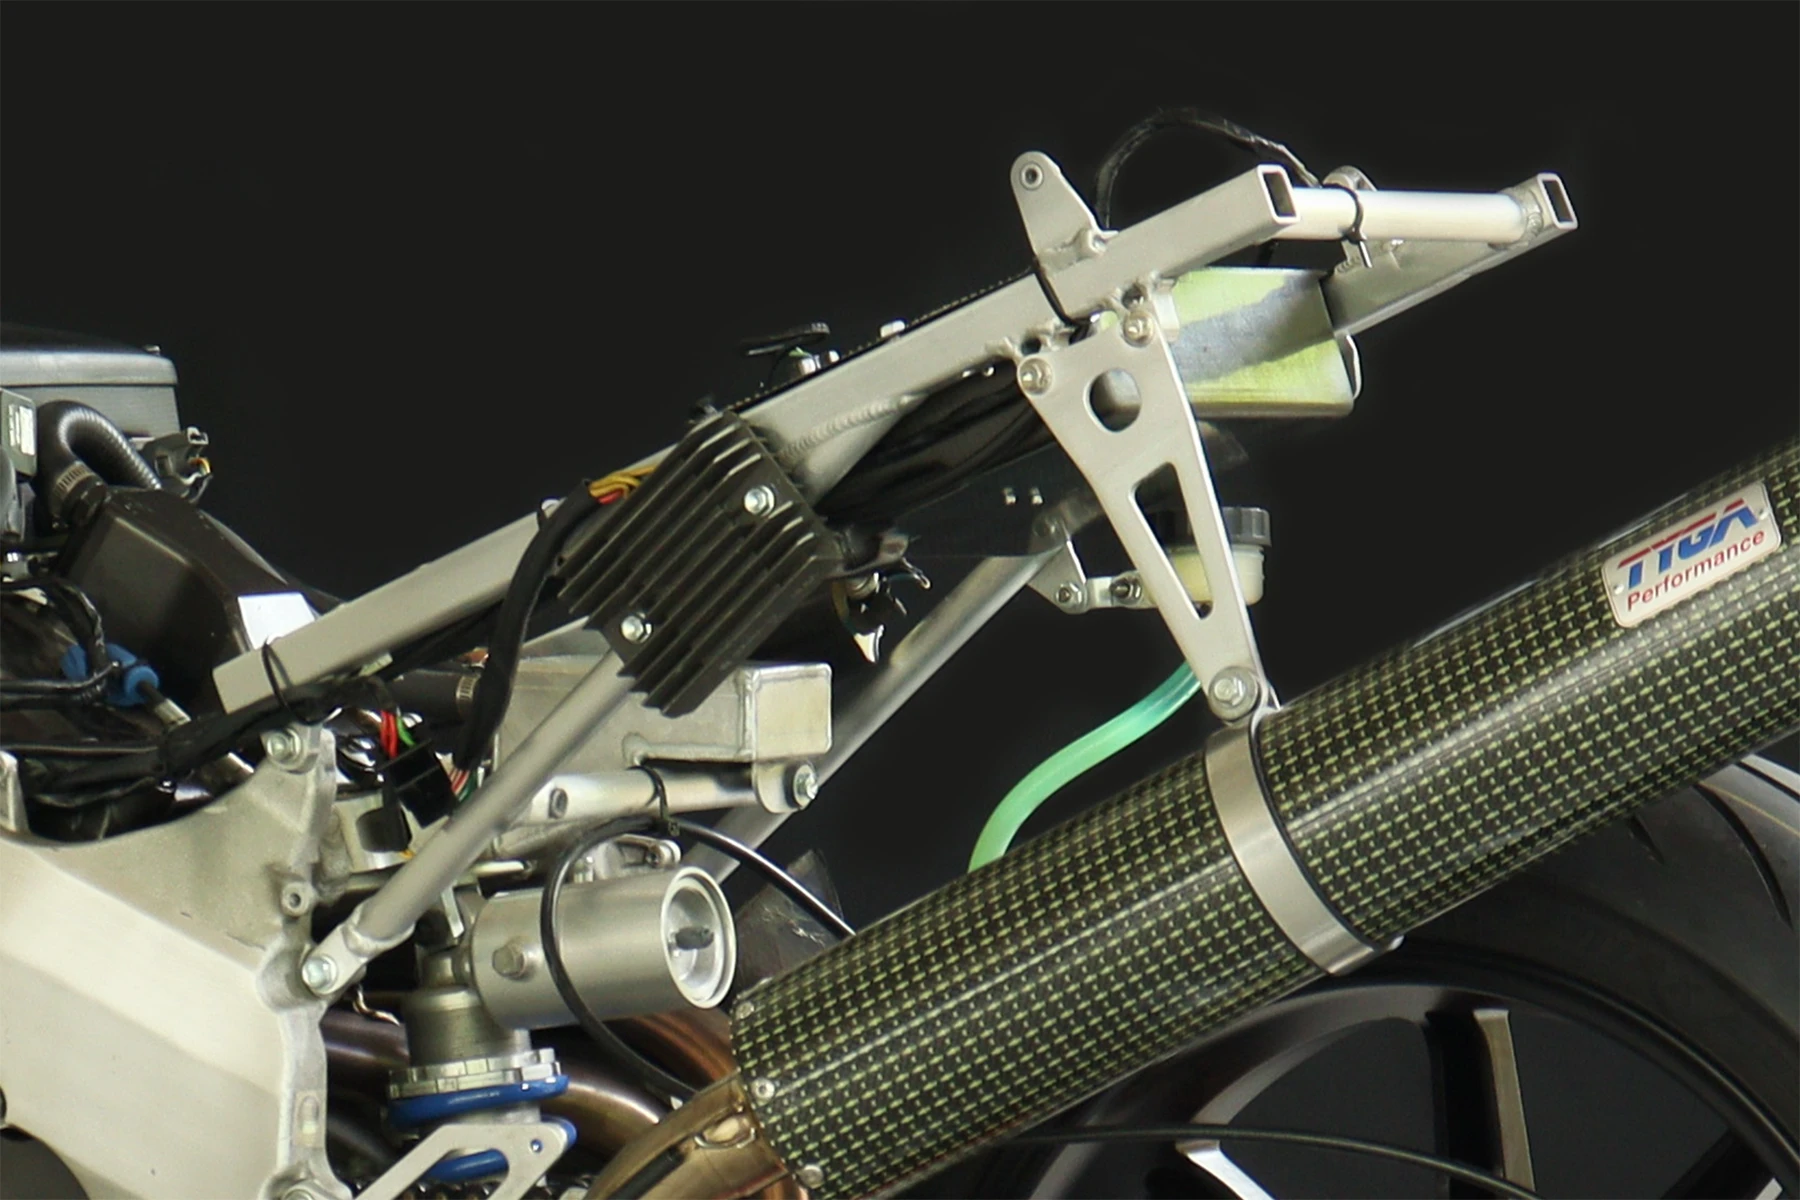
The subframe was stock but looked a bit “neither here nor there” when it came to the finish, so we stripped the anodizing back to bare metal, cut off the redundant rear section, and welded on the seat cowling lugs so they looked much prettier. The ECU tray arrived requiring a bit of trimming. I undertook this job myself, applying some U-section rubber trim along the edges to protect the wiring and cutting slots for the relays to sit in. We then installed one of our own brackets on the bottom of the tray for the igniter unit to slot into. Next, I installed rivet nuts to mount the assembly, and fabricated two brackets on the ECU tray to position the PGM unit directly above the igniter unit—replicating how it is laid out on some of the HRC-spec bikes (others have the igniter mounted on the side of the frame, which is very confusing!).
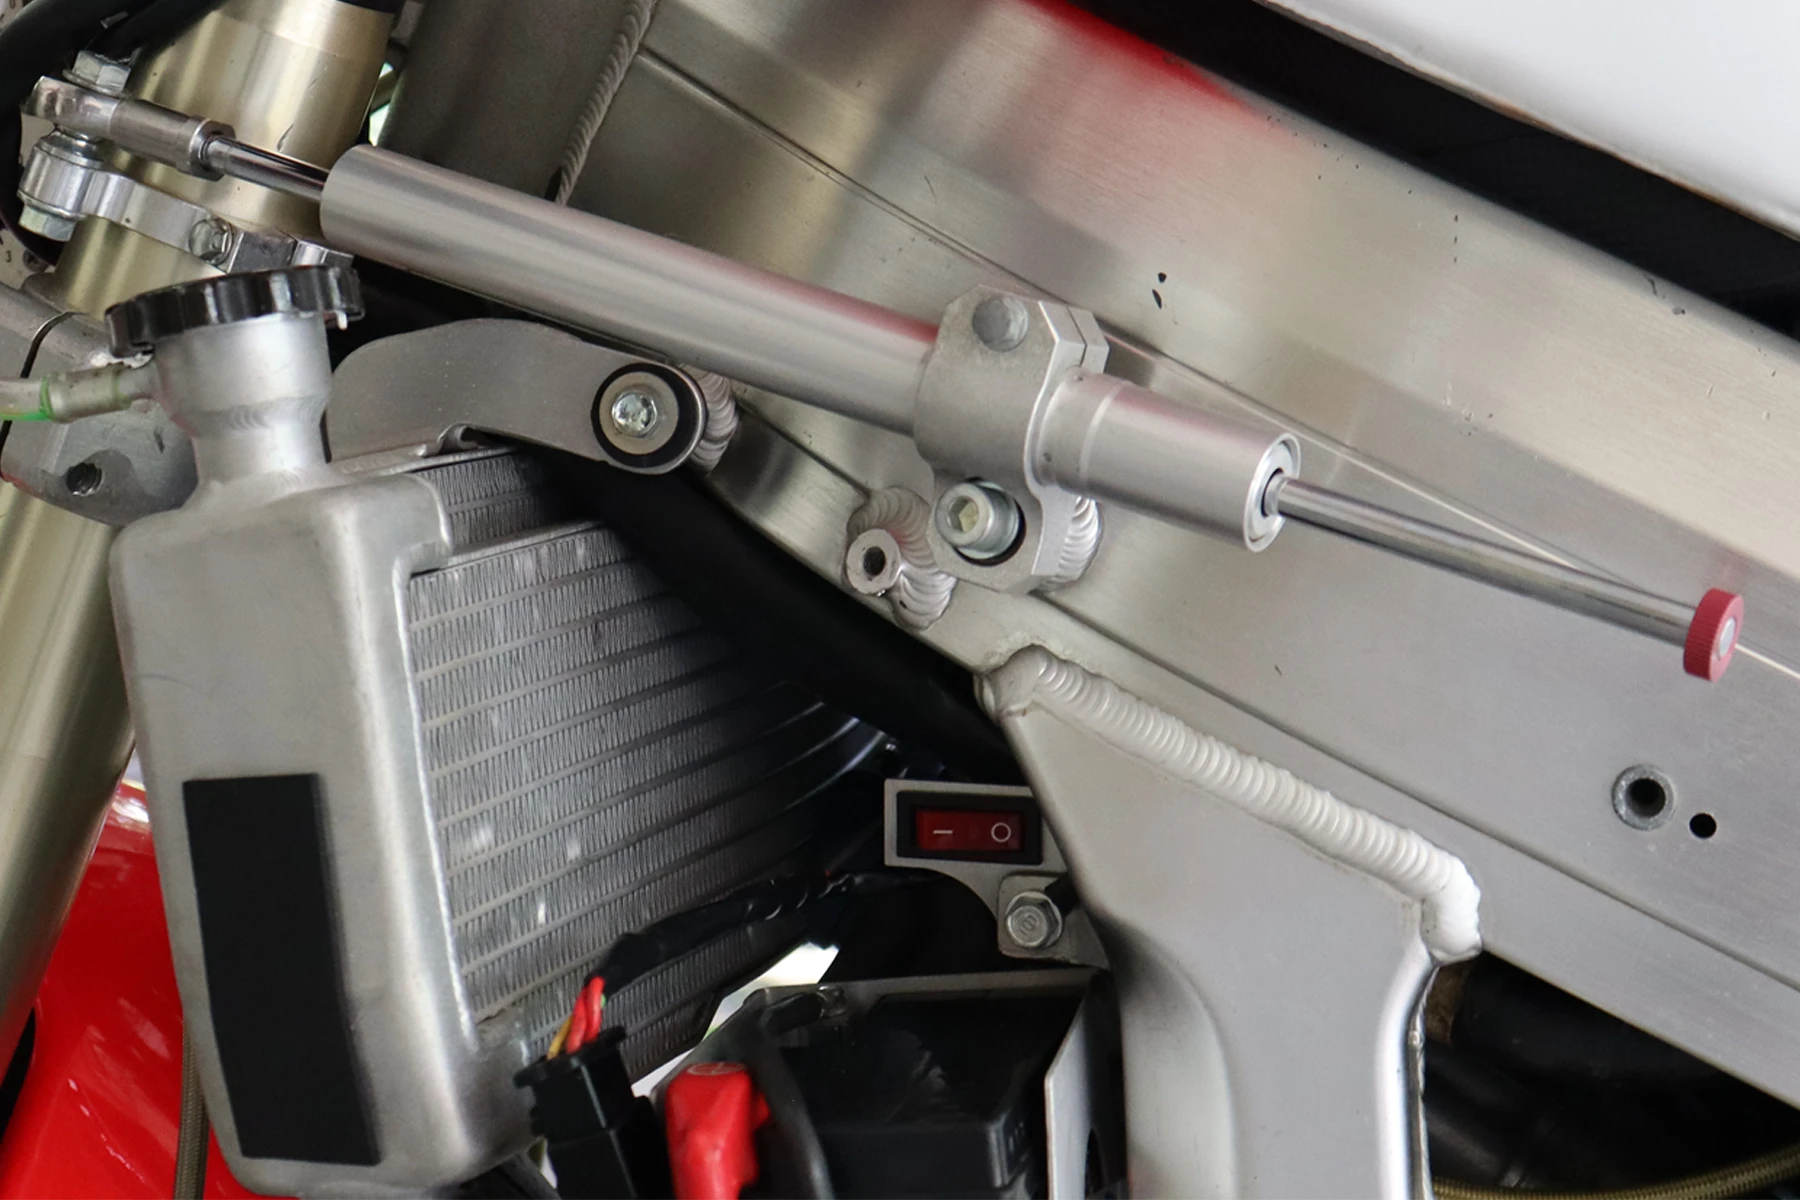
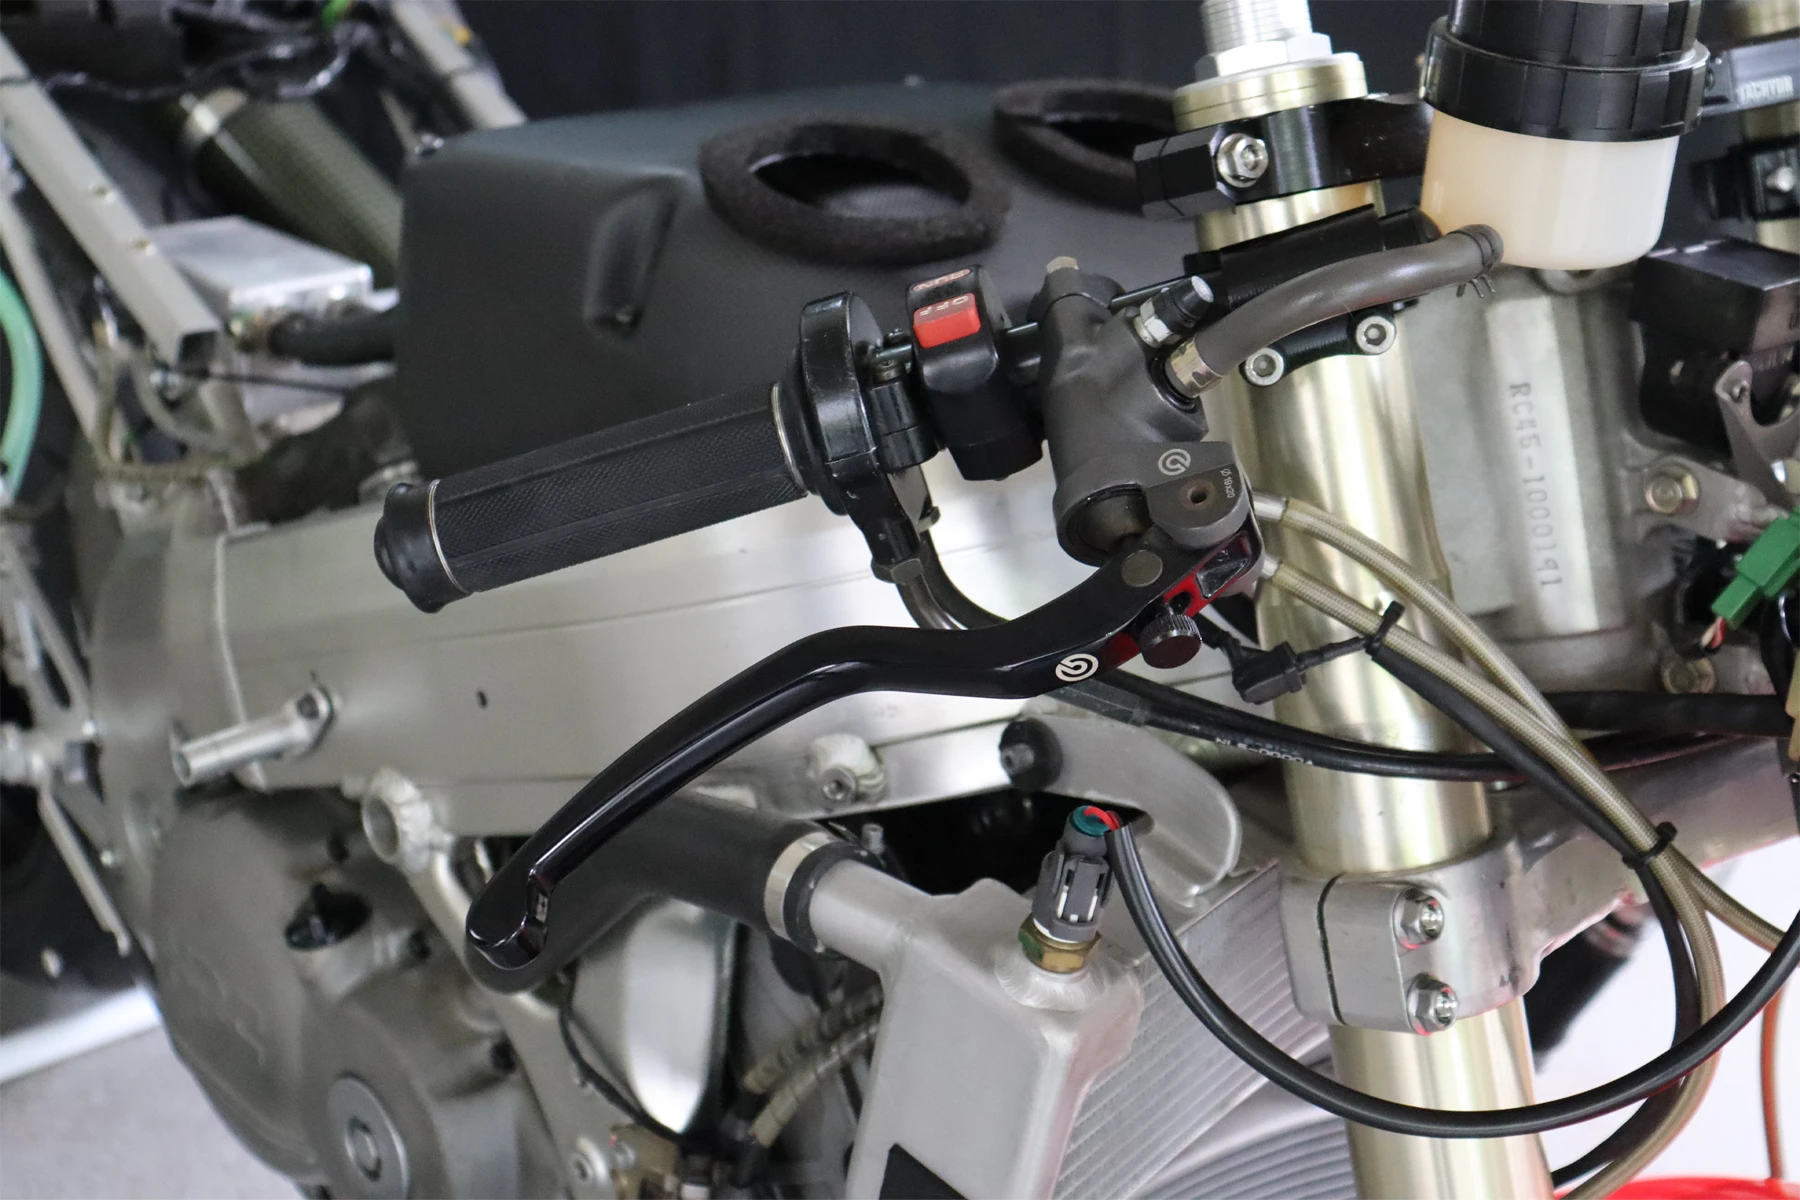
Being a race bike, it naturally needs a steering damper. Over the years, we have gradually built up a collection of leaking and accident-damaged HRC dampers. Matt carefully dismantled a few of them and was able to rebuild one of the correct length using new seals and his own special recipe of diesel and fork oil. We machined our own steering damper clamps and tracked down an unscratched, knurled adjuster knob to finish it off.
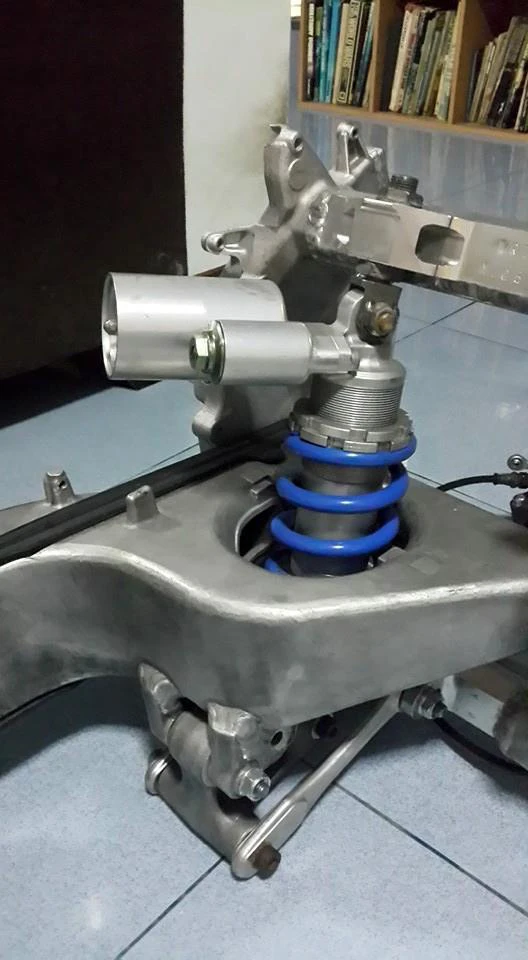
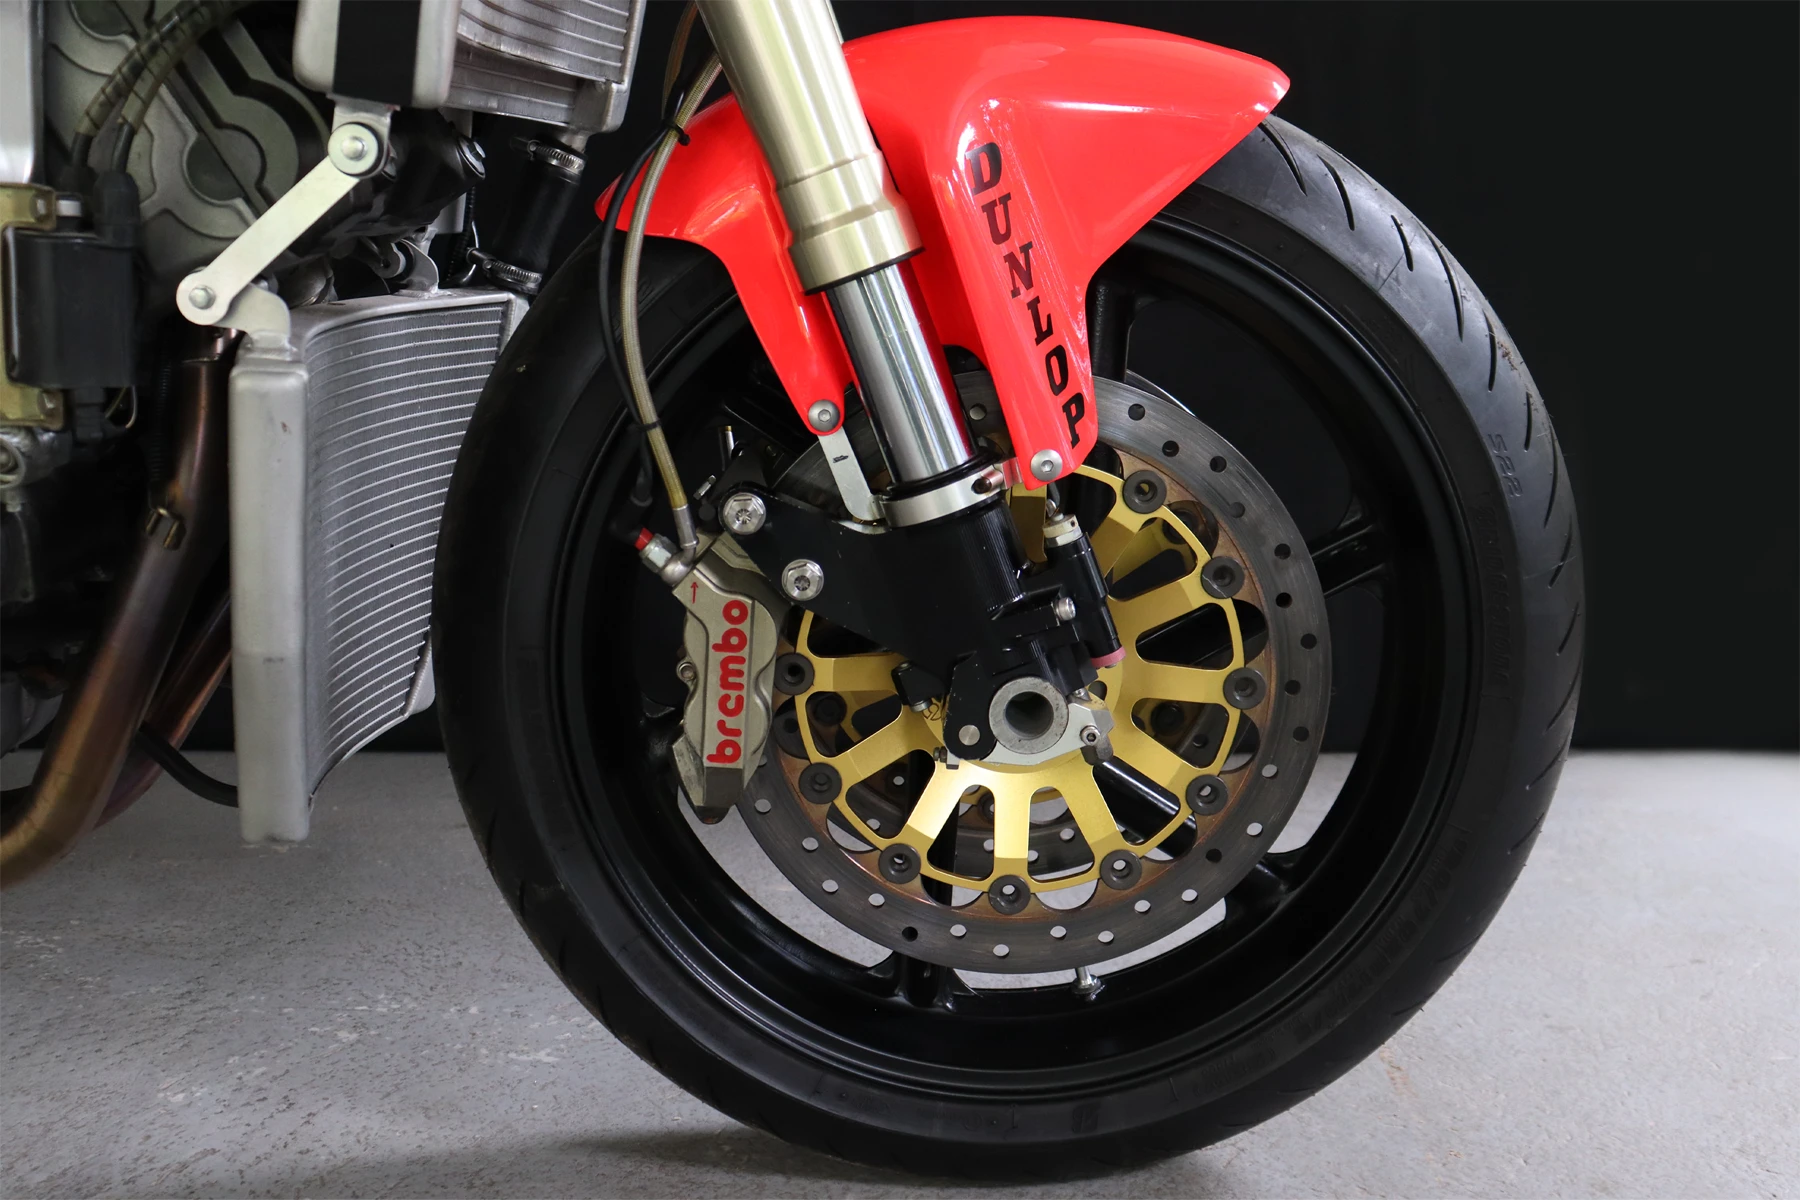
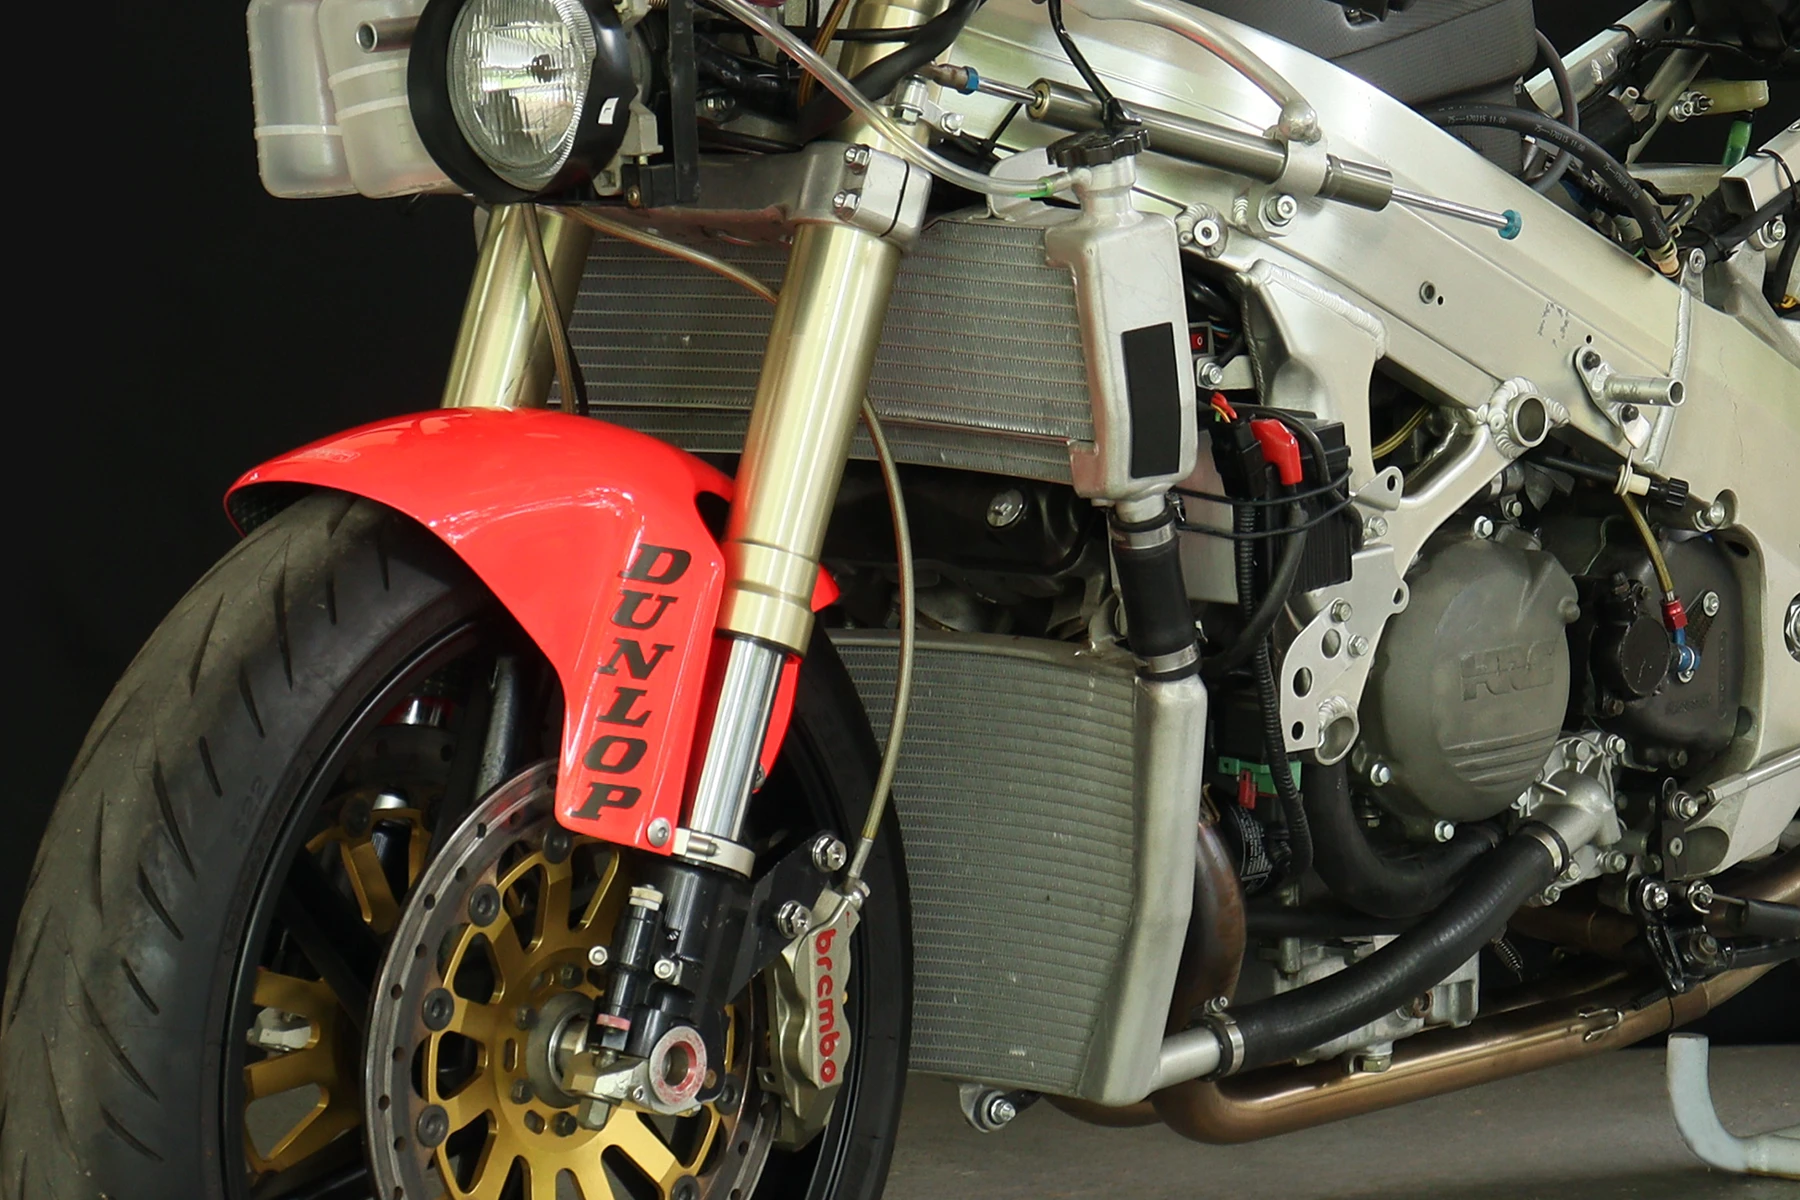
Another shout-out goes to Matt for rebuilding the rear NL5 shock absorber. It was actually in decent condition and just needed a thorough service. Fortunately, the front forks had already been serviced back when they were temporarily installed on the RVF400, which was a major plus. They already had a front brake pressure switch installed on the Brembo set up.
An ex-Honda factory Large Project Leader (LPL) visited us last year and gifted us some pure “unobtanium” from his days at HRC. Included among these holy-grail items were four factory RVF caliper mounting bolts from the early 1990s. Not only are they titanium, but the attention to detail is staggering—they even feature retained titanium washers for rapid wheel changes on endurance racing machines.
Warning: Replacing heavy steel OEM hardware with titanium alternatives is a highly addictive sickness, and those four caliper bolts triggered a massive relapse. I immediately started scavenging through every drawer and tray in the workshop. Eventually, I hoarded enough titanium bolts to swap out the top triple clamp hardware, various stays, and the front fuel tank mounts. I had to force myself to stay off the internet, or I would have bankrupted us on ti wheel shafts, hubs, and God only knows what else. Either way, the new fasteners look absolutely spot on!
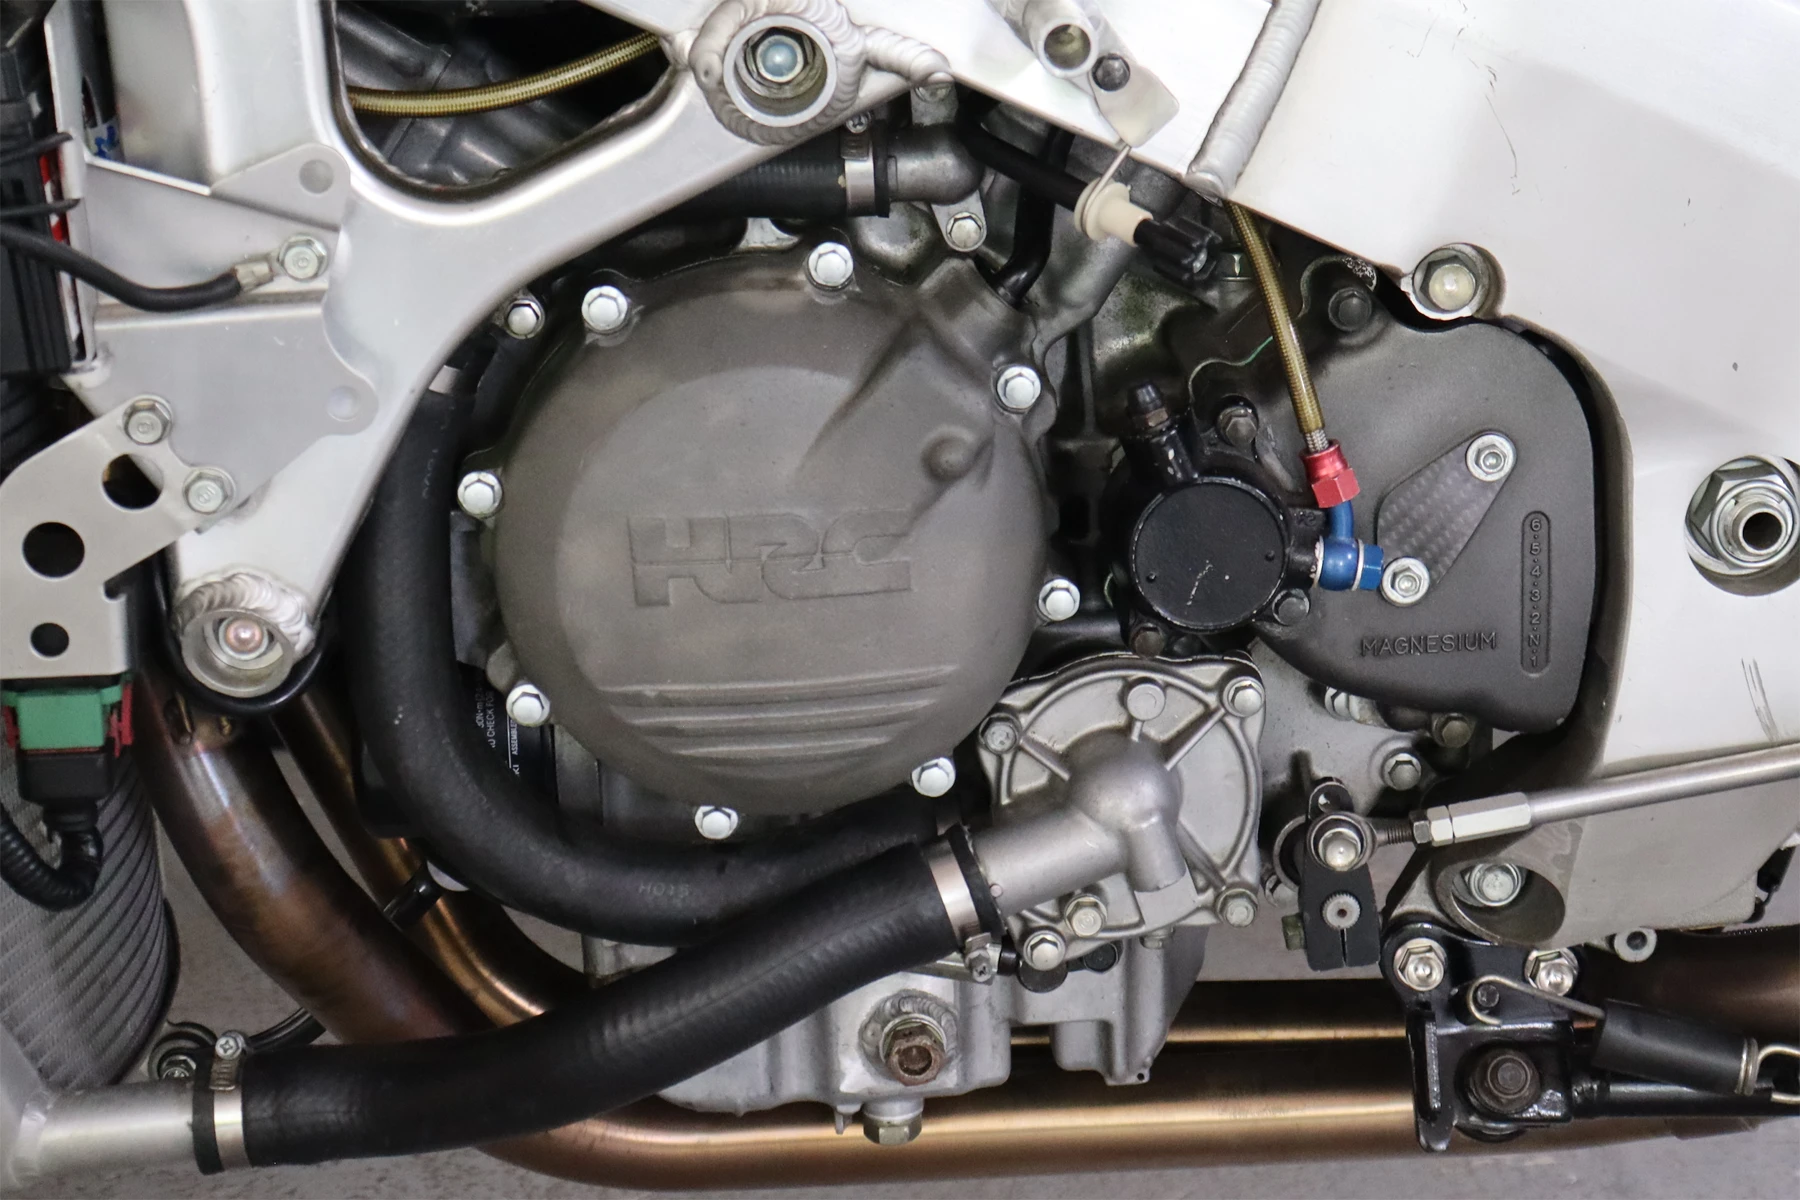
The smashed race engine also donated its magnesium covers, which luckily were undamaged, and removing them revealed a rare endurance racer generator underneath. Like most things with this project, wiring it up was not as straightforward as we had hoped; the wiring was the wrong length and the connector the wrong type. However, it was nothing too serious that Matt couldn’t sort out.
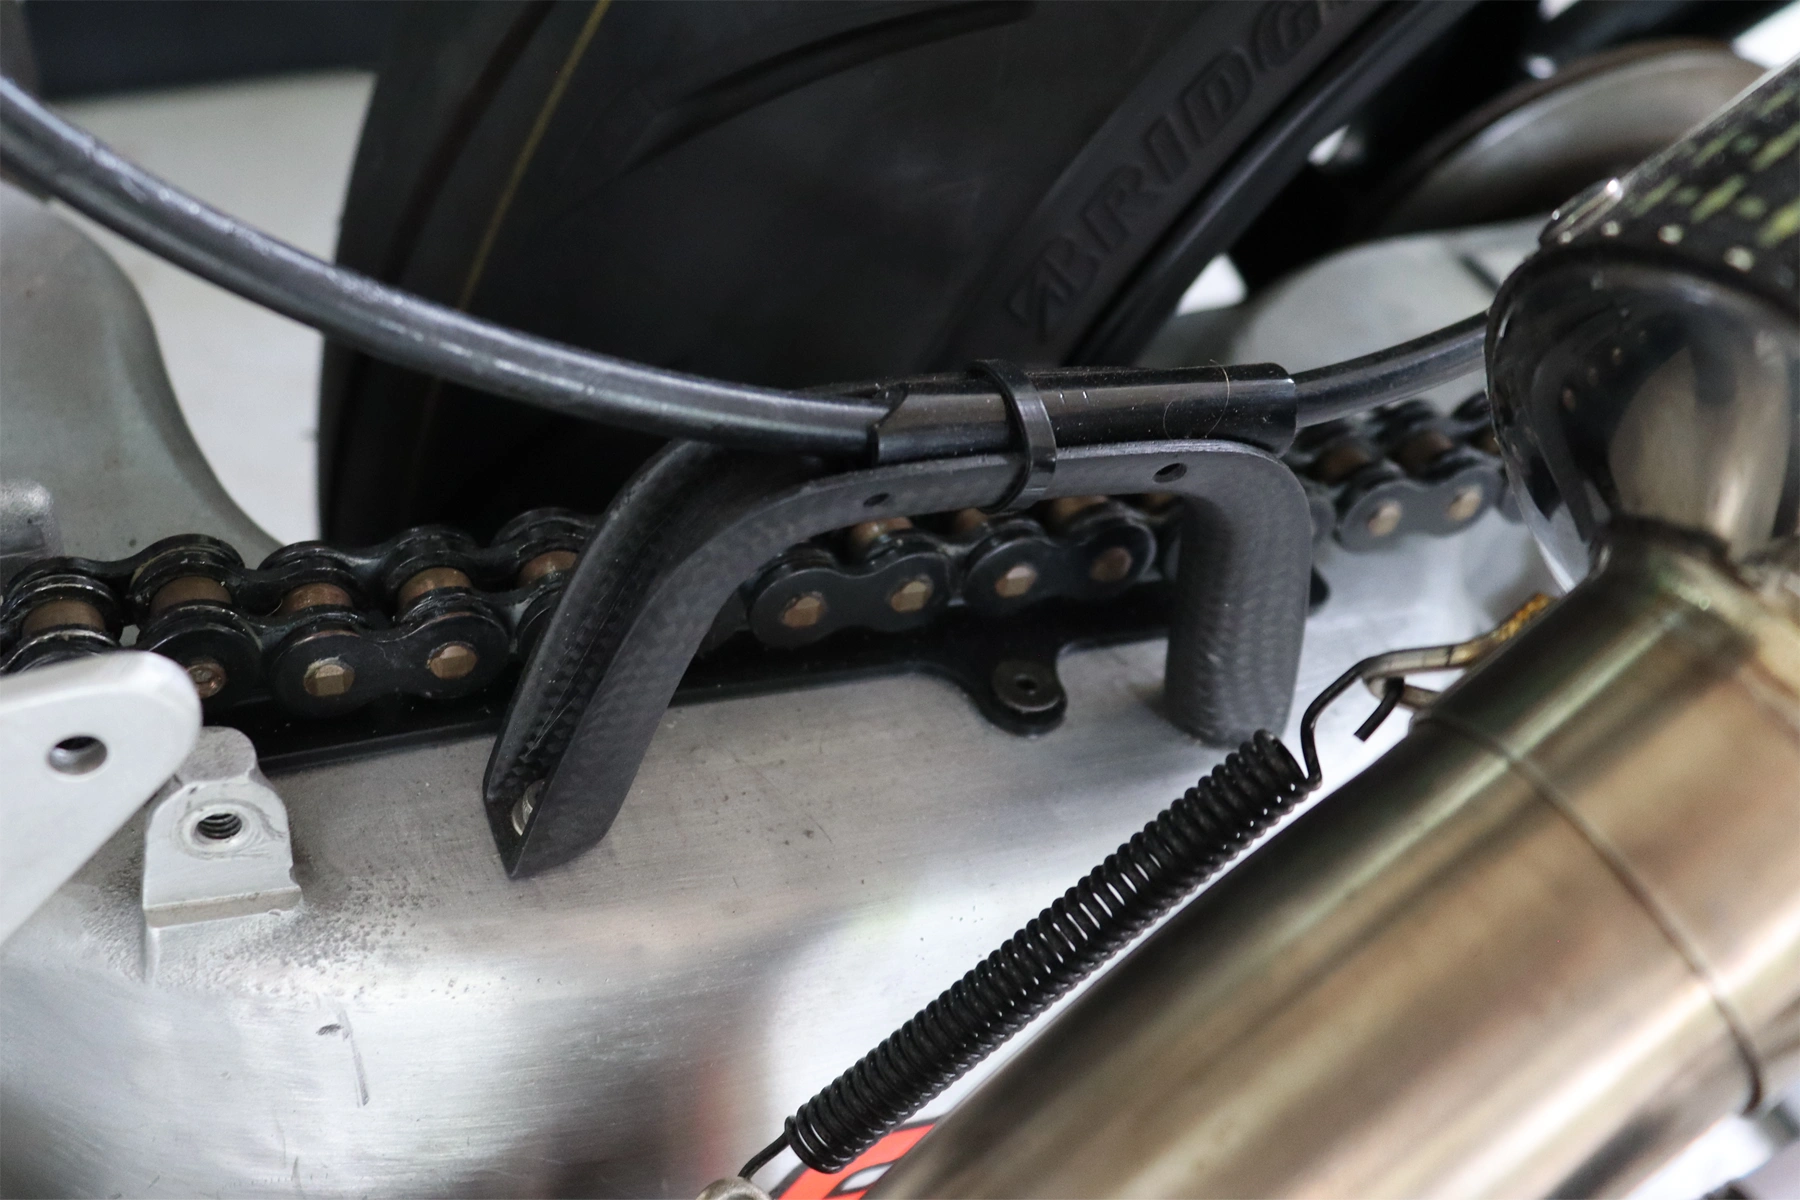
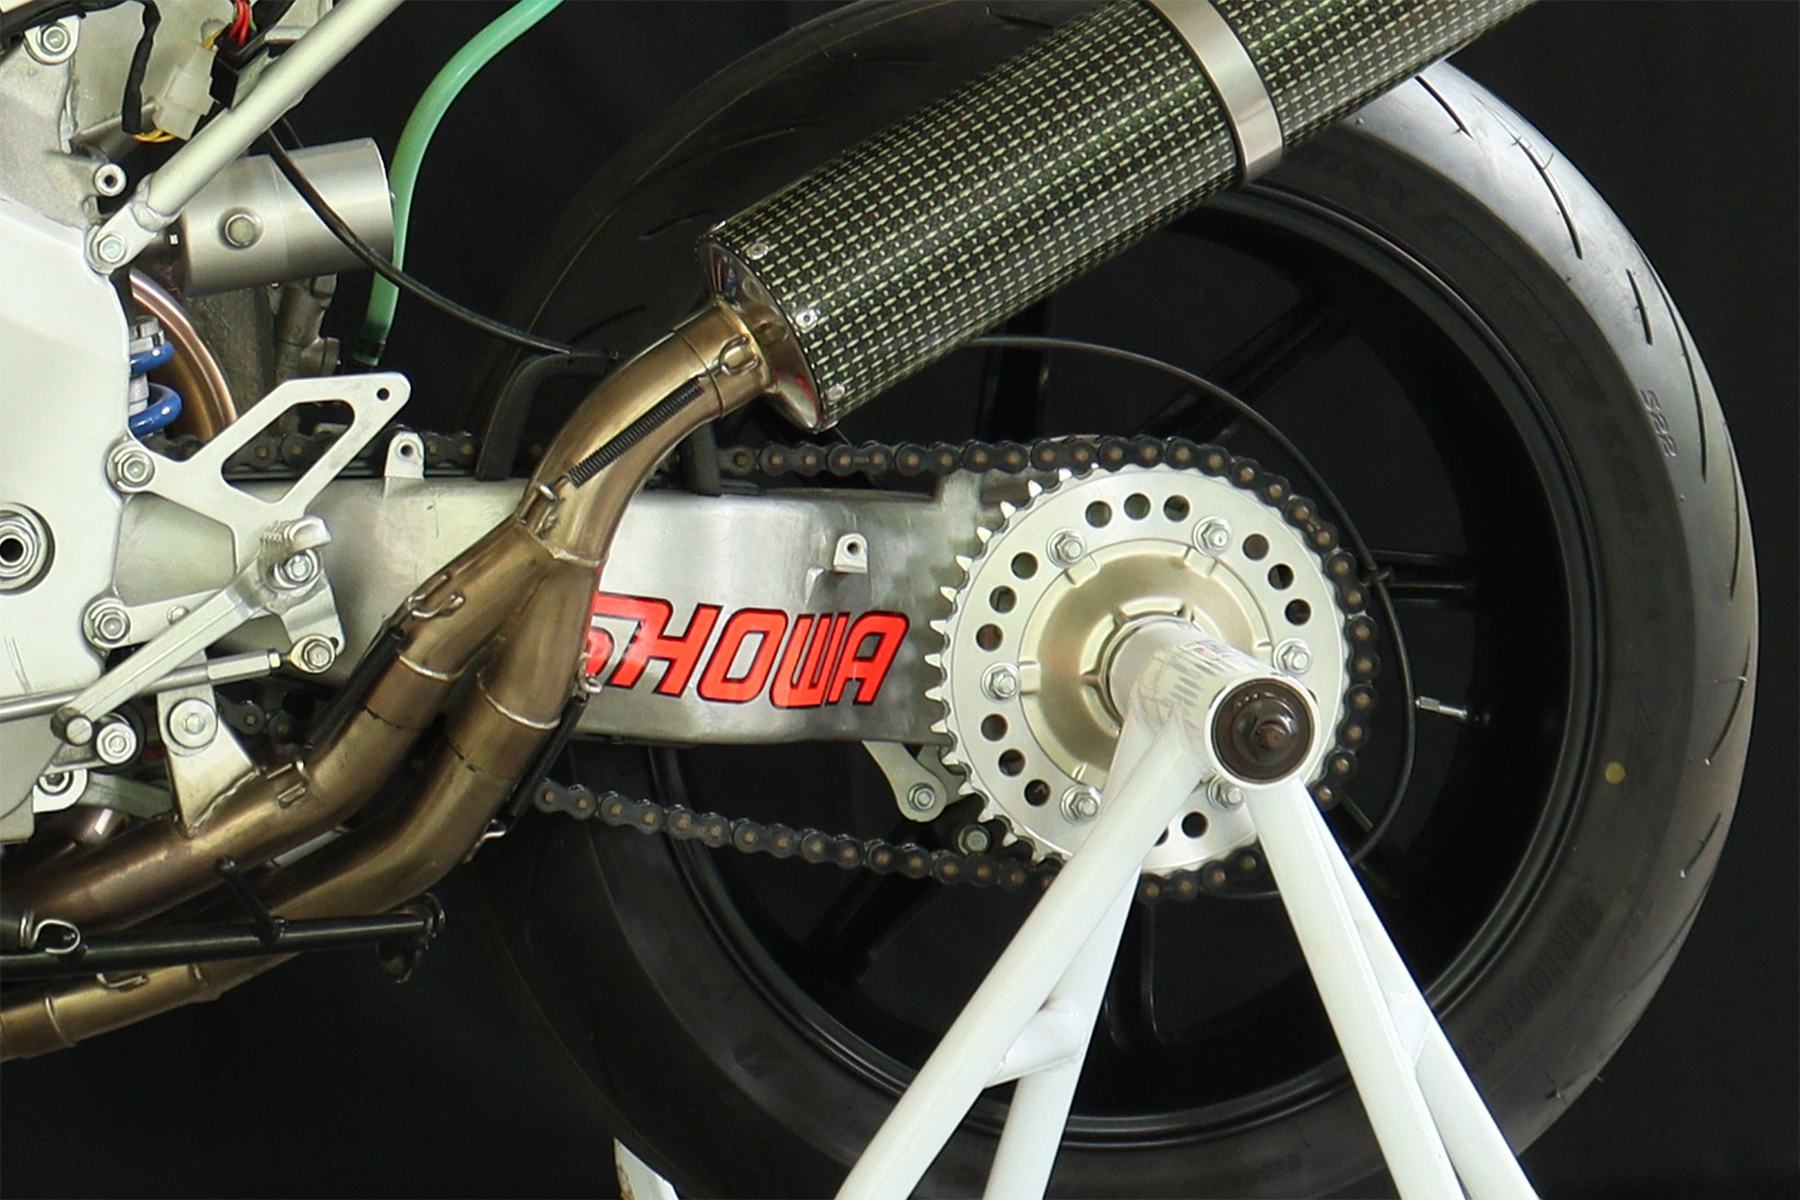
I installed the swingarm, rear brake, and rear suspension combo, and considering the rest of the dramas, this part went smoothly. However, once installed, we decided that the swingarm had a bit too much character. Matt had the welders fill in the worst of the gouges and then dressed them back to a smooth finish, so it now looks superficially undamaged. We then installed one of our carbon HRC-style rear brake line holders next to the chain to keep the line from wobbling into the rear wheel. Both the rear hub brake assembly and the shock look incredibly trick.
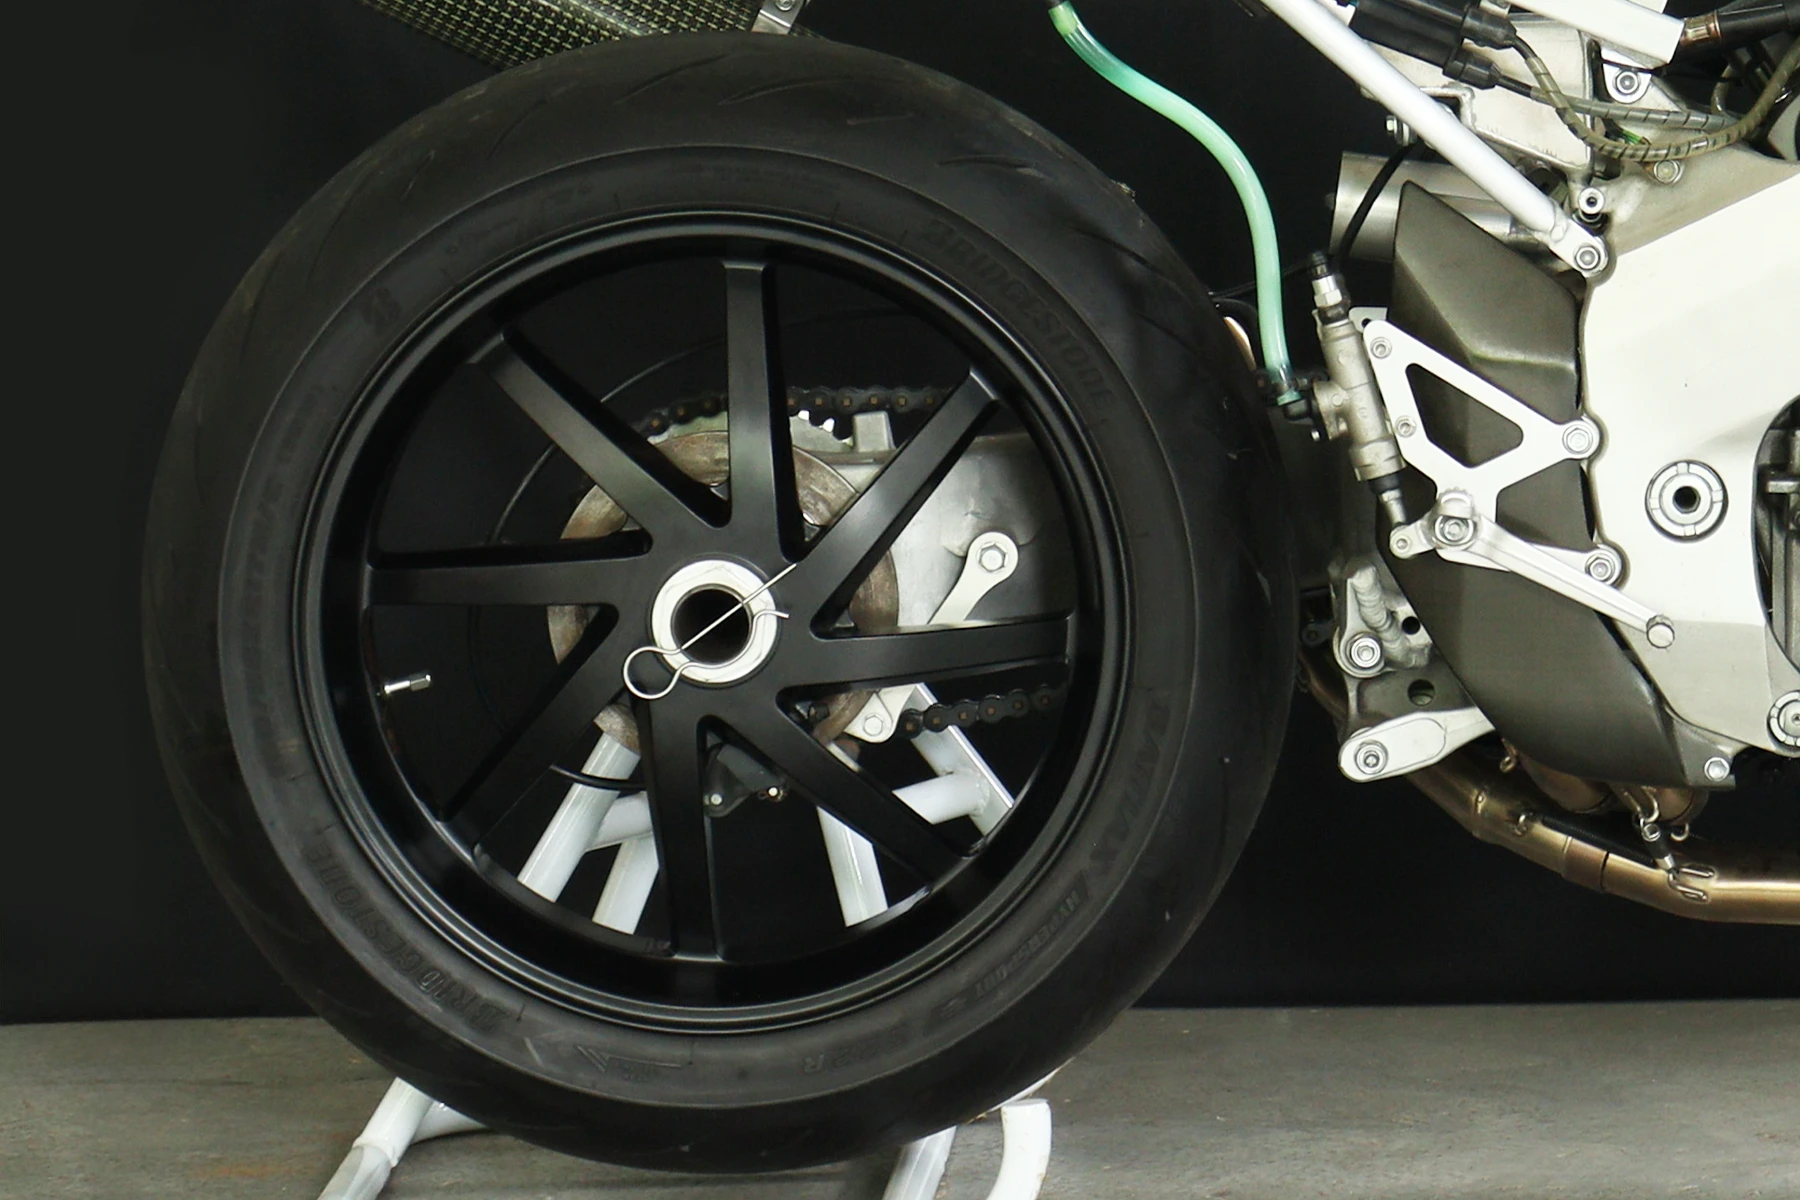
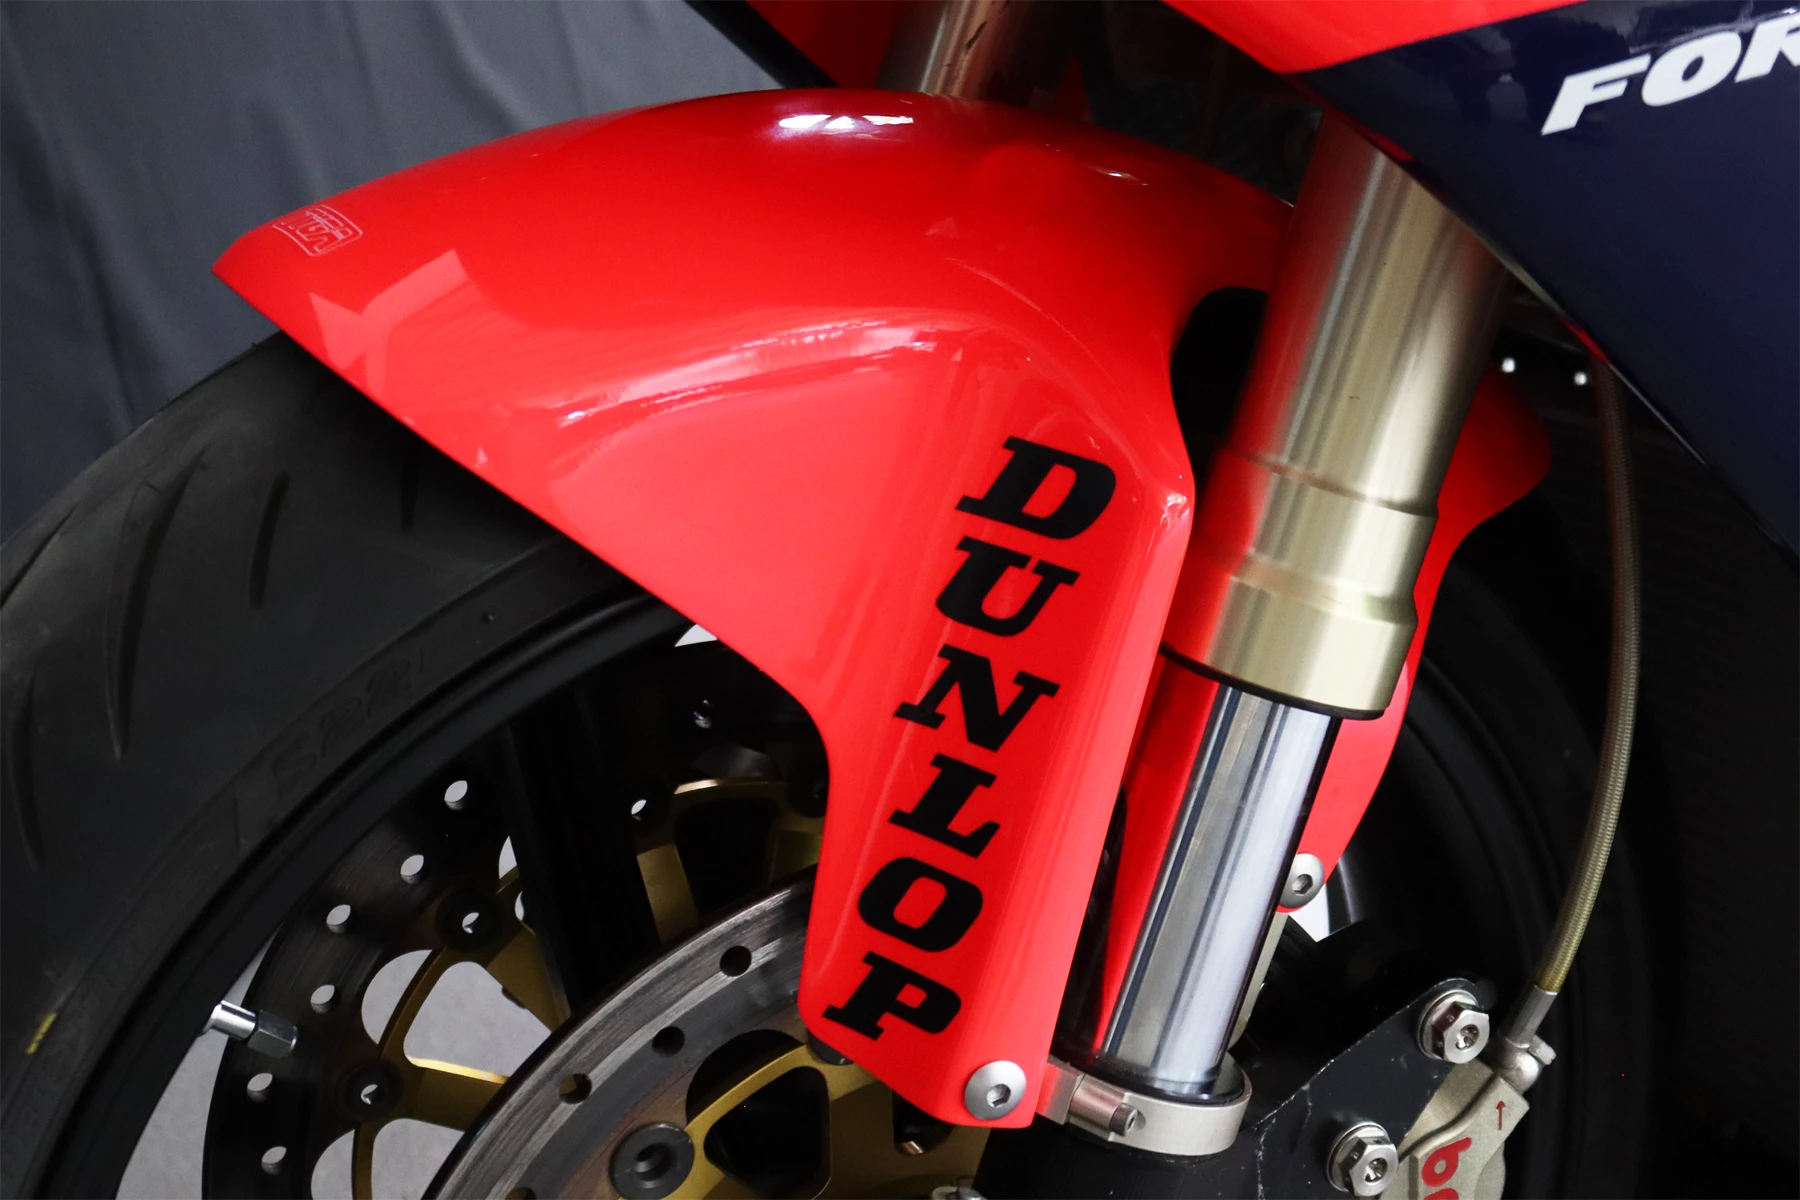
The front end went in with little trouble, except for the brake rotors, which had the wrong diameter and offset. Luckily, I managed to find a correct pair on Yahoo Auctions, and that part of the puzzle was solved. The beautiful magnesium wheels from Gecko were shod in Bridgestone S22 rubber and bolted into the chassis.
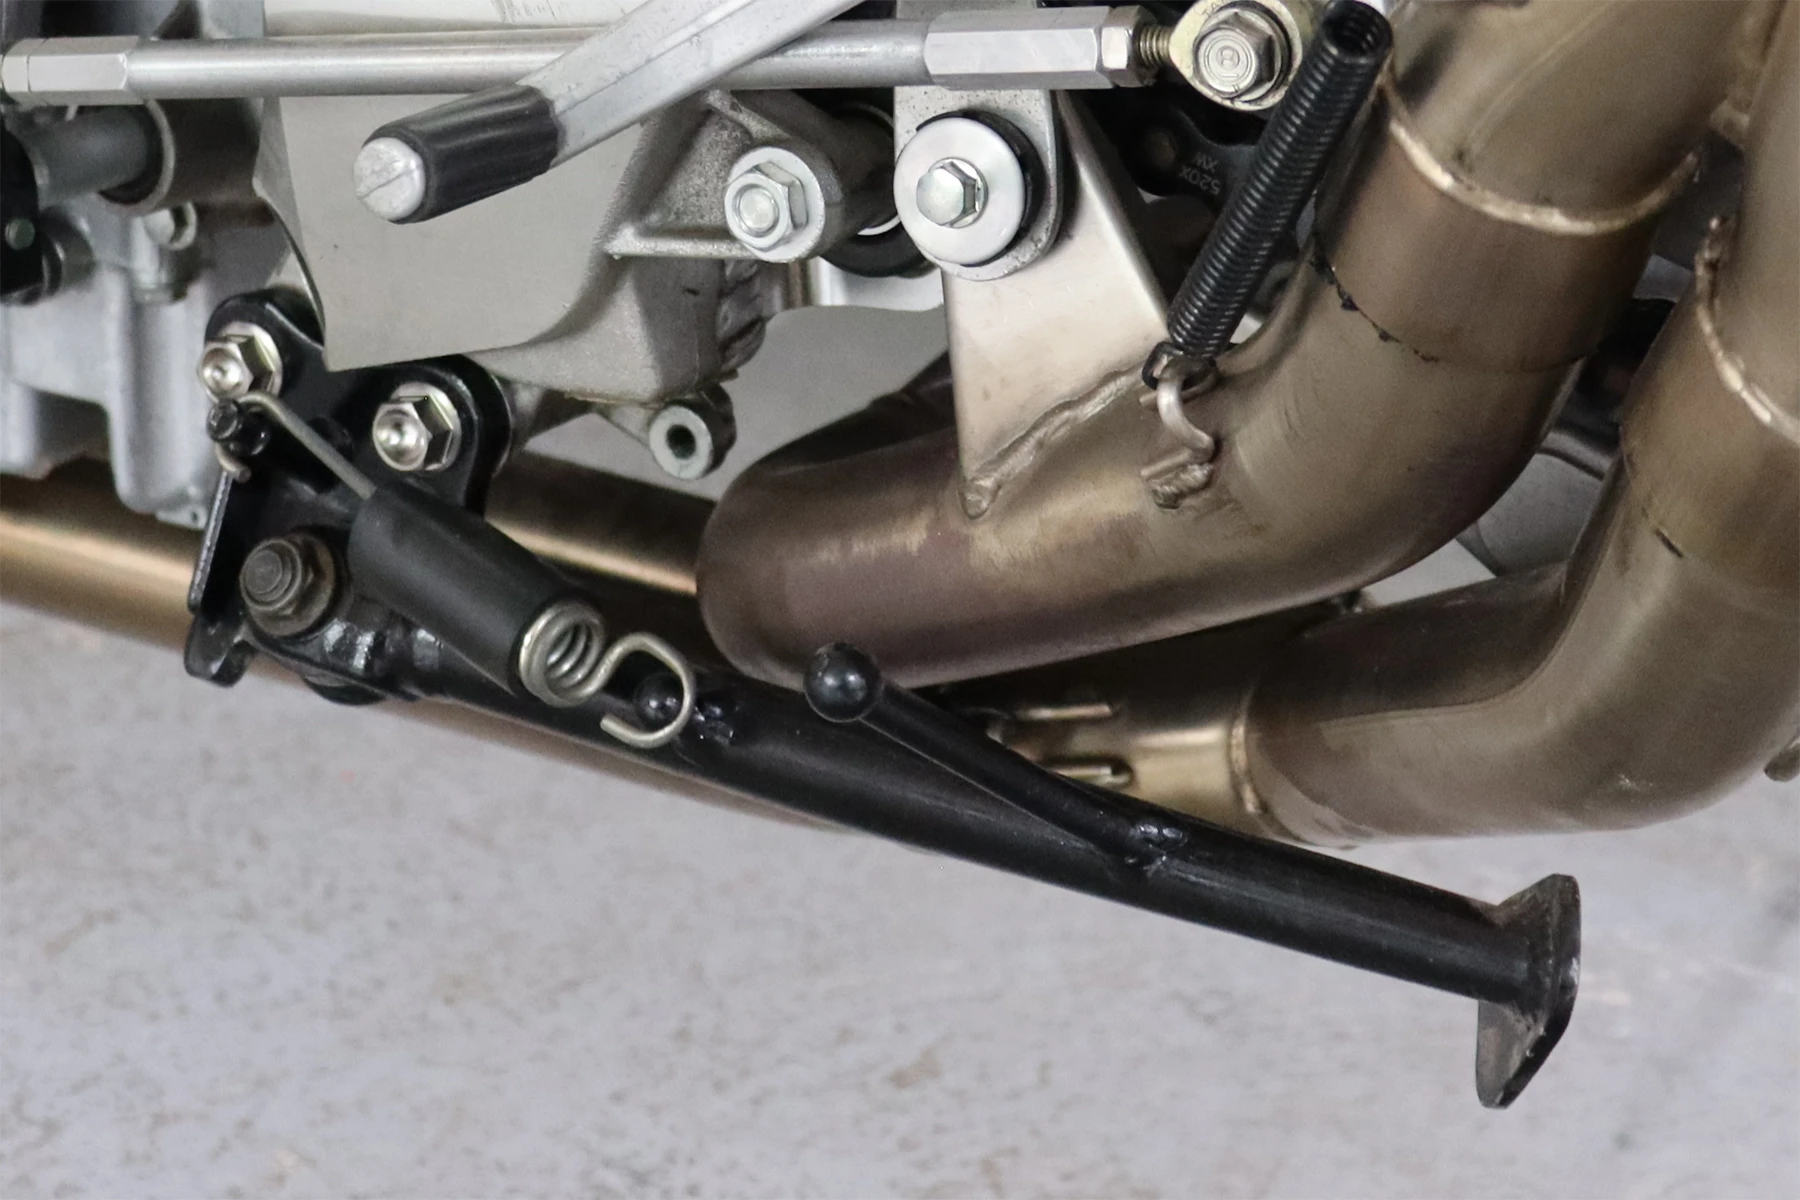
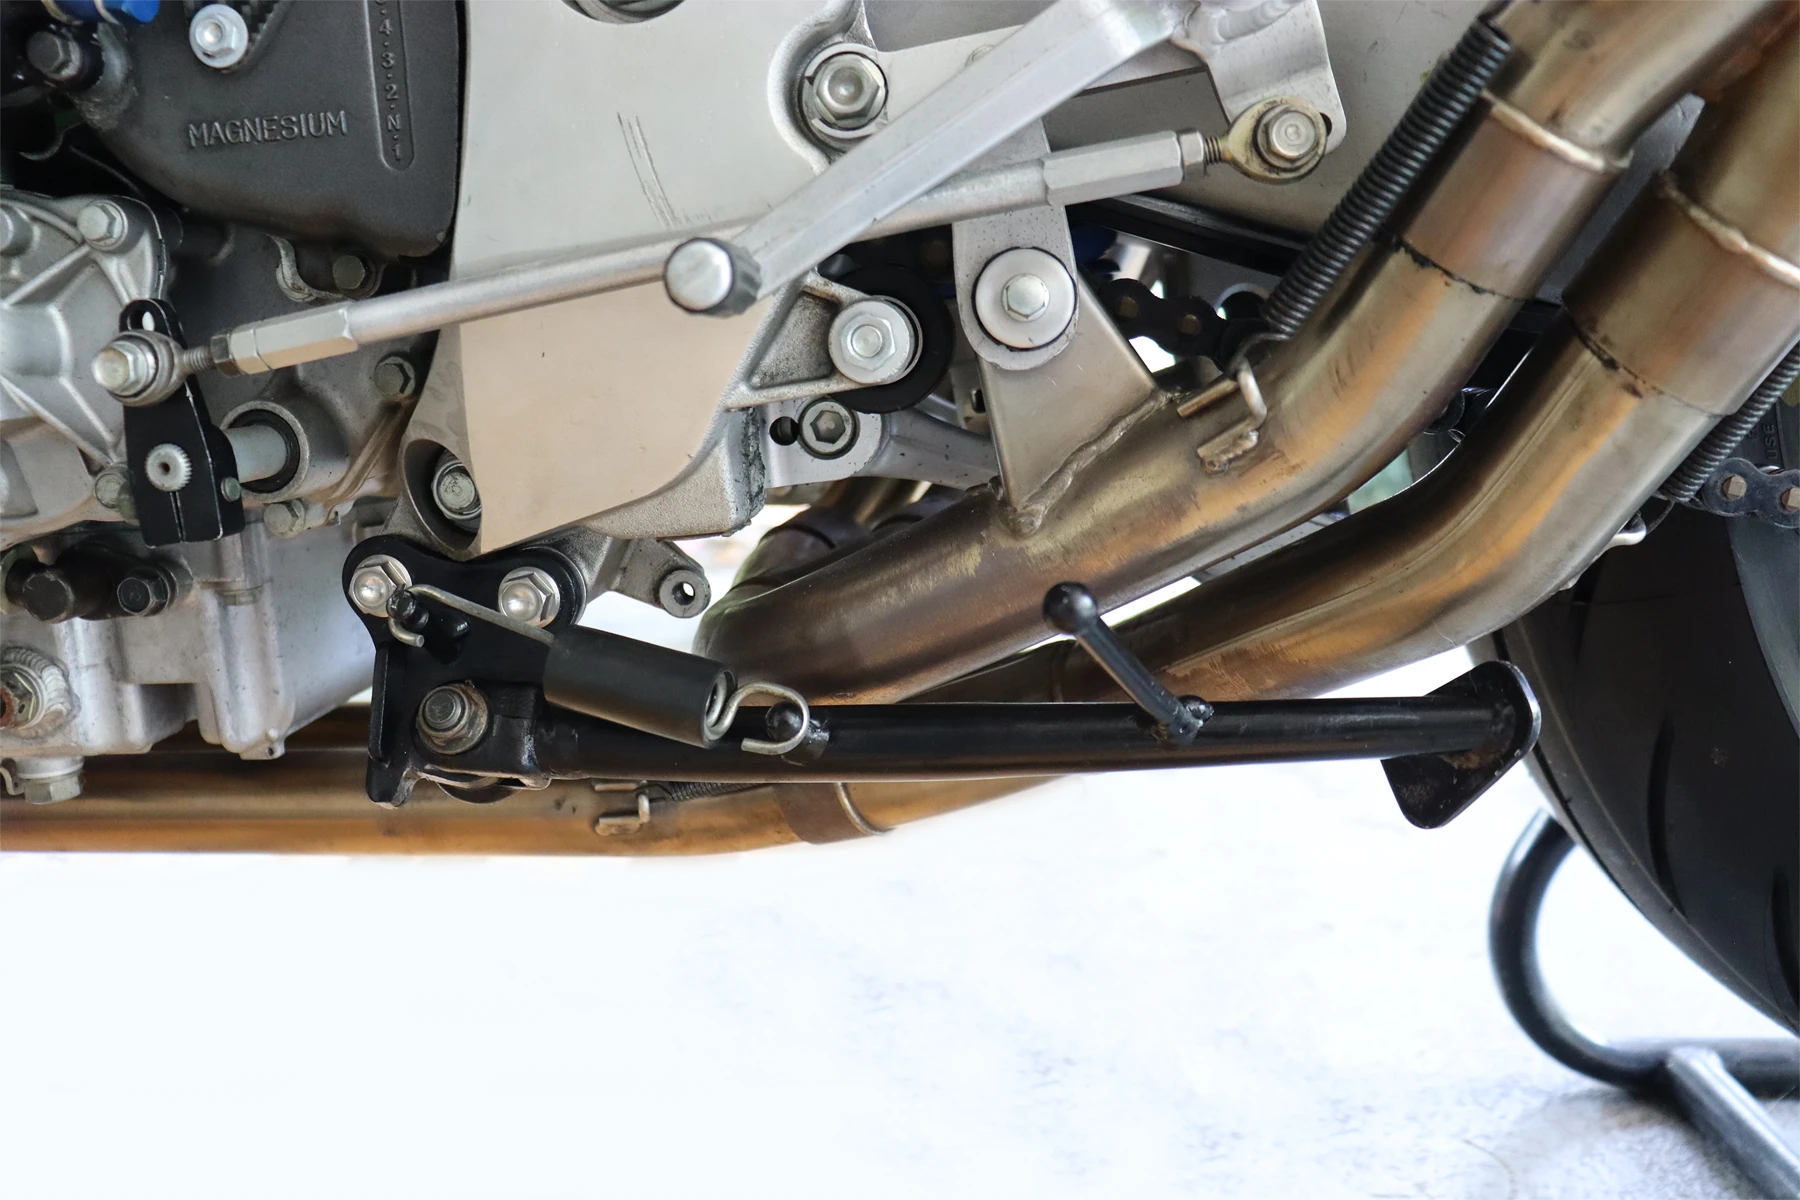
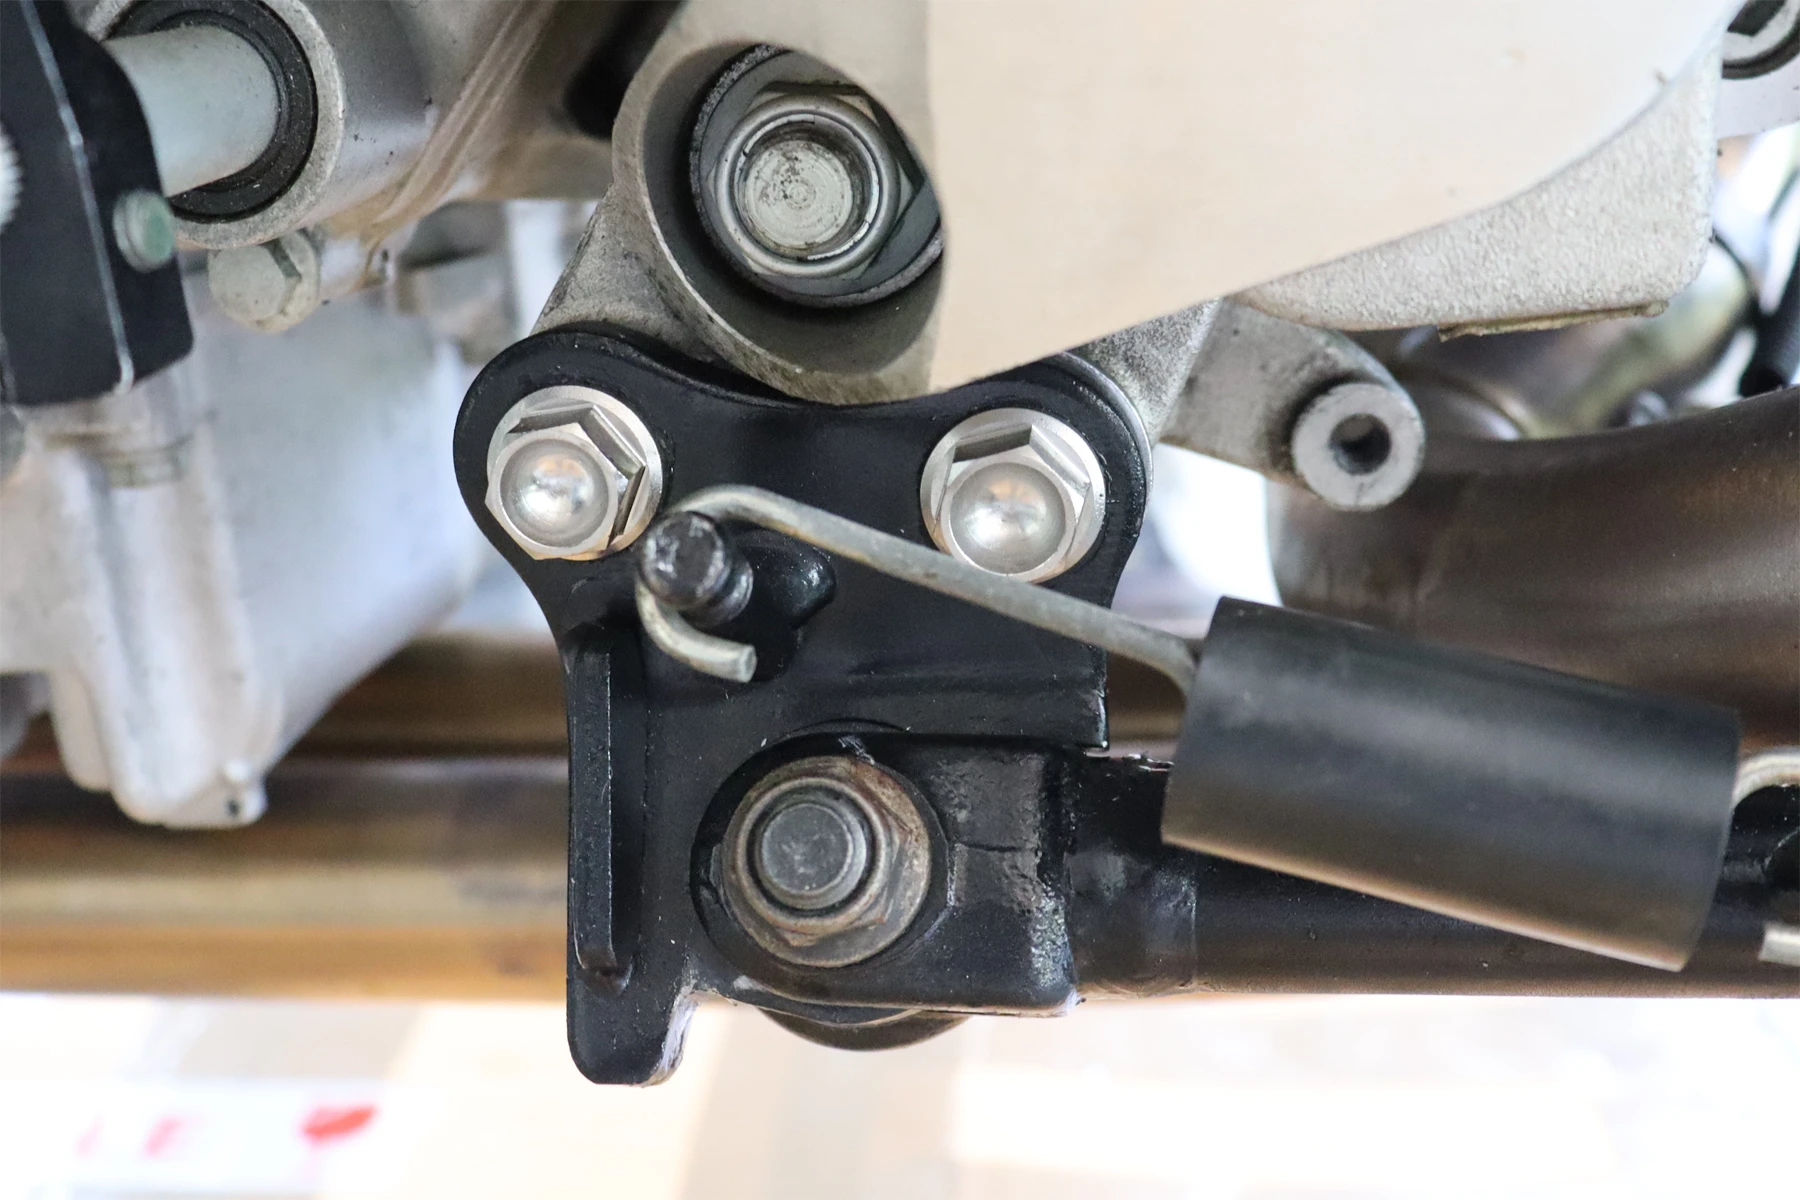
With the NL5 suspension, the bike sits much higher, meaning the stock sidestand was now far too short. I had our “Skunkworks” guy, K. Ri, make the necessary modifications. Because the stock stand is tapered, blending in the extended piece was a real challenge. Then, of course, as soon as we reinstalled it on the bike, it whacked right into the HRC exhaust when retracted. A careful weld on the return stopper, ground down to perfection, did the trick. We thought this item was ticked off our list, but more on that below.
On the subject of the exhaust, if you remember, the bike came with a proper HRC full system. This was in good condition and mostly undamaged. However, it was heavily tarnished, and K. Ri spent hours polishing it back to a shiny silver finish—only for it to turn brown as soon as it got up to operating temperature. Oh well!
There was another issue, too. As can often be the case after dismantling, cleaning, and reassembling an exhaust system, the sections shifted slightly, and the sidestand started touching the pipe again. This time, instead of a big job that would mess up the paint with more welding, I opted for an old trick: I placed a couple of slim spacers between the frame and the sidestand mount. Sorted!
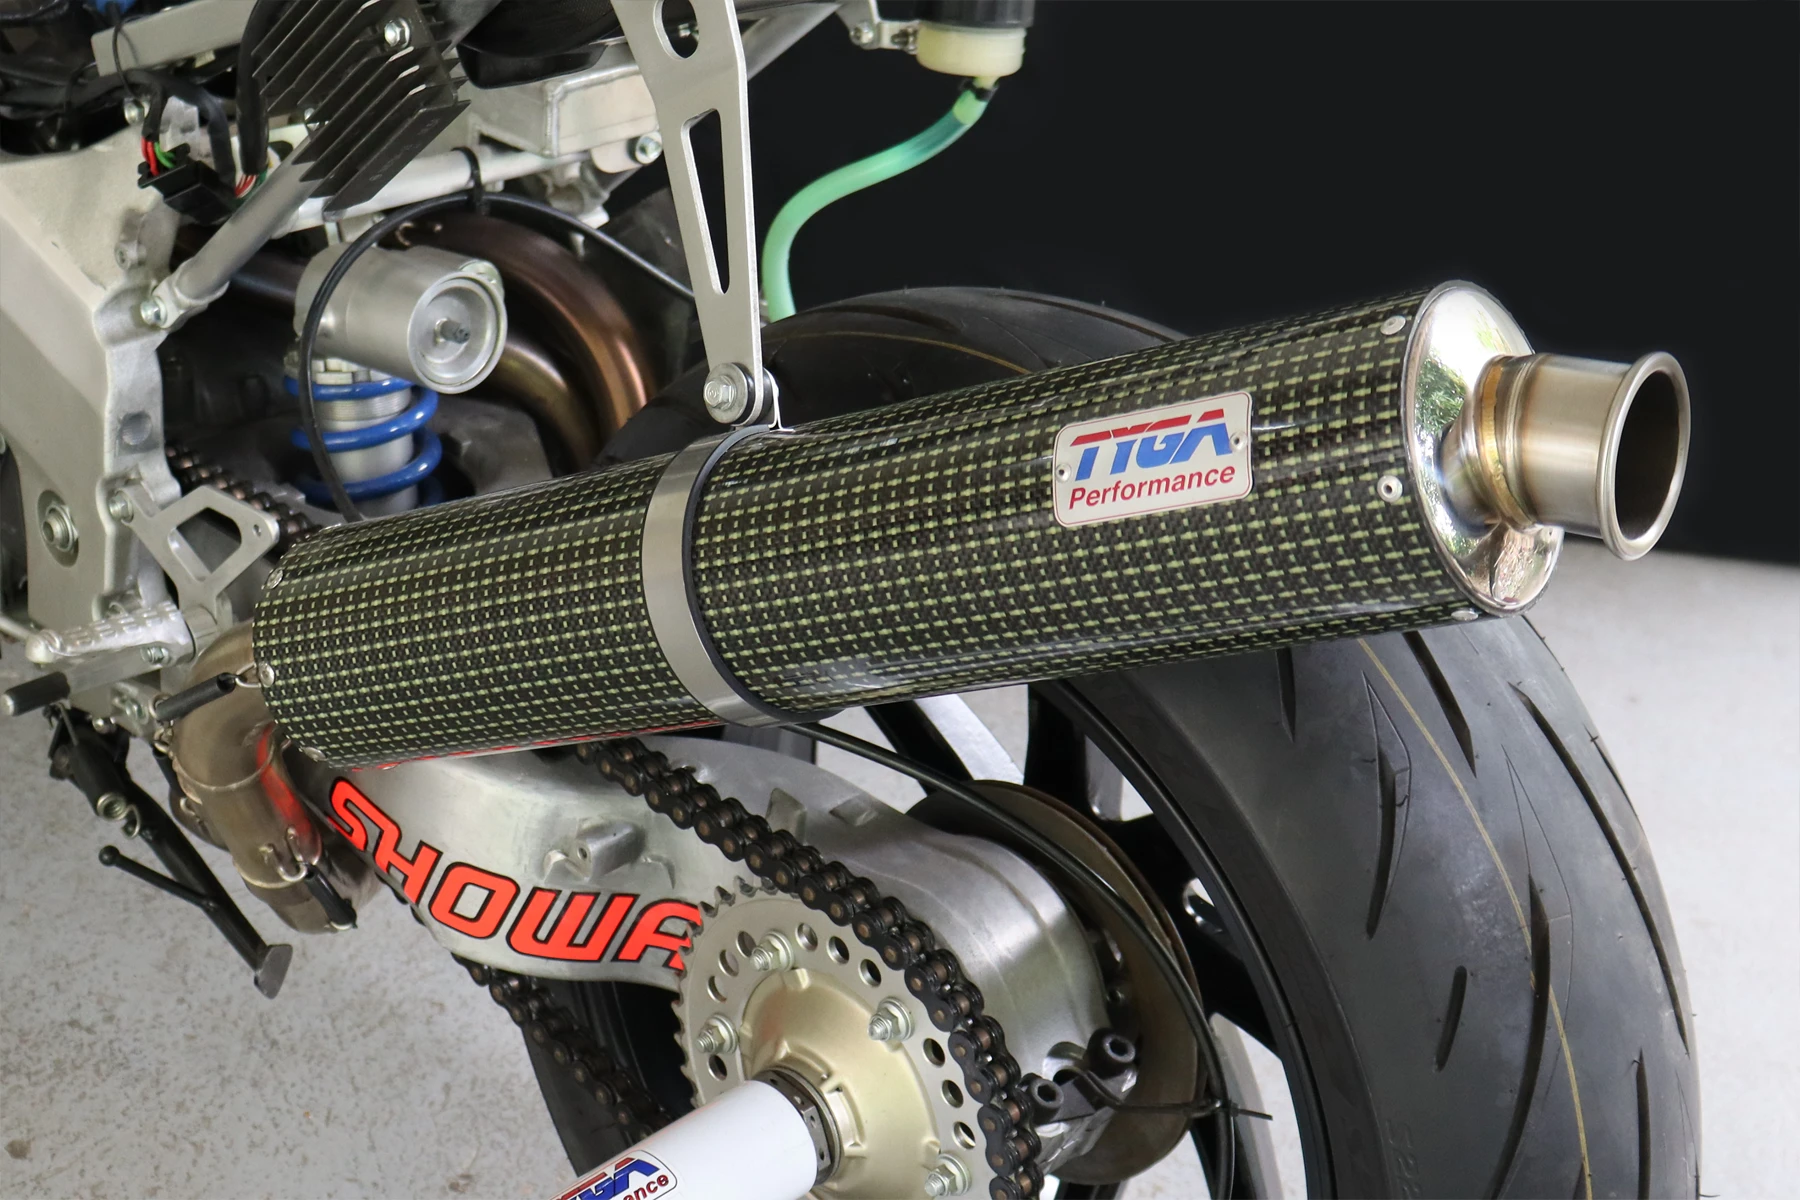
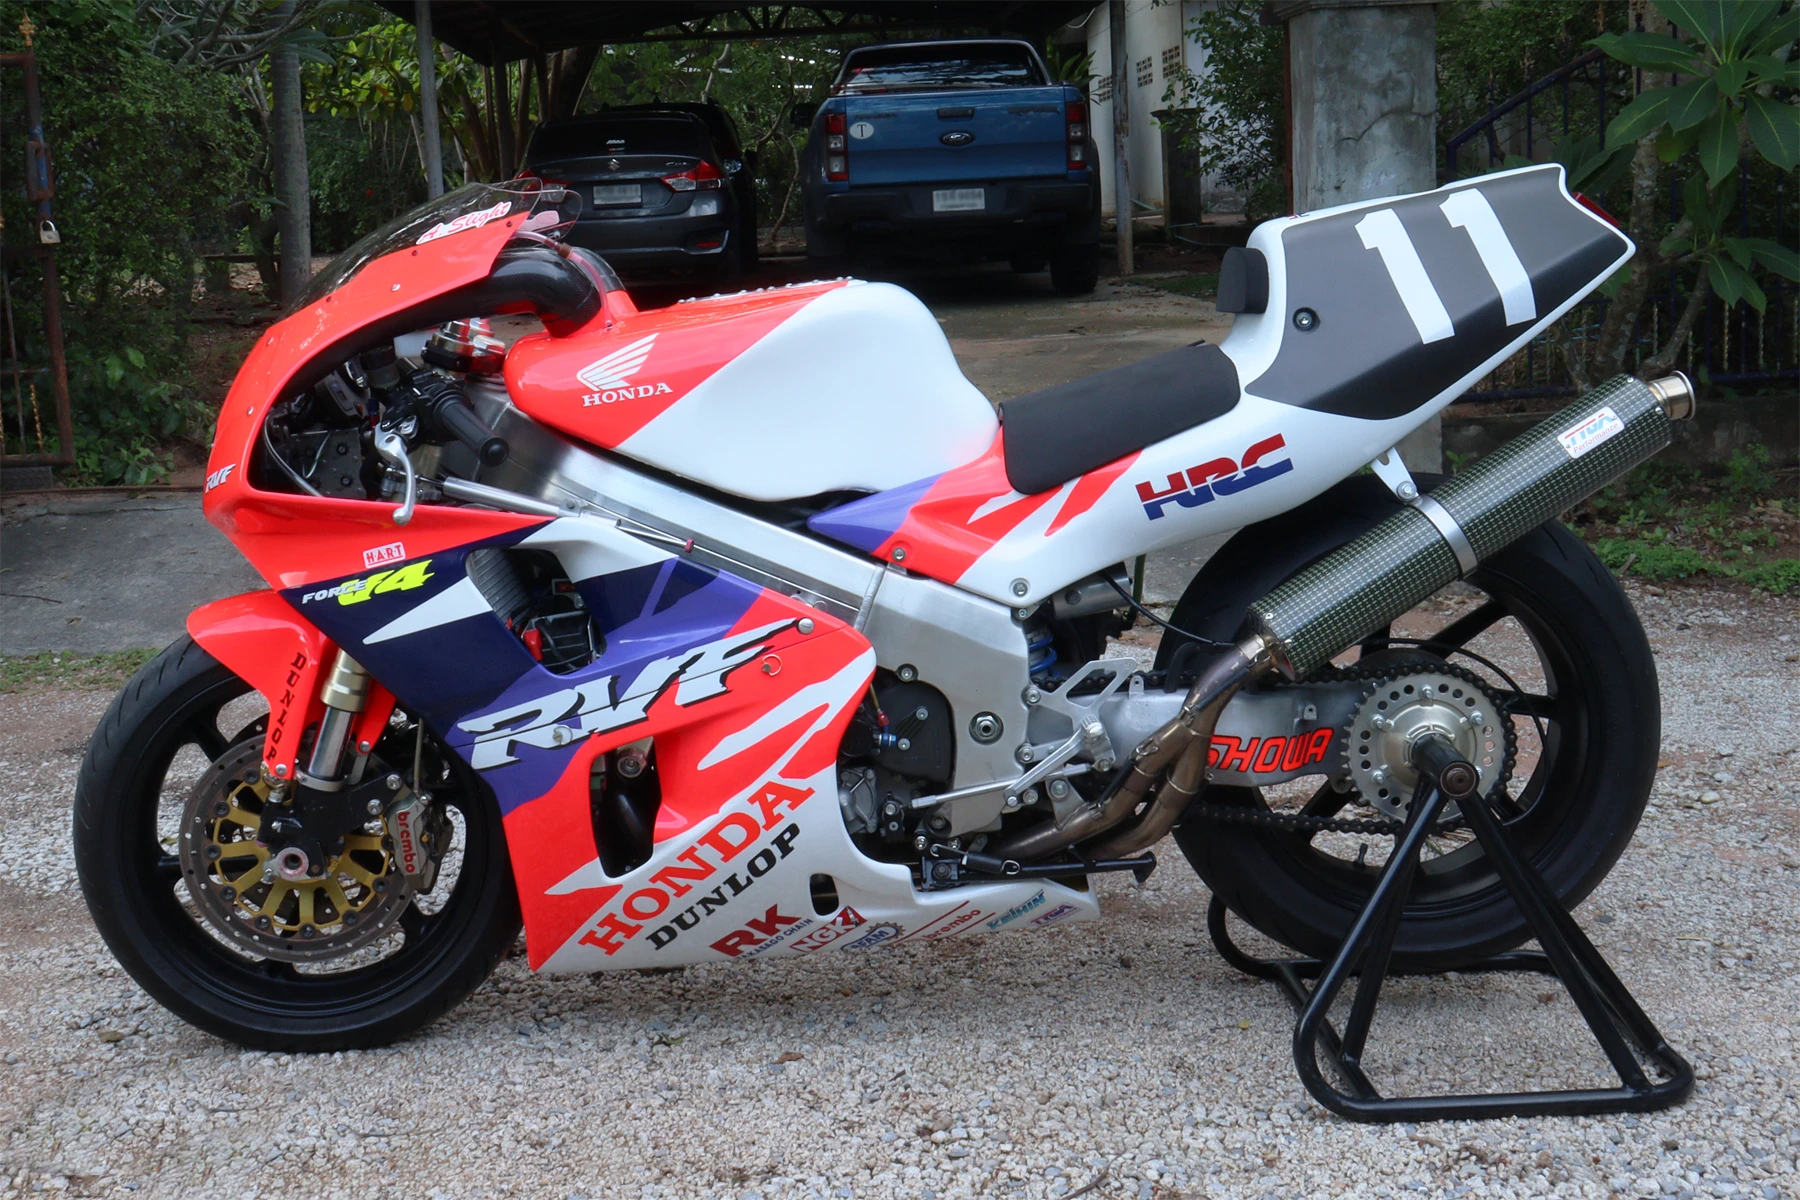
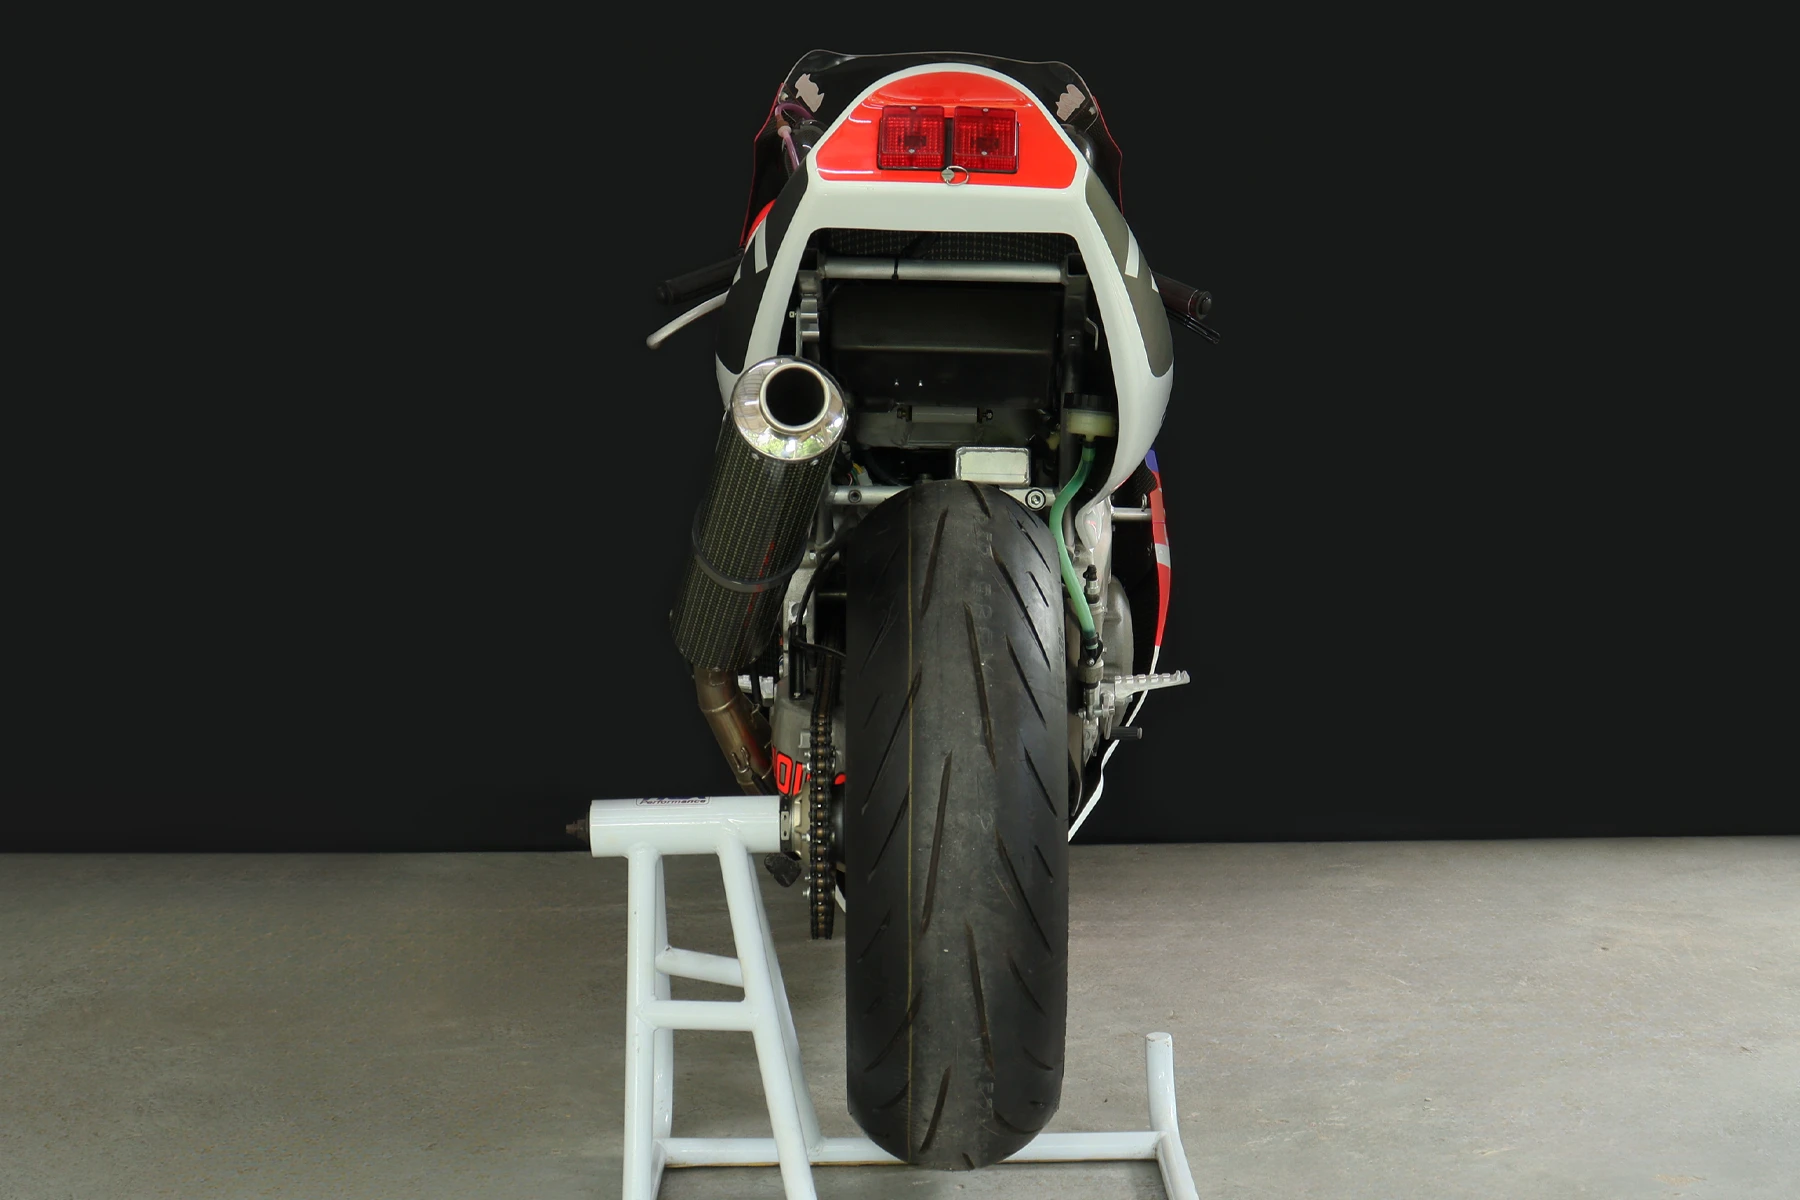
The silencer that came with this system was a very basic unit with an aluminium sleeve. We wanted something a bit more in line with the NWA factory bikes, so we decided to manufacture our own TYGA version. We ran into a couple of hurdles here. First, we didn’t have that exact diameter in production, and second, our tooling was right at its physical limit for how long a sleeve it could draw (530mm). Luckily, we had just enough length. We decided to utilize our existing two-inch internal core diameter paired with a special Kevlar-weave outer tube, finished with a subtle TYGA logo riveted onto it. The final result came out pretty much exactly how we wanted.
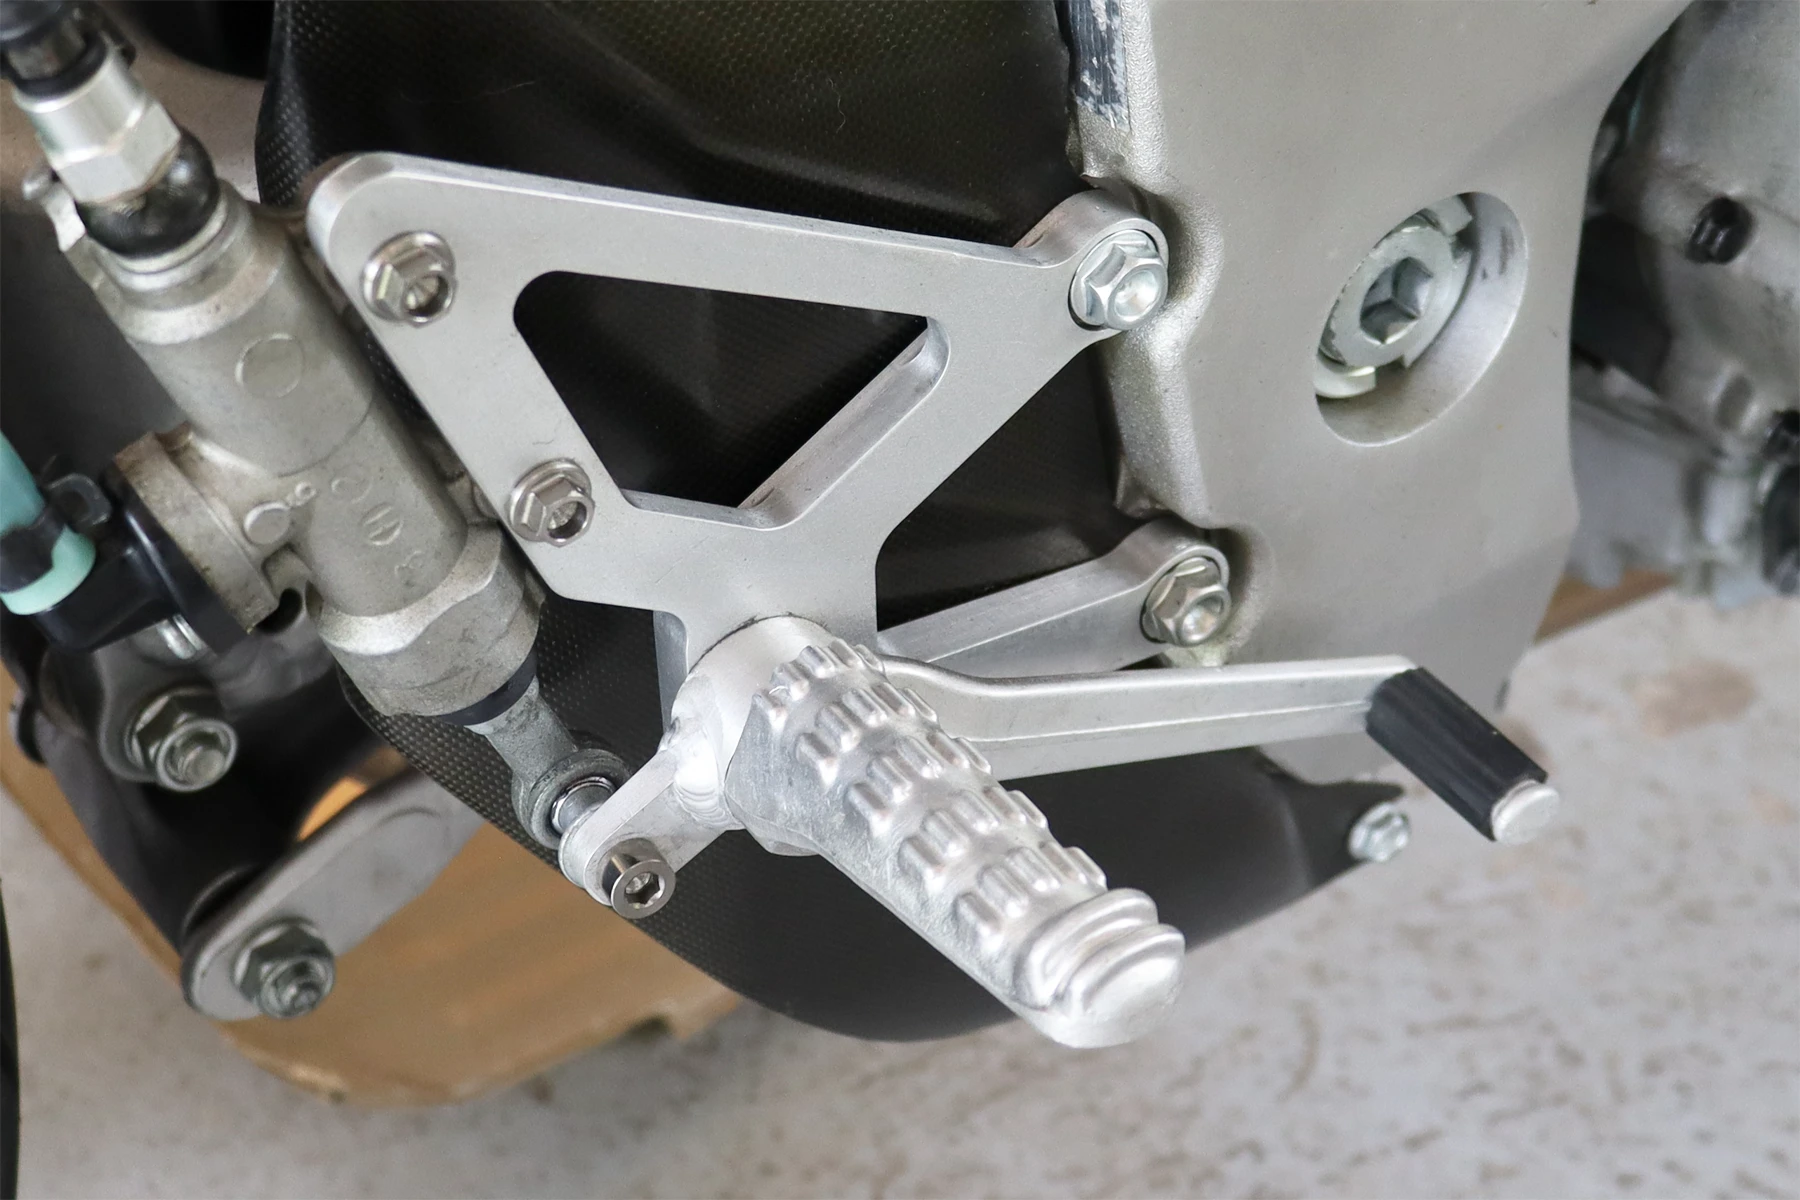
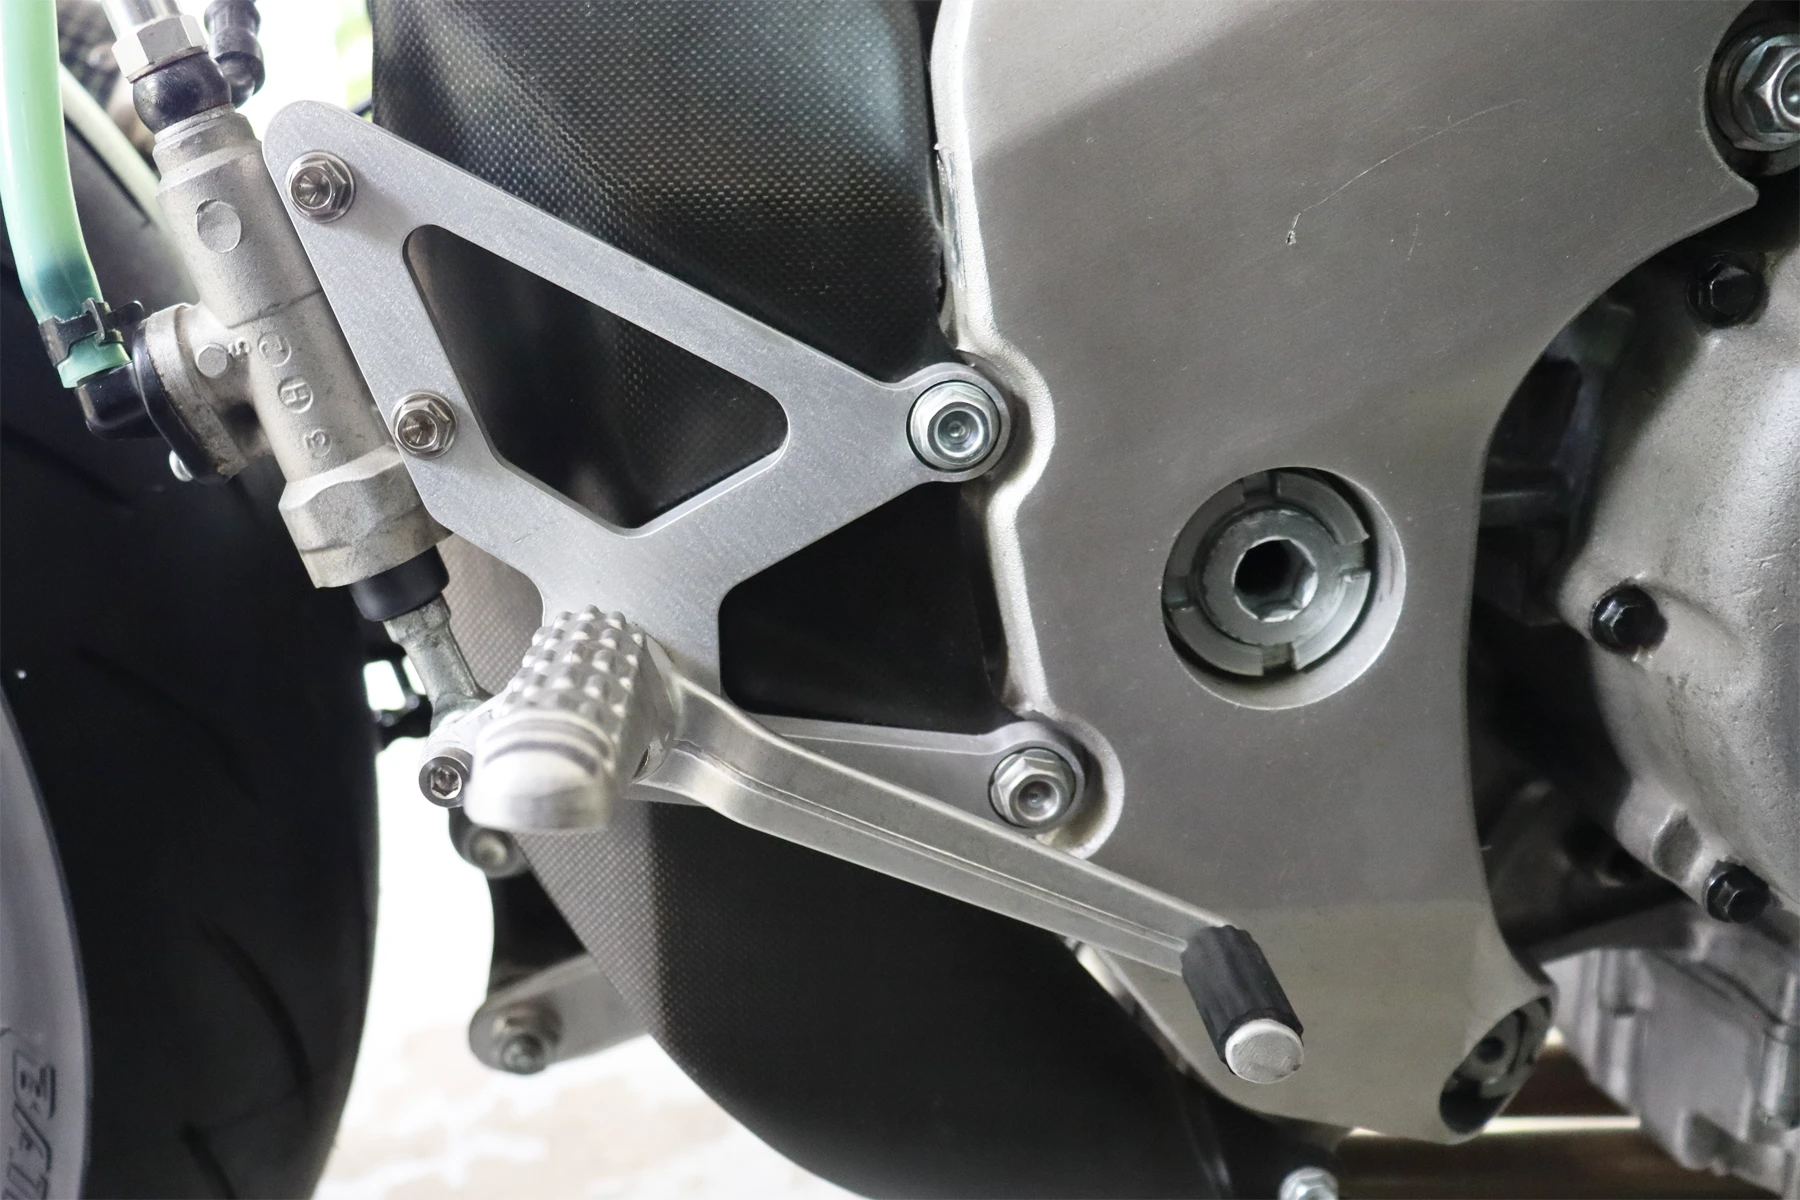
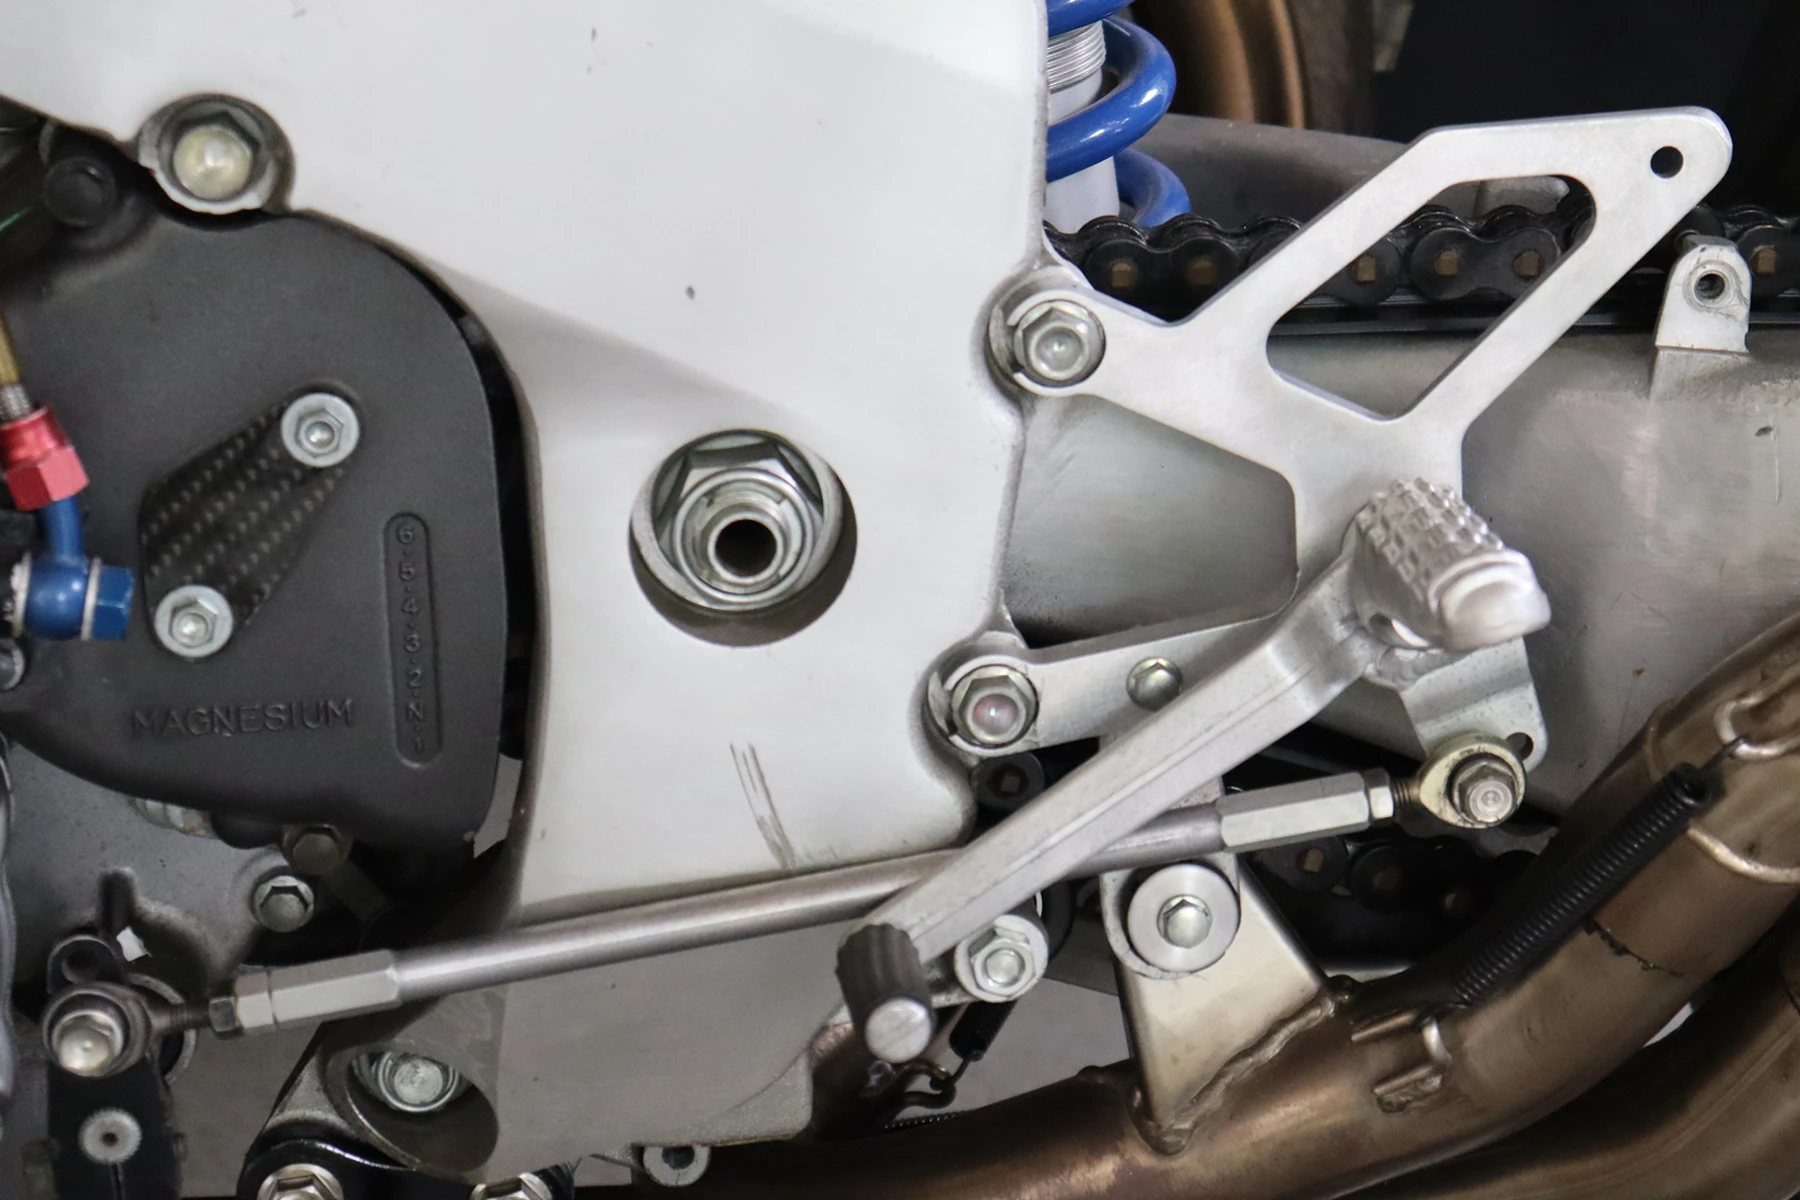
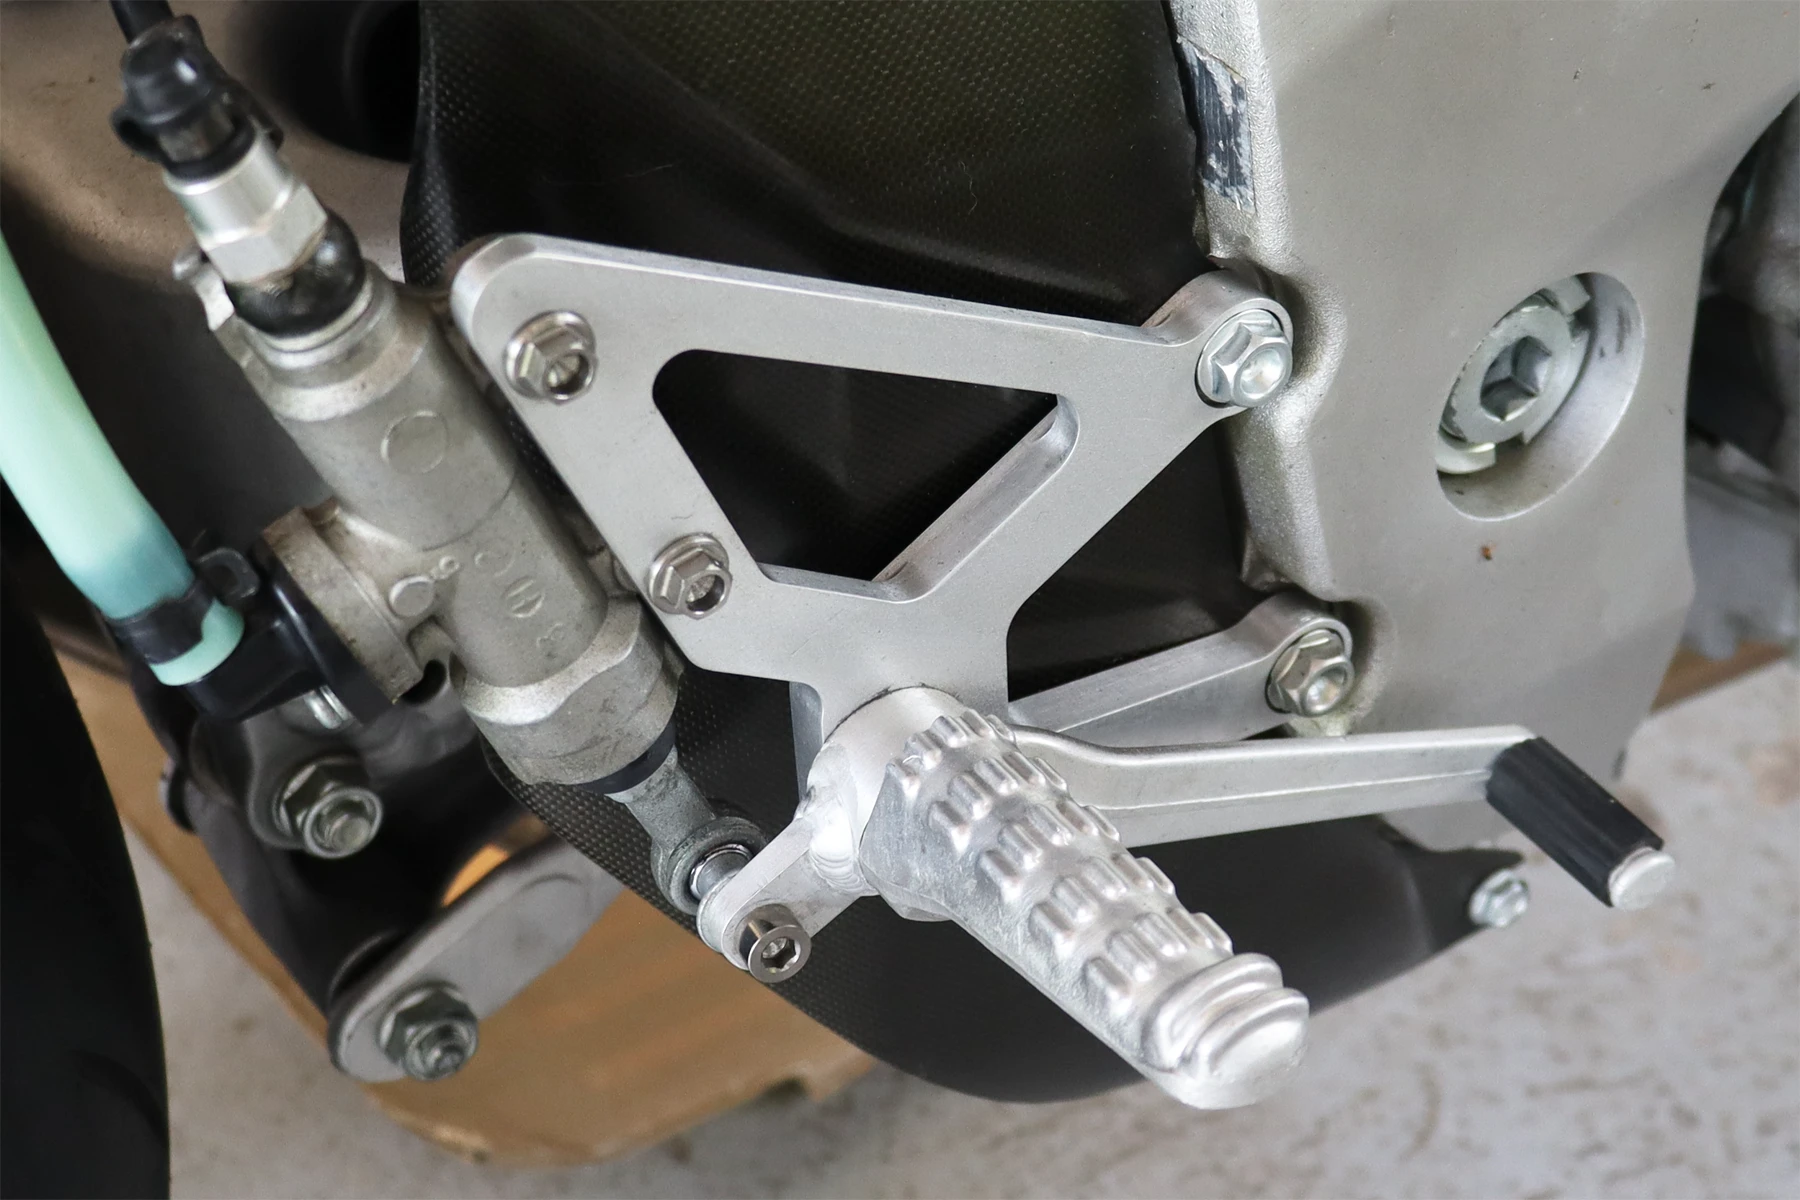
Another challenging area of the bike was the foot controls. Normally, HRC components are pretty straightforward, and with every RS250 project, it seemed we had a massive box of levers, hangers, and pegs to pull from. The bike arrived with NL5-profiled hangers, so we were off to a good start. However, upon closer inspection, we realized they weren’t very good copies. Steve from GT Performance supplied us with some beautiful replicas. That said, with me being particularly picky, I decided I didn’t want adjustable hangers anymore and instead sourced a rare pair of non-adjustable NL5 units.
With that part sorted, you would think fitting the pegs and levers would be easy. As it turned out, HRC doesn’t really have a default setup for this type of hardware. Some brake levers have the tab to mount the master cylinder plunger opposite the main lever, some lower, and some higher. Some are offset and others inline when viewed from above. In addition, some run bushings that are pressed directly into the lever, while others use independent steel bushings with entirely different diameters. I must have gone through our big bag of spares three times before finding a workable solution for the gear-shift side. The brake side proved impossible to match up, so Matt and the fabricators cleverly cut the tab off a brake lever and welded it into a higher position. This finally allowed us to run the master cylinder that came with the mini-Brembo and swingarm combo.
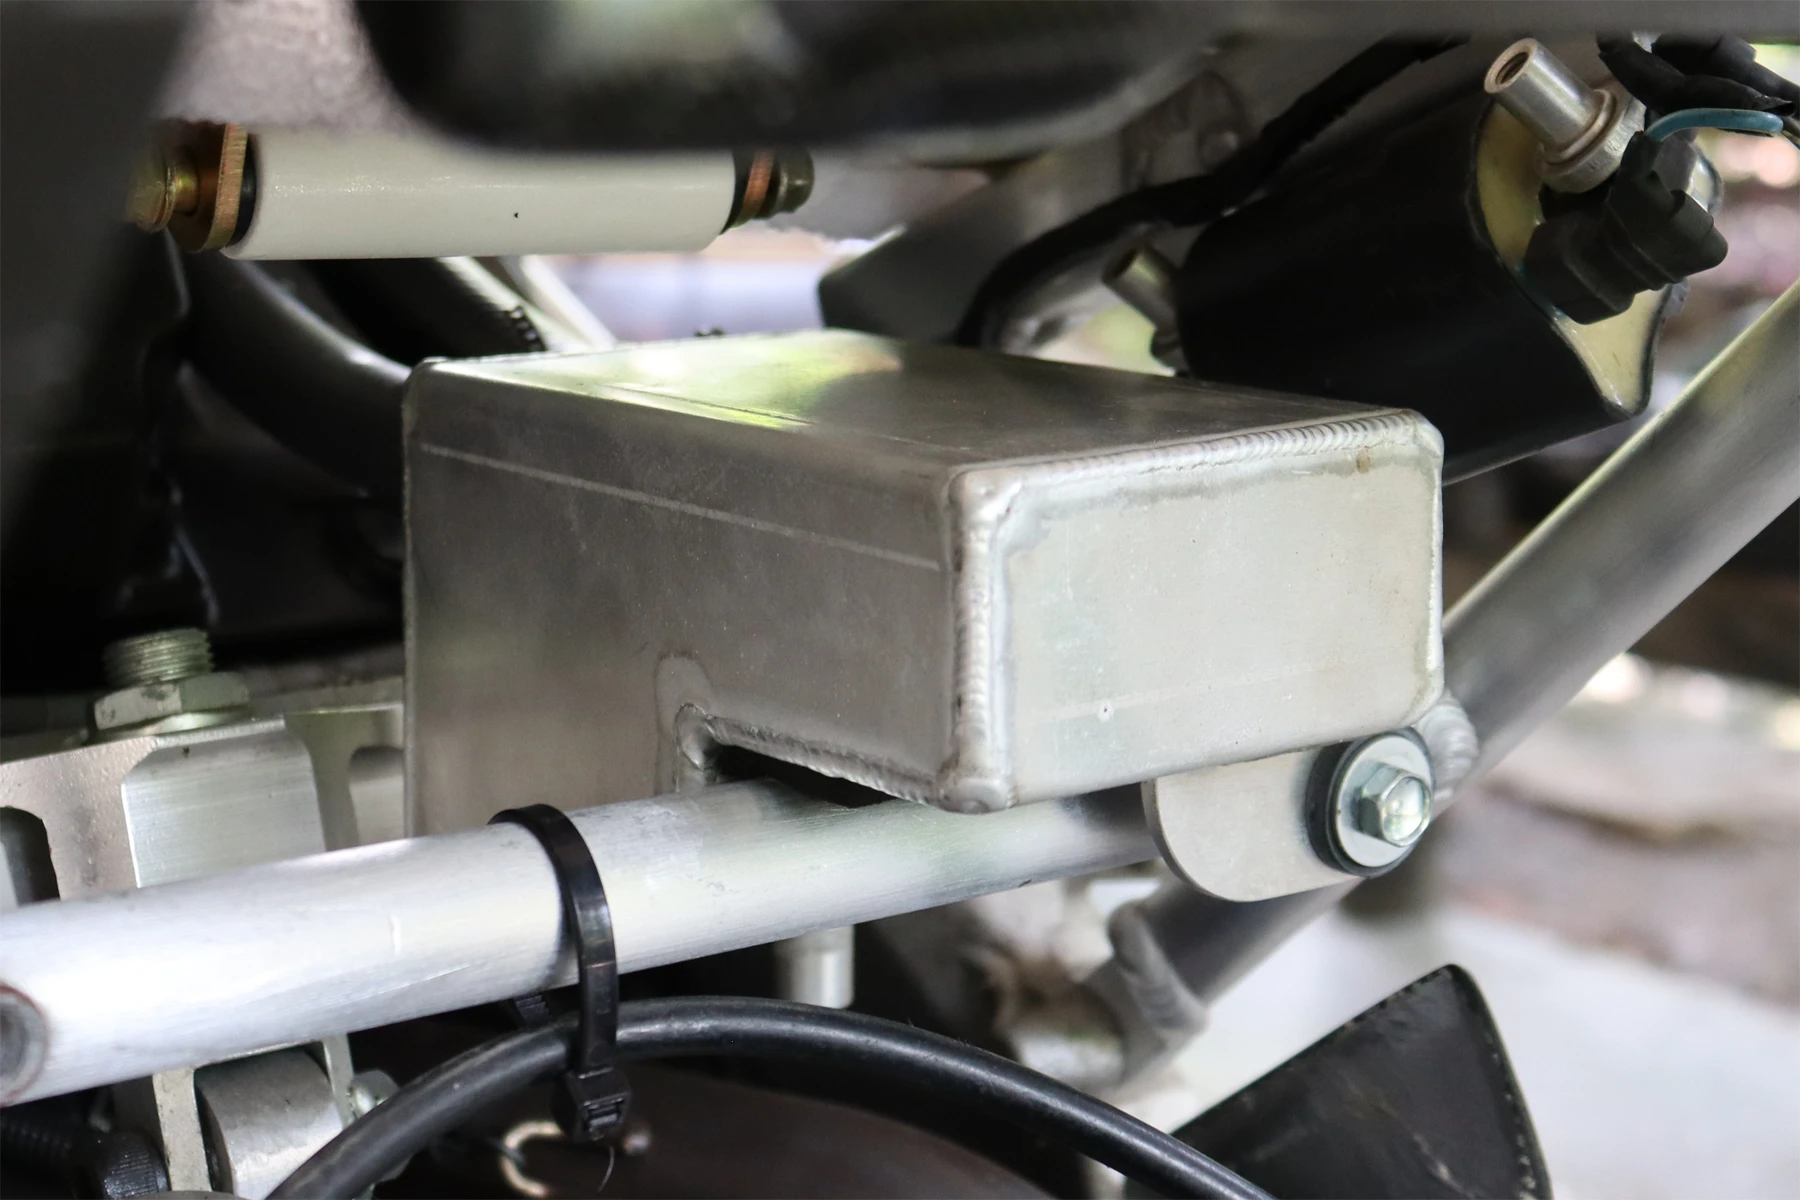
Meanwhile, Steve convinced us that the RVF didn’t actually need an oil cooler, so removing the stock unit was the easy part. To delete it properly, you either need a genuine HRC bypass part—if you can find one—or you take the alternative route and have a custom hydraulic line made. We first tried a hydraulic shop in Bangkok, but their main workload was clearly heavy machinery like Caterpillar D9s, and the fittings they offered were absolutely massive. We quickly hightailed it out of there and tried a local shop instead. While they were also more accustomed to industrial rather than racing applications, they successfully fabricated a clean bypass loop with the proper fittings, allowing us to safely eliminate the oil cooler. Maybe we will source a prettier one down the road, but luckily, it isn’t something you notice unless you are incredibly observant. It was time to tick this off the list and move on to the next jobs.
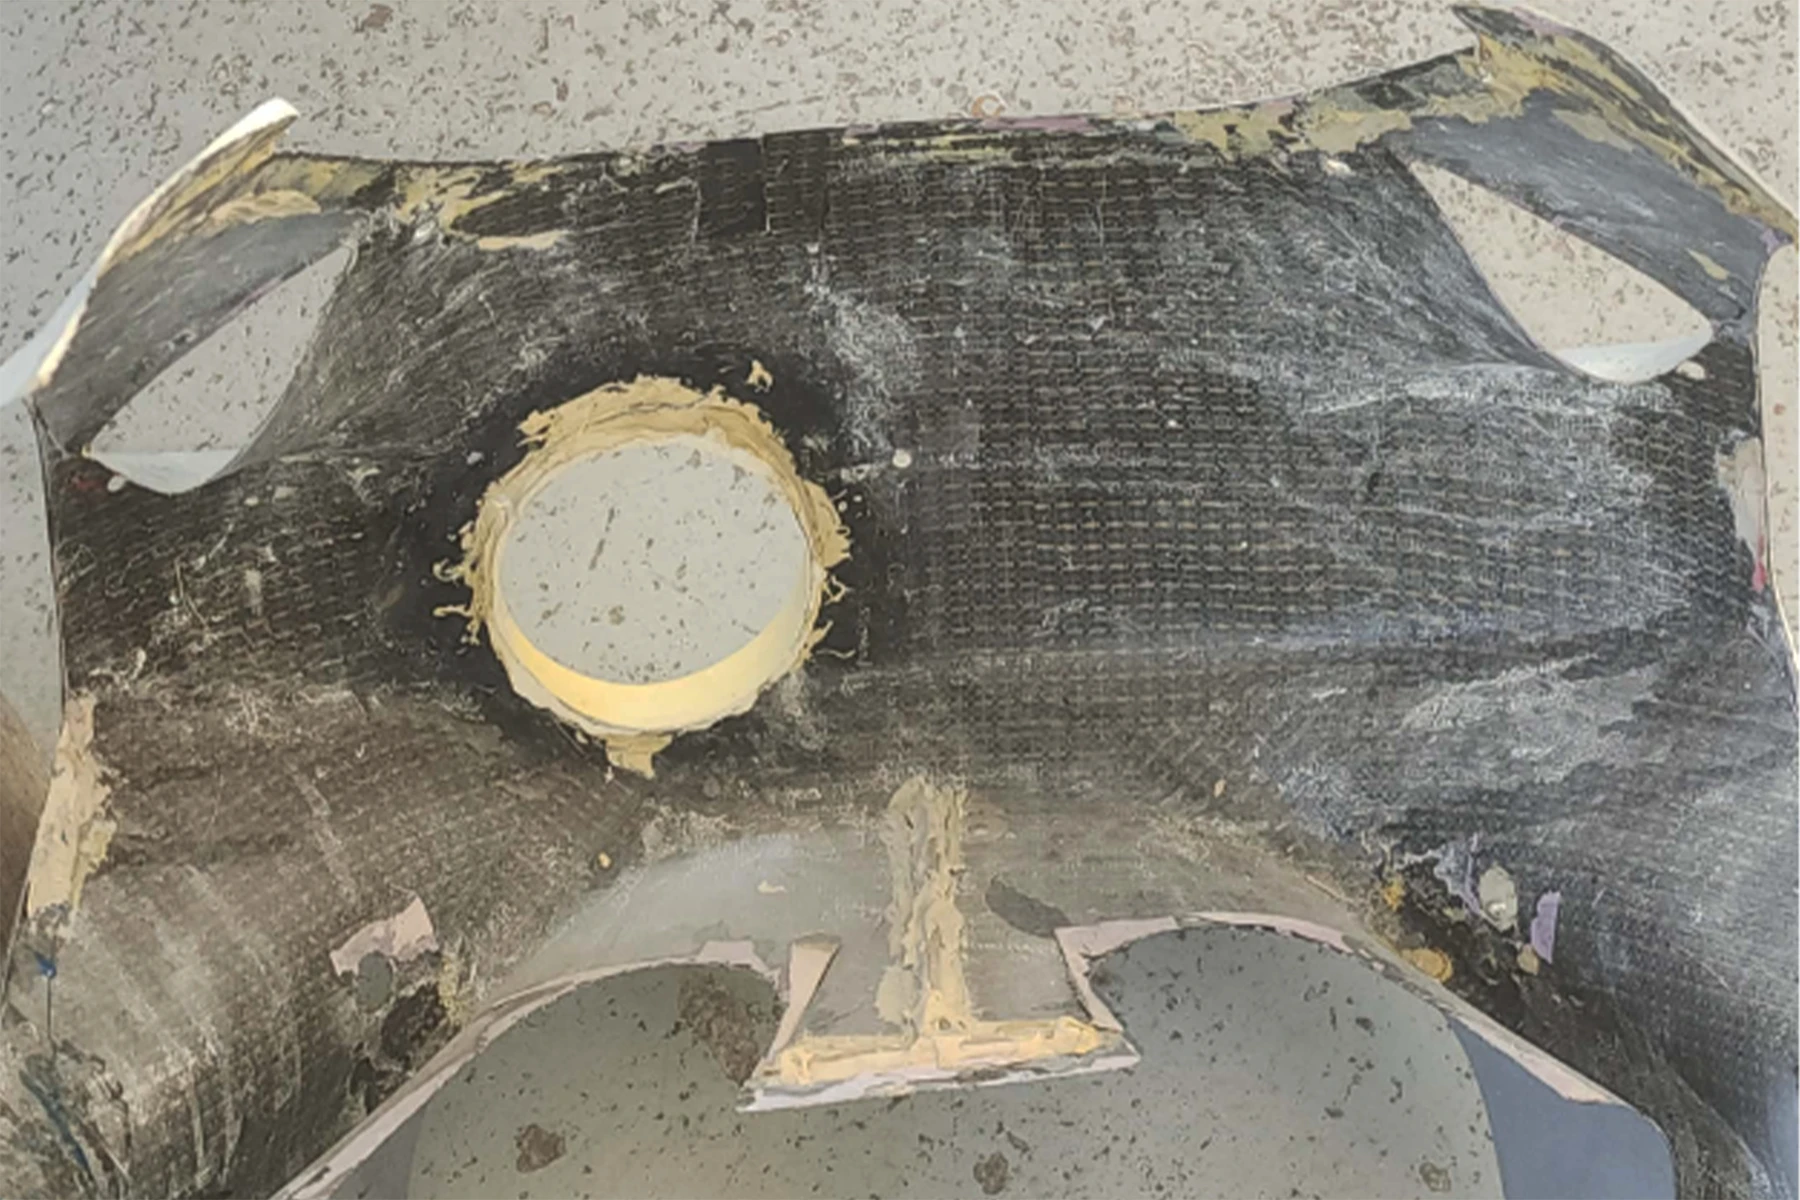
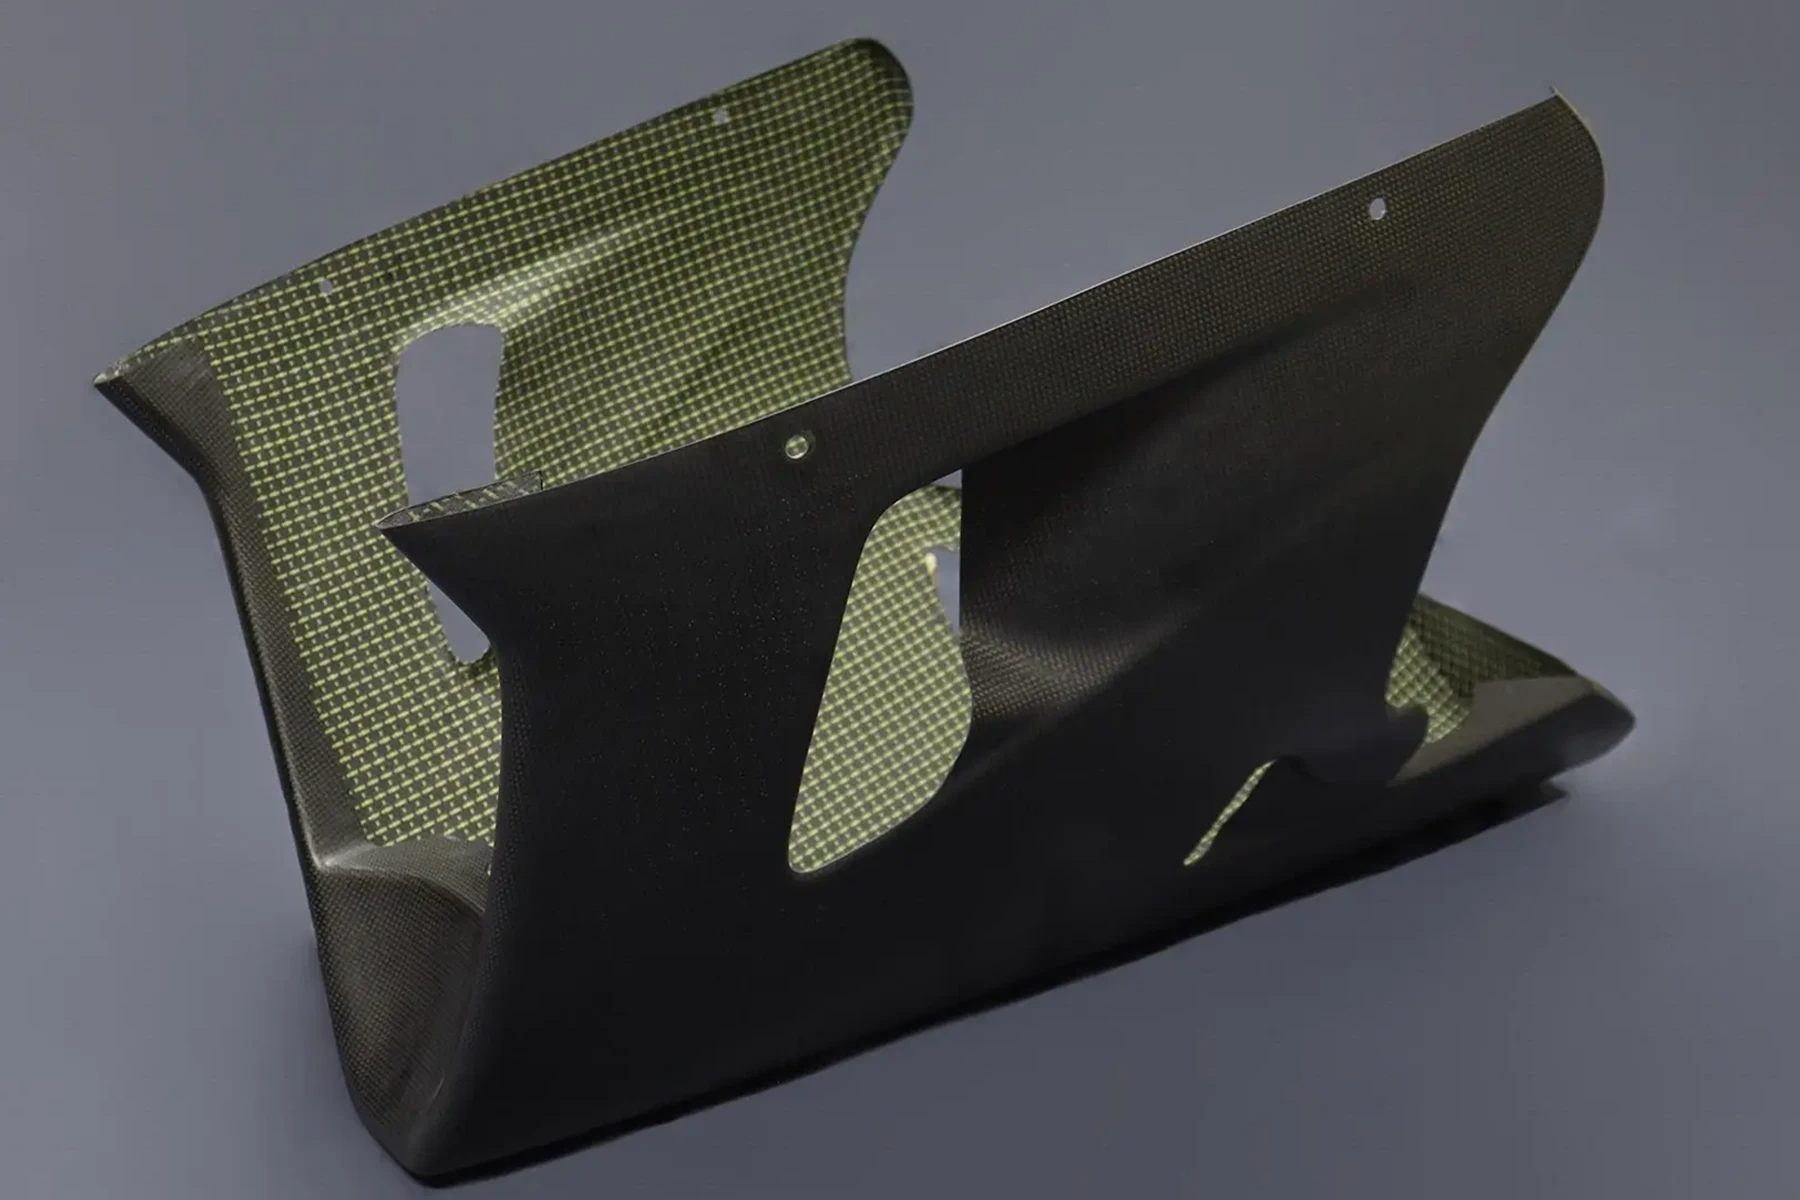
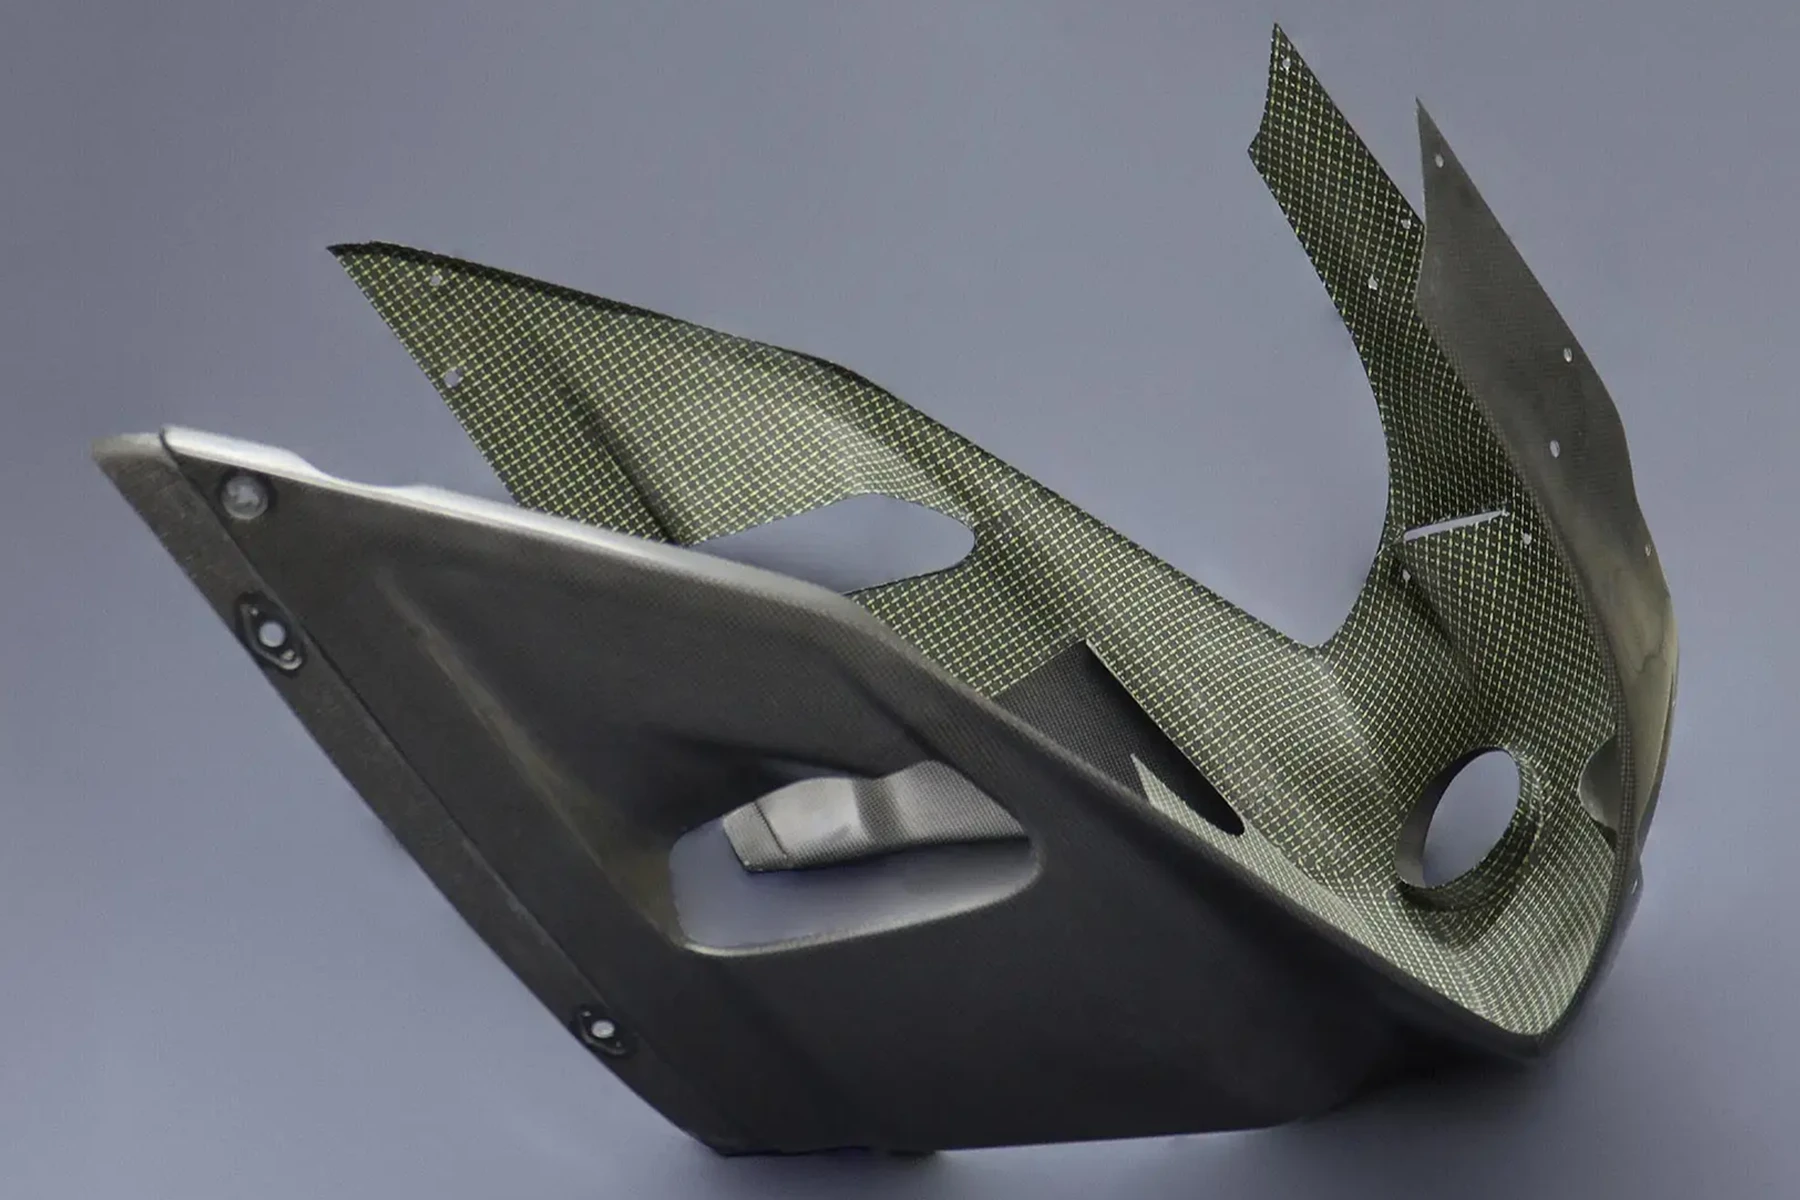
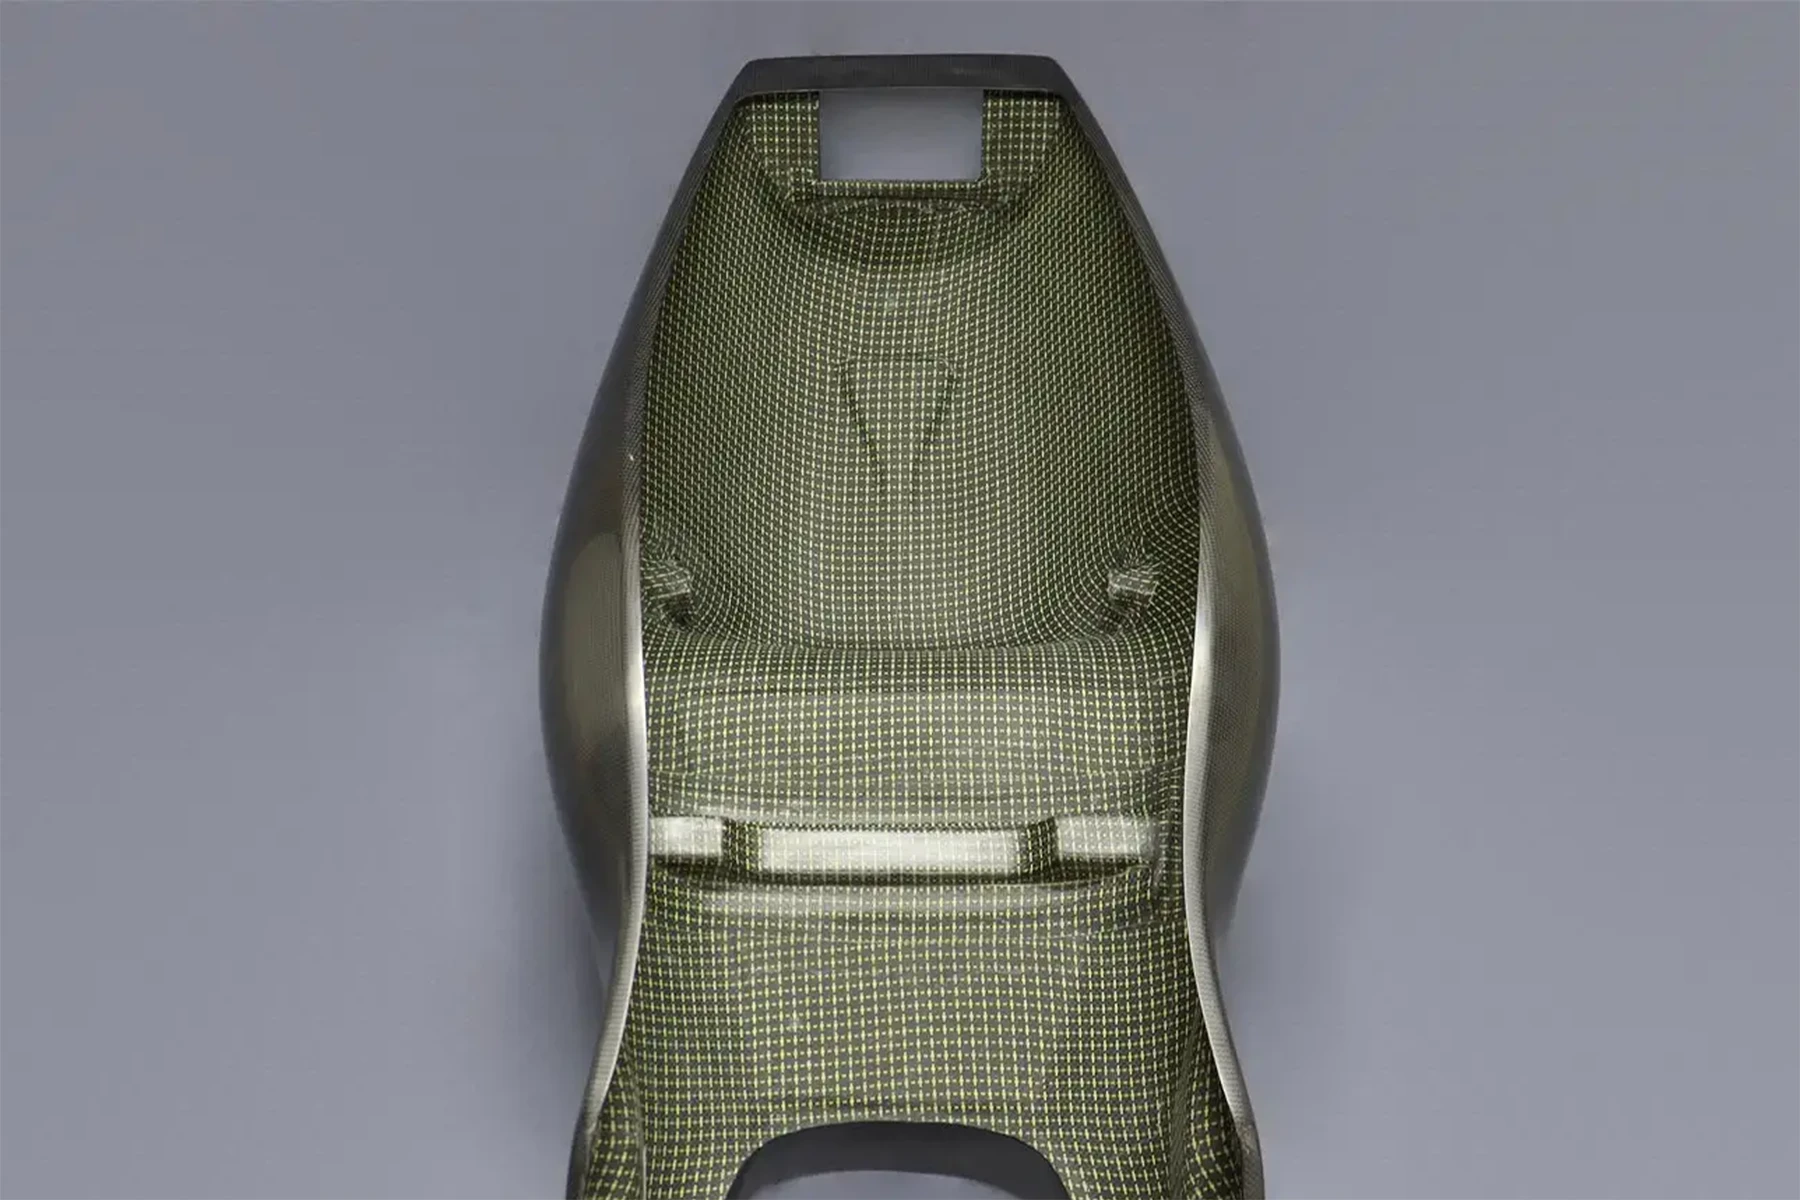
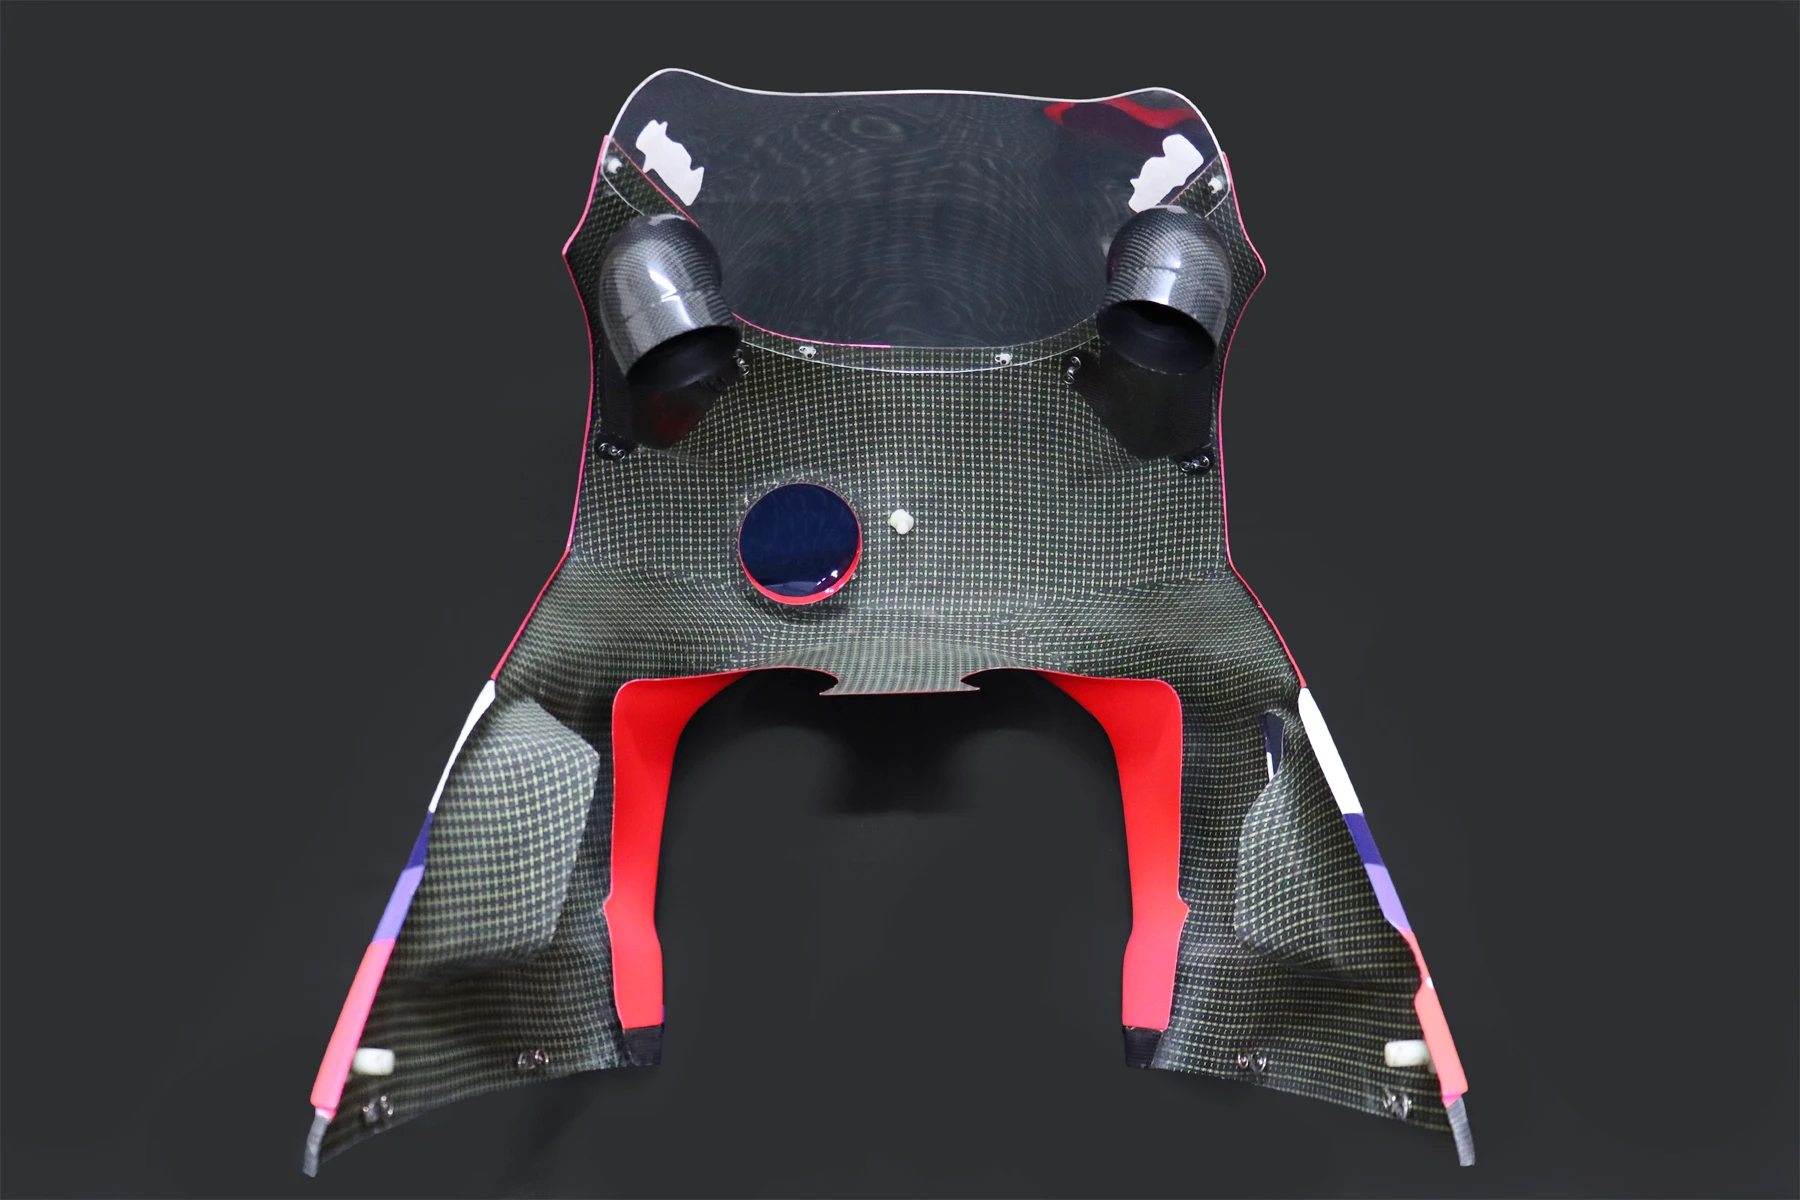
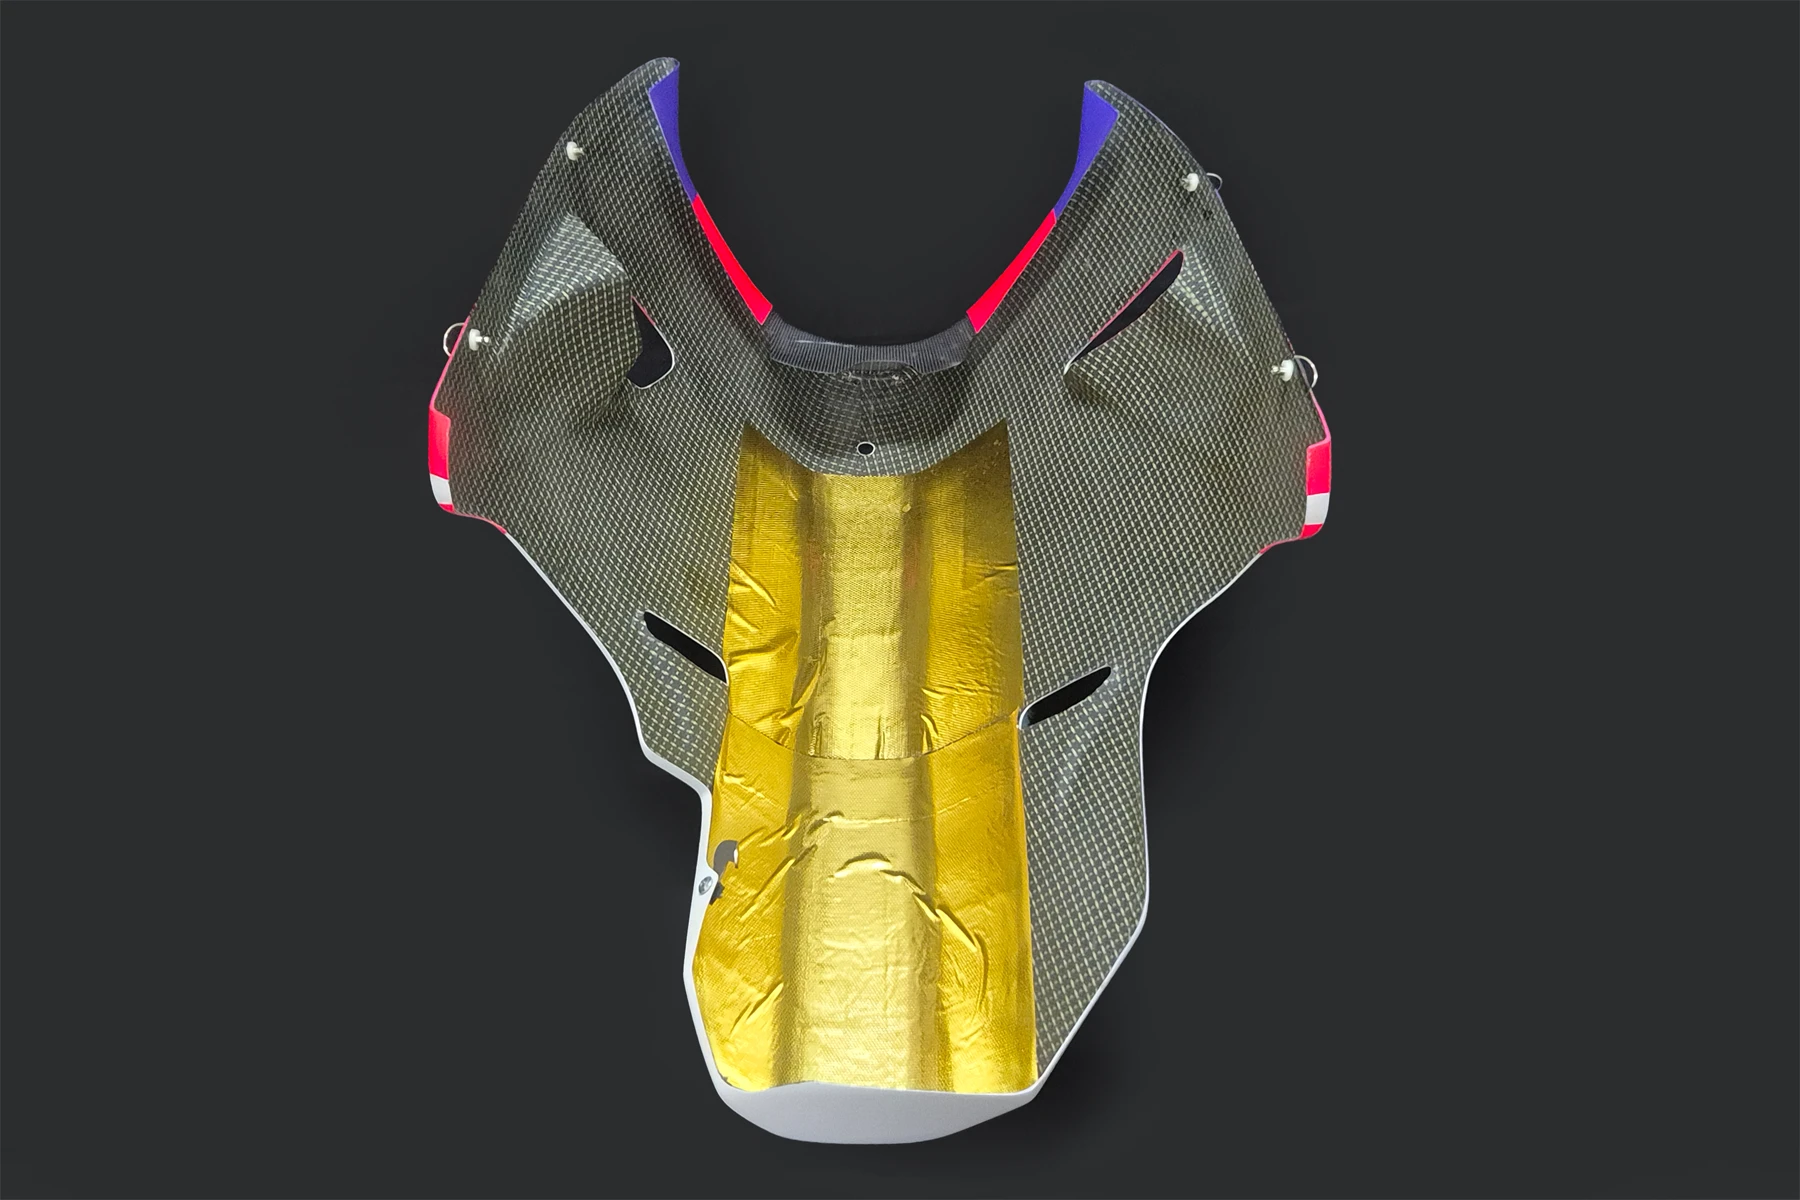
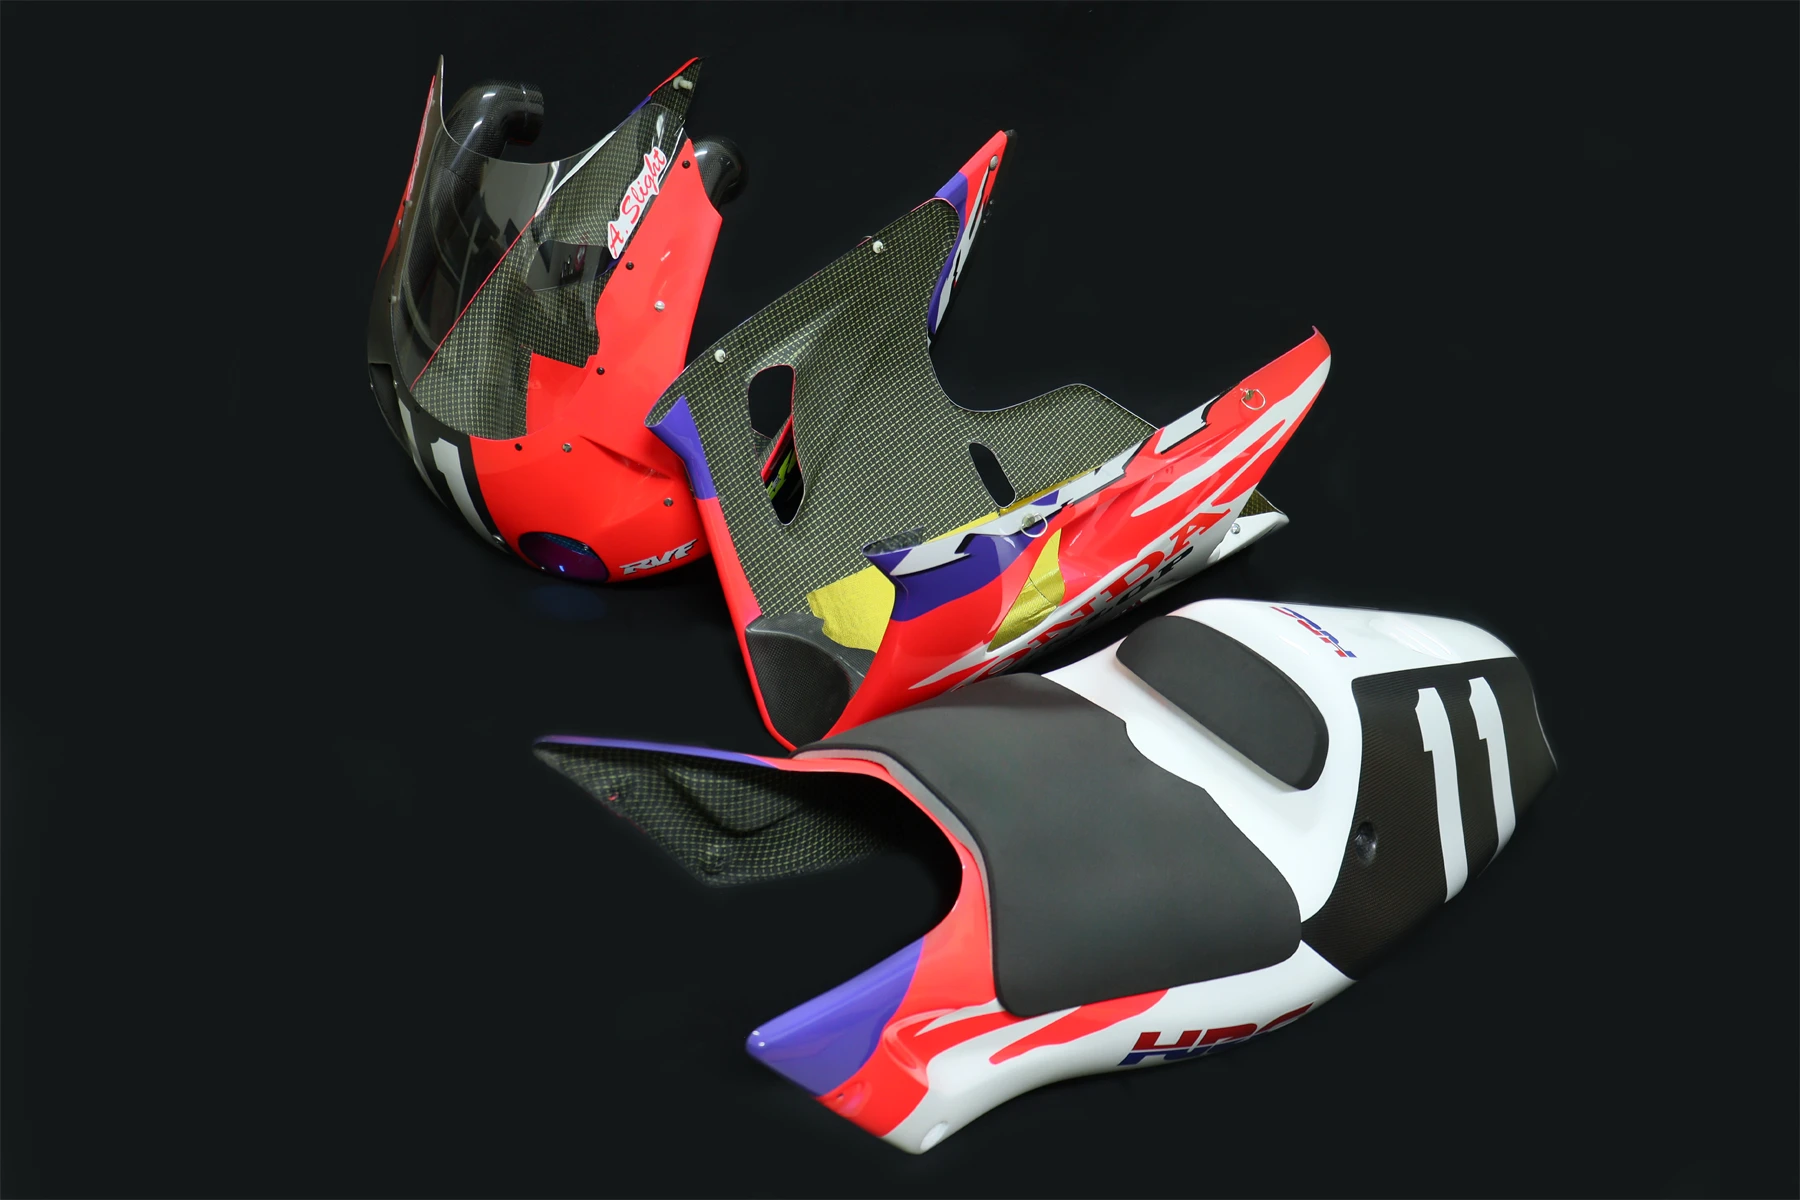
The next stage was to get our composite design guru, K. Thanet, to work his magic. The seat cowling that came with the bike was ready to mold right from the get-go. However, the genuine factory upper fairing was wafer-thin and proved to be a total nightmare to reinforce just to get it strong enough to take a mold. It had about 20 sticks glued from one side to the other just to hold it more or less in position and prevent it from warping or caving in. Thanet tried his best to save the upper so it could still be used on a bike, but unfortunately, it now looks much the worse for wear.
The lower cowling presented its own unique challenge. Not only had it been cut in half for ease of shipping, but we also needed to adapt it to accommodate a sidestand for street use while still retaining its fluid-containment belly pan design. Of course, Thanet came through with very little input required from us. That is the beauty of working with an expert in their field; in no time at all, he delivered our molds for the fairing, air ducts, seat cowling, and airbox.
These molds were then handed over to our team of skilled laminators, led by K. Wattana, who did their absolute best to replicate HRC quality. Judging by the results, I am not sure which team impresses me more. On one hand, given their relatively basic setup, K. Wattana’s team works absolute miracles. On the other hand, so did HRC, when you consider that they achieved this level of quality over 30 years ago.
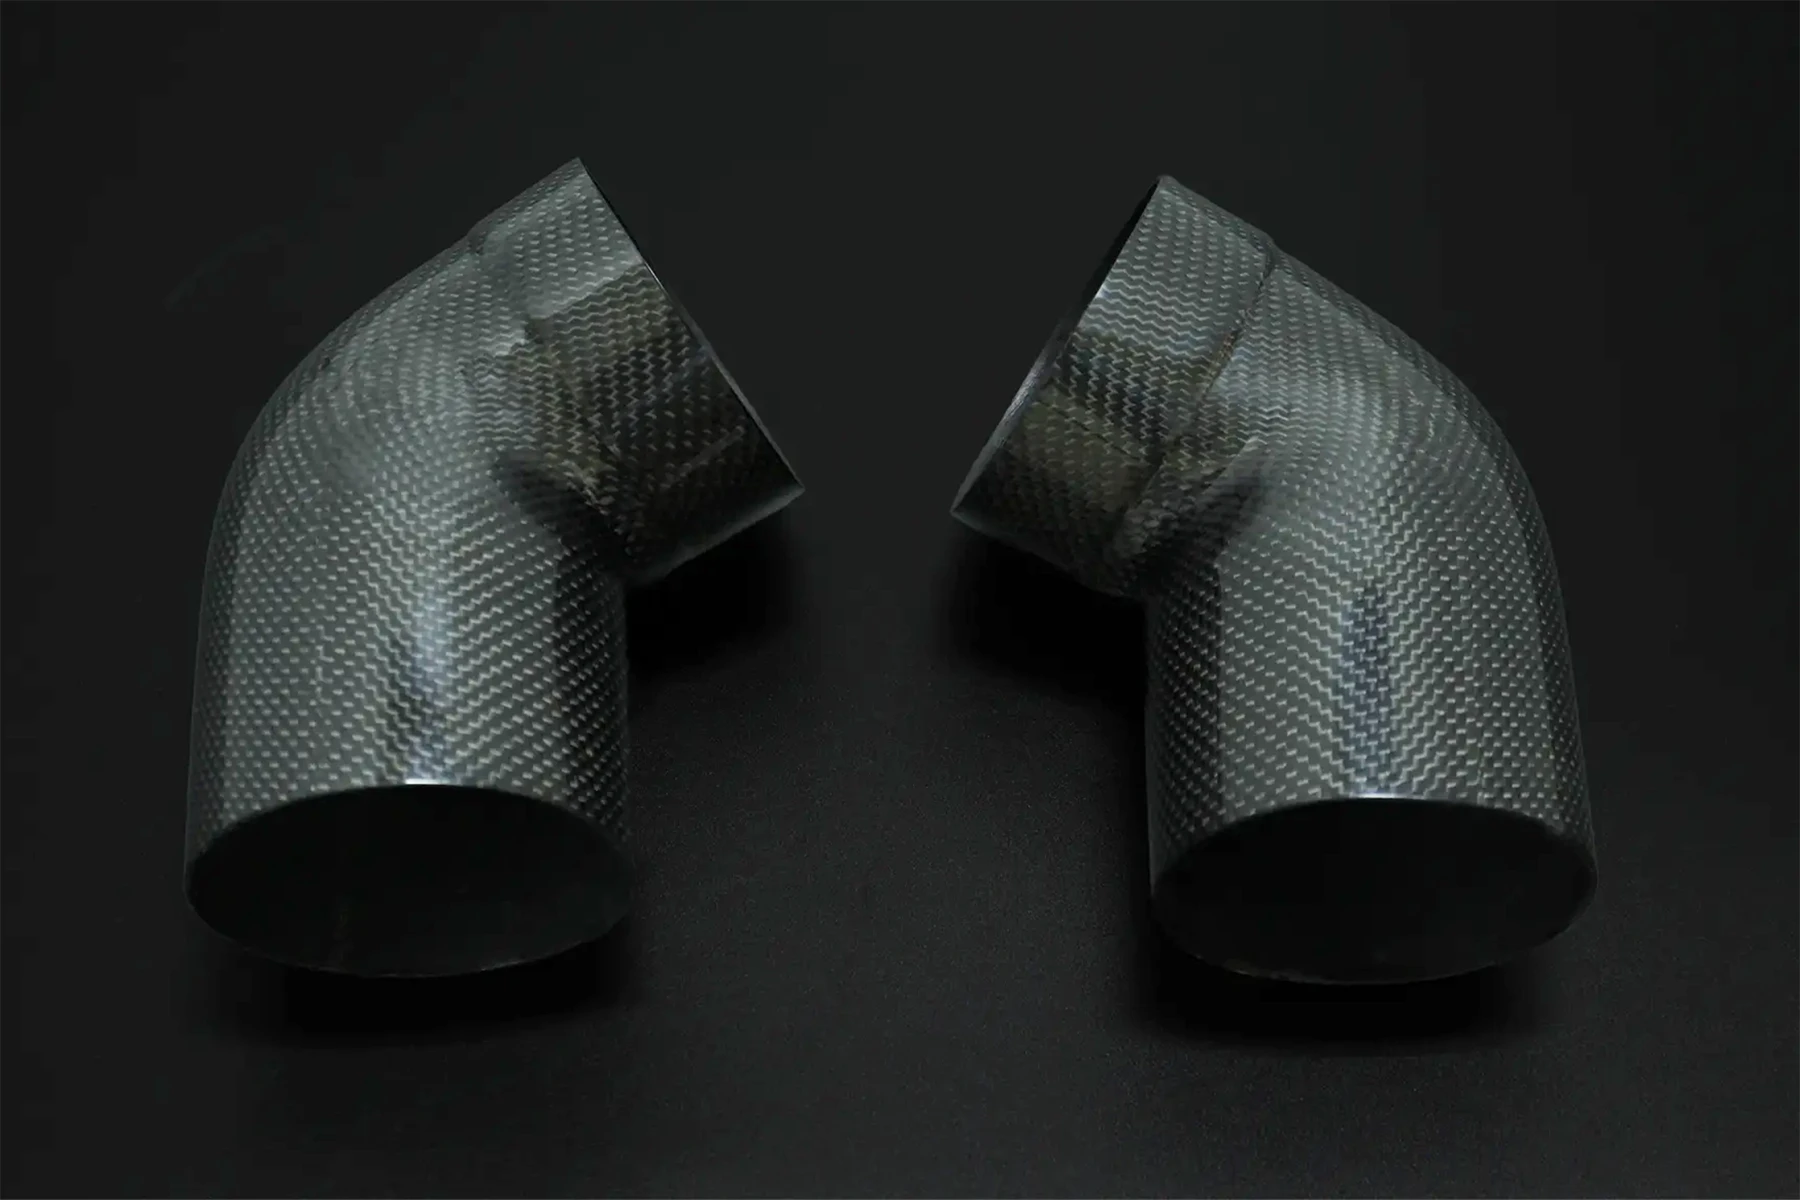
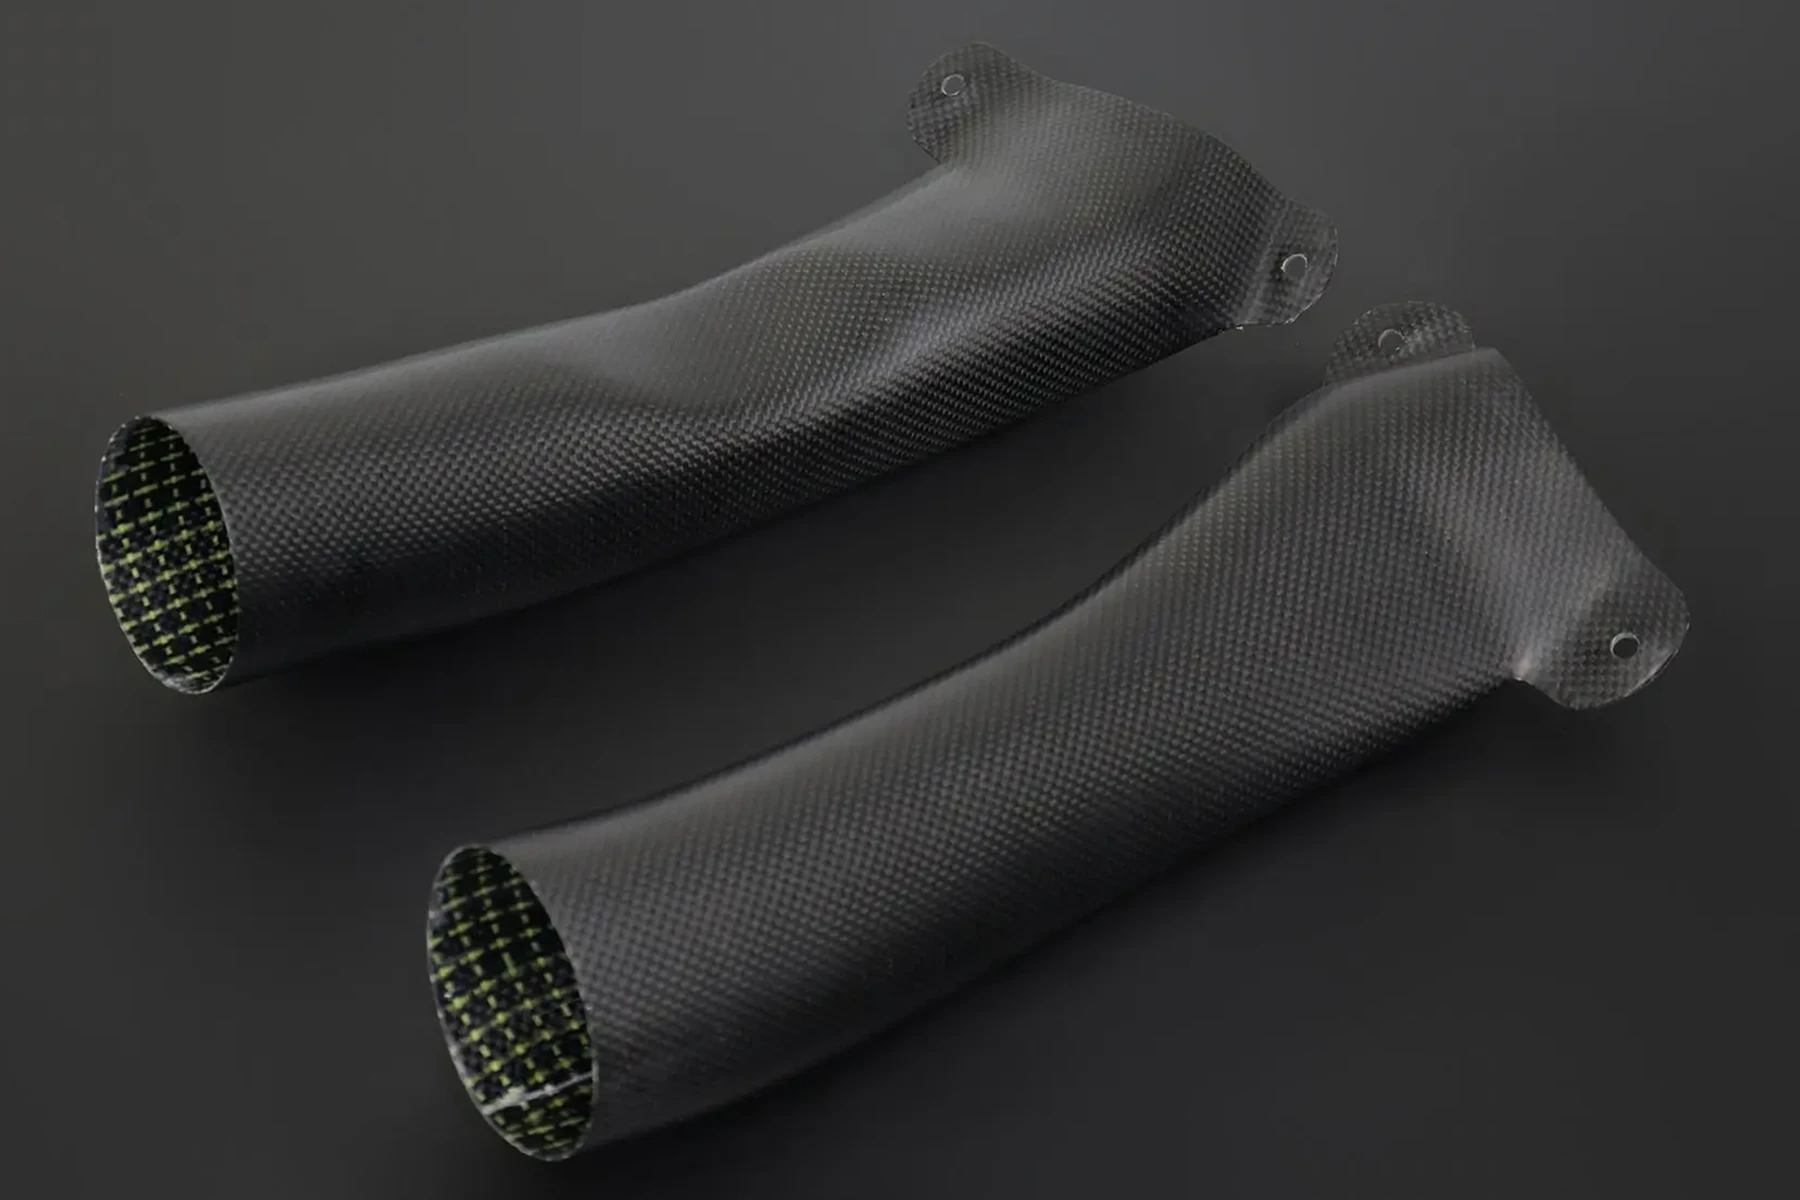
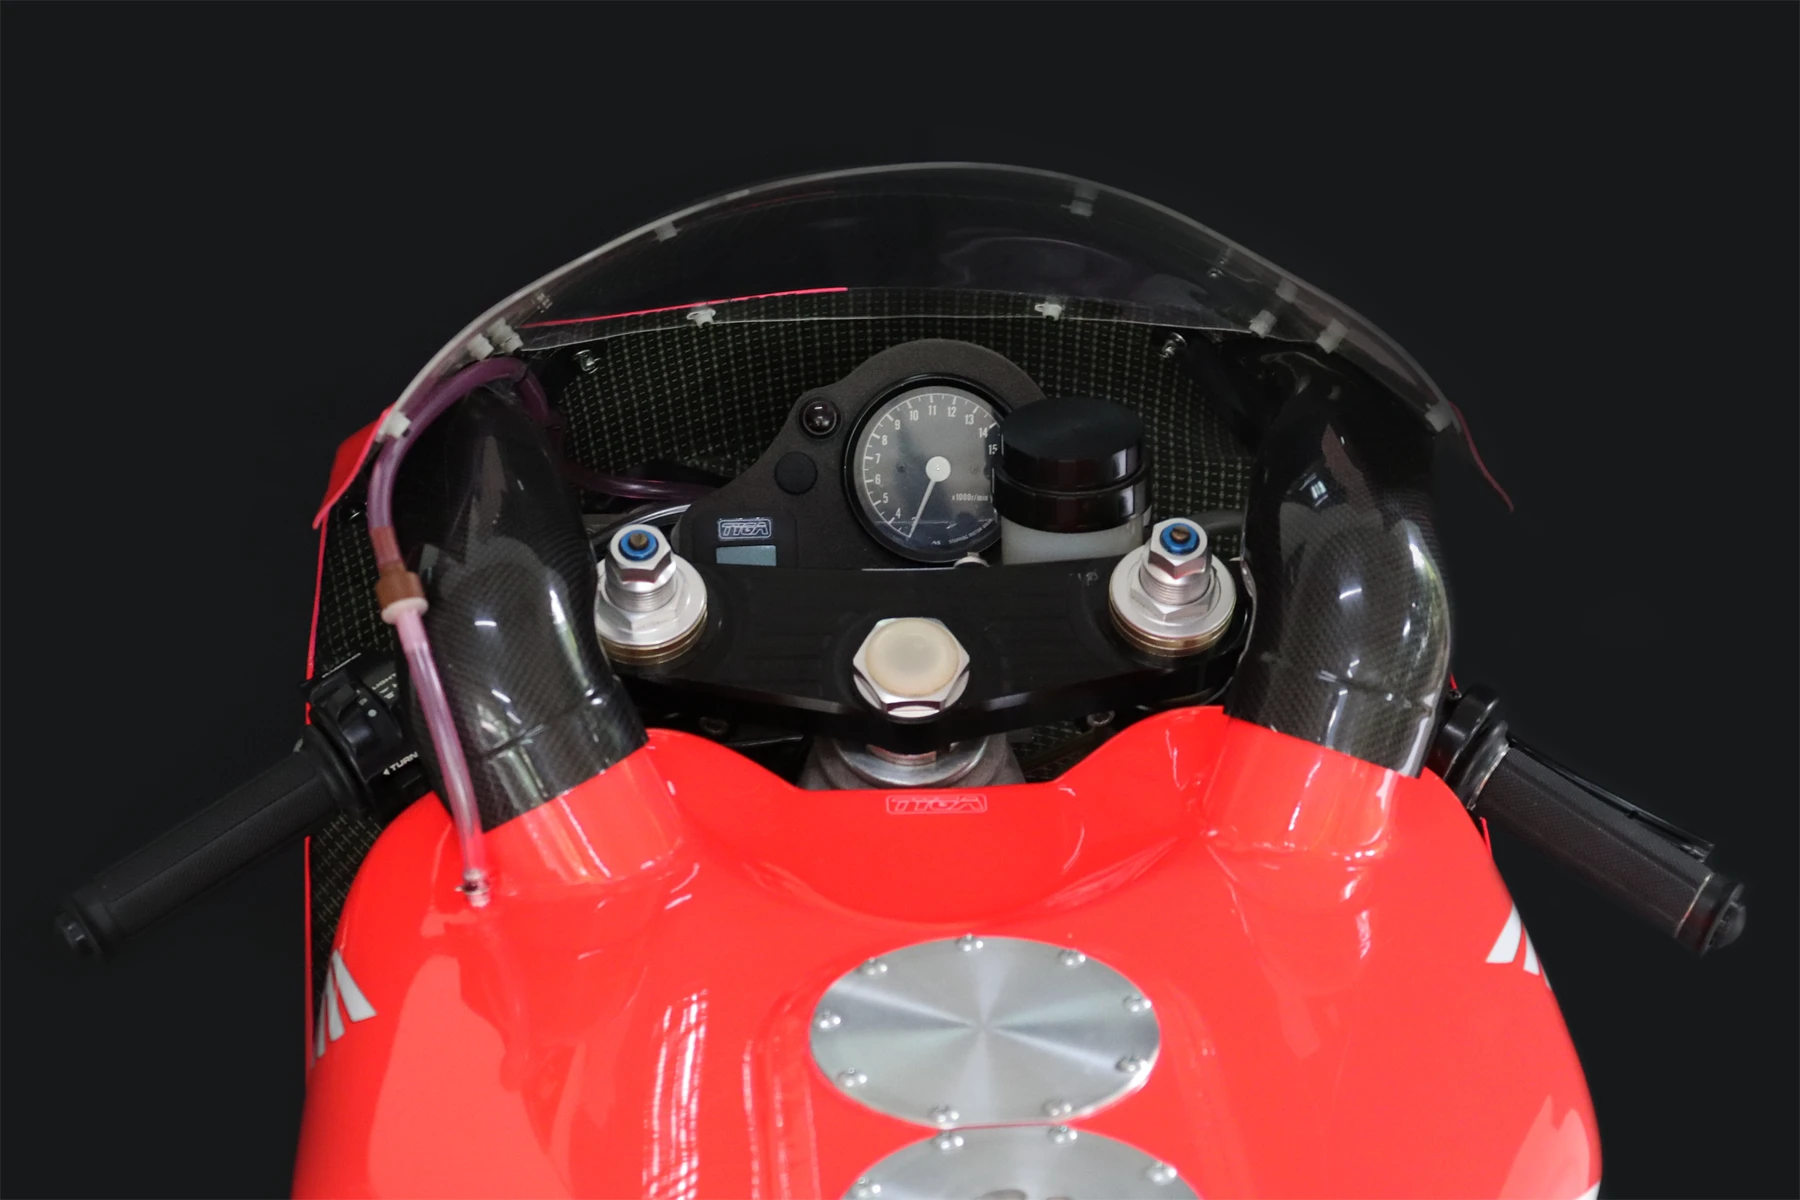
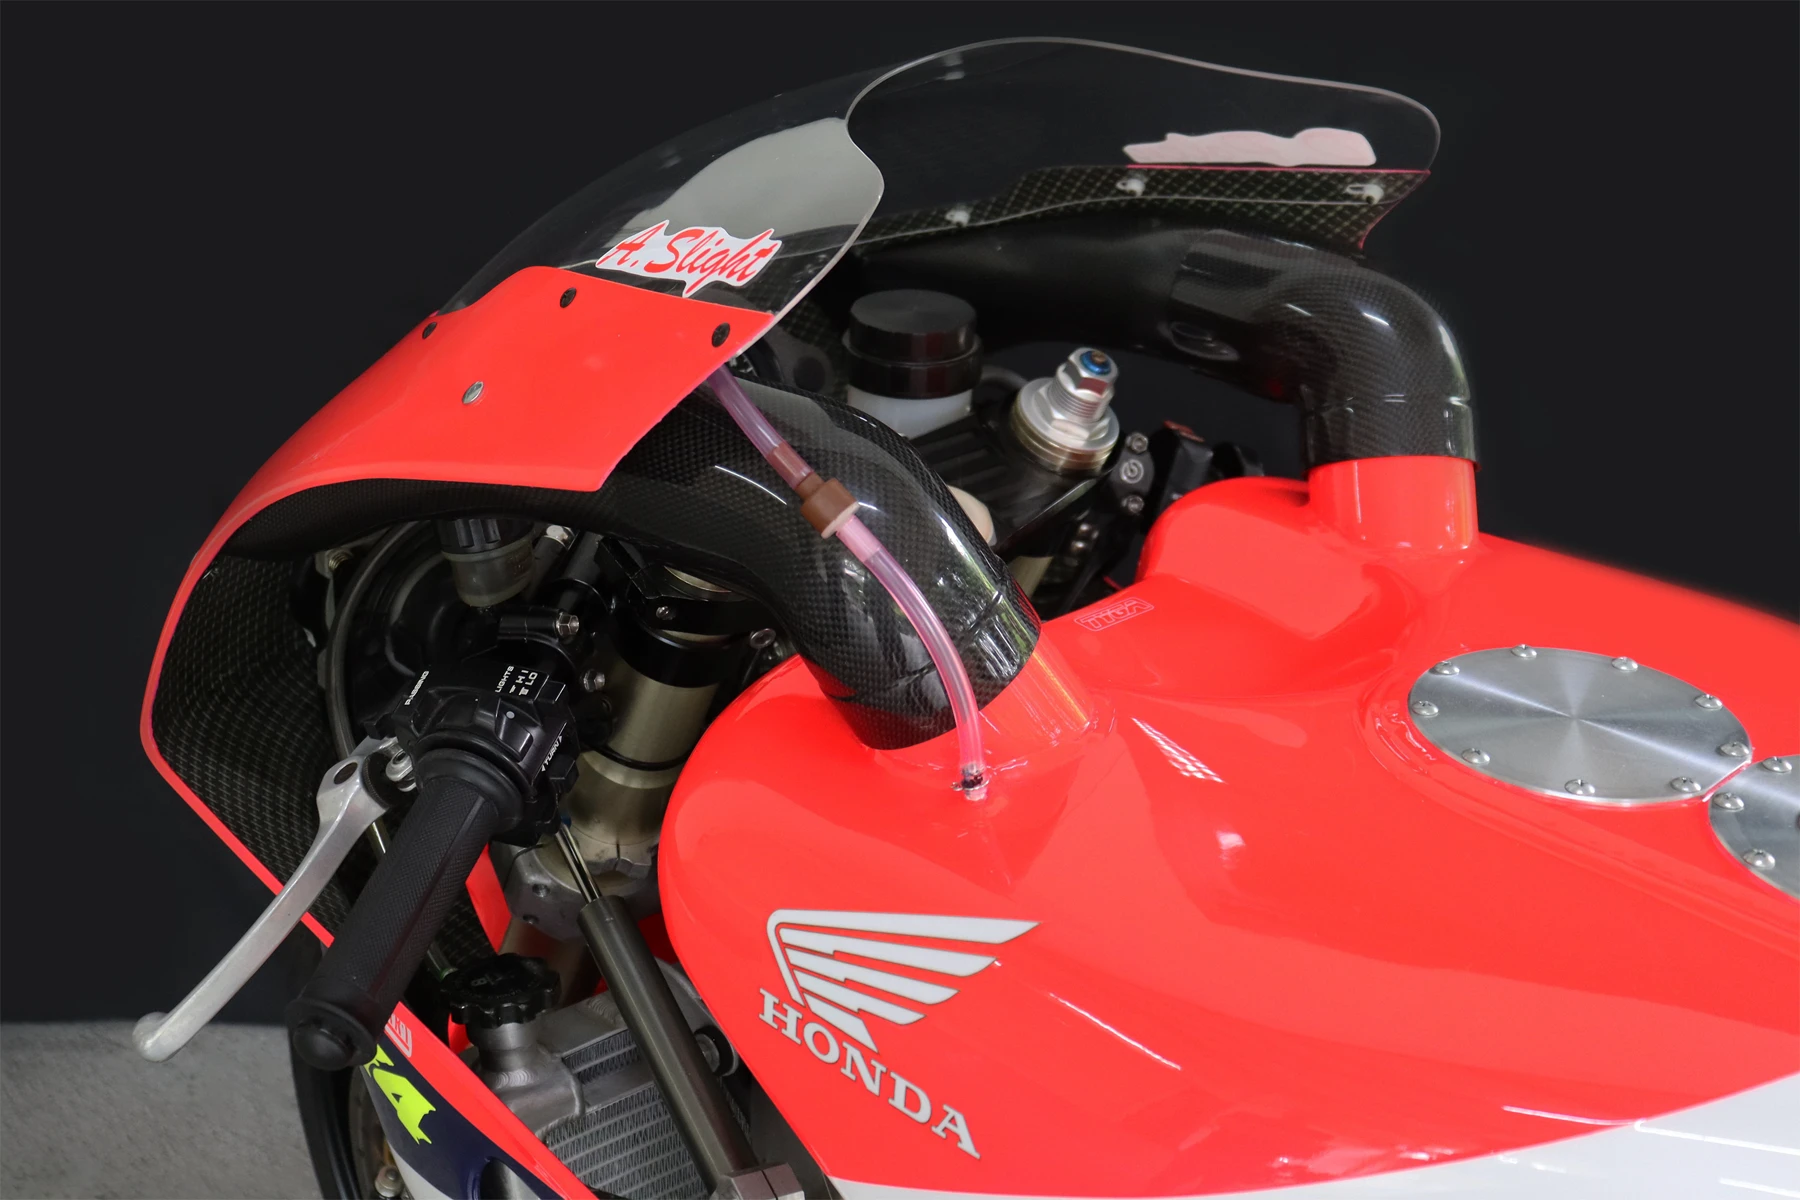
I wish the reader could see these panels in person—well, you actually can if you order some from us! They weigh next to nothing, yet they are incredibly stiff and fit together beautifully. Little touches, like the special HRC-style Kevlar weave on the inside and high-quality mounting hardware, make all the difference. The air ducts also came out phenomenally well; being perfectly round, crisp, and with no noticeable seams, they are a massive credit to the team considering it is all wet lay-up carbon fibre.
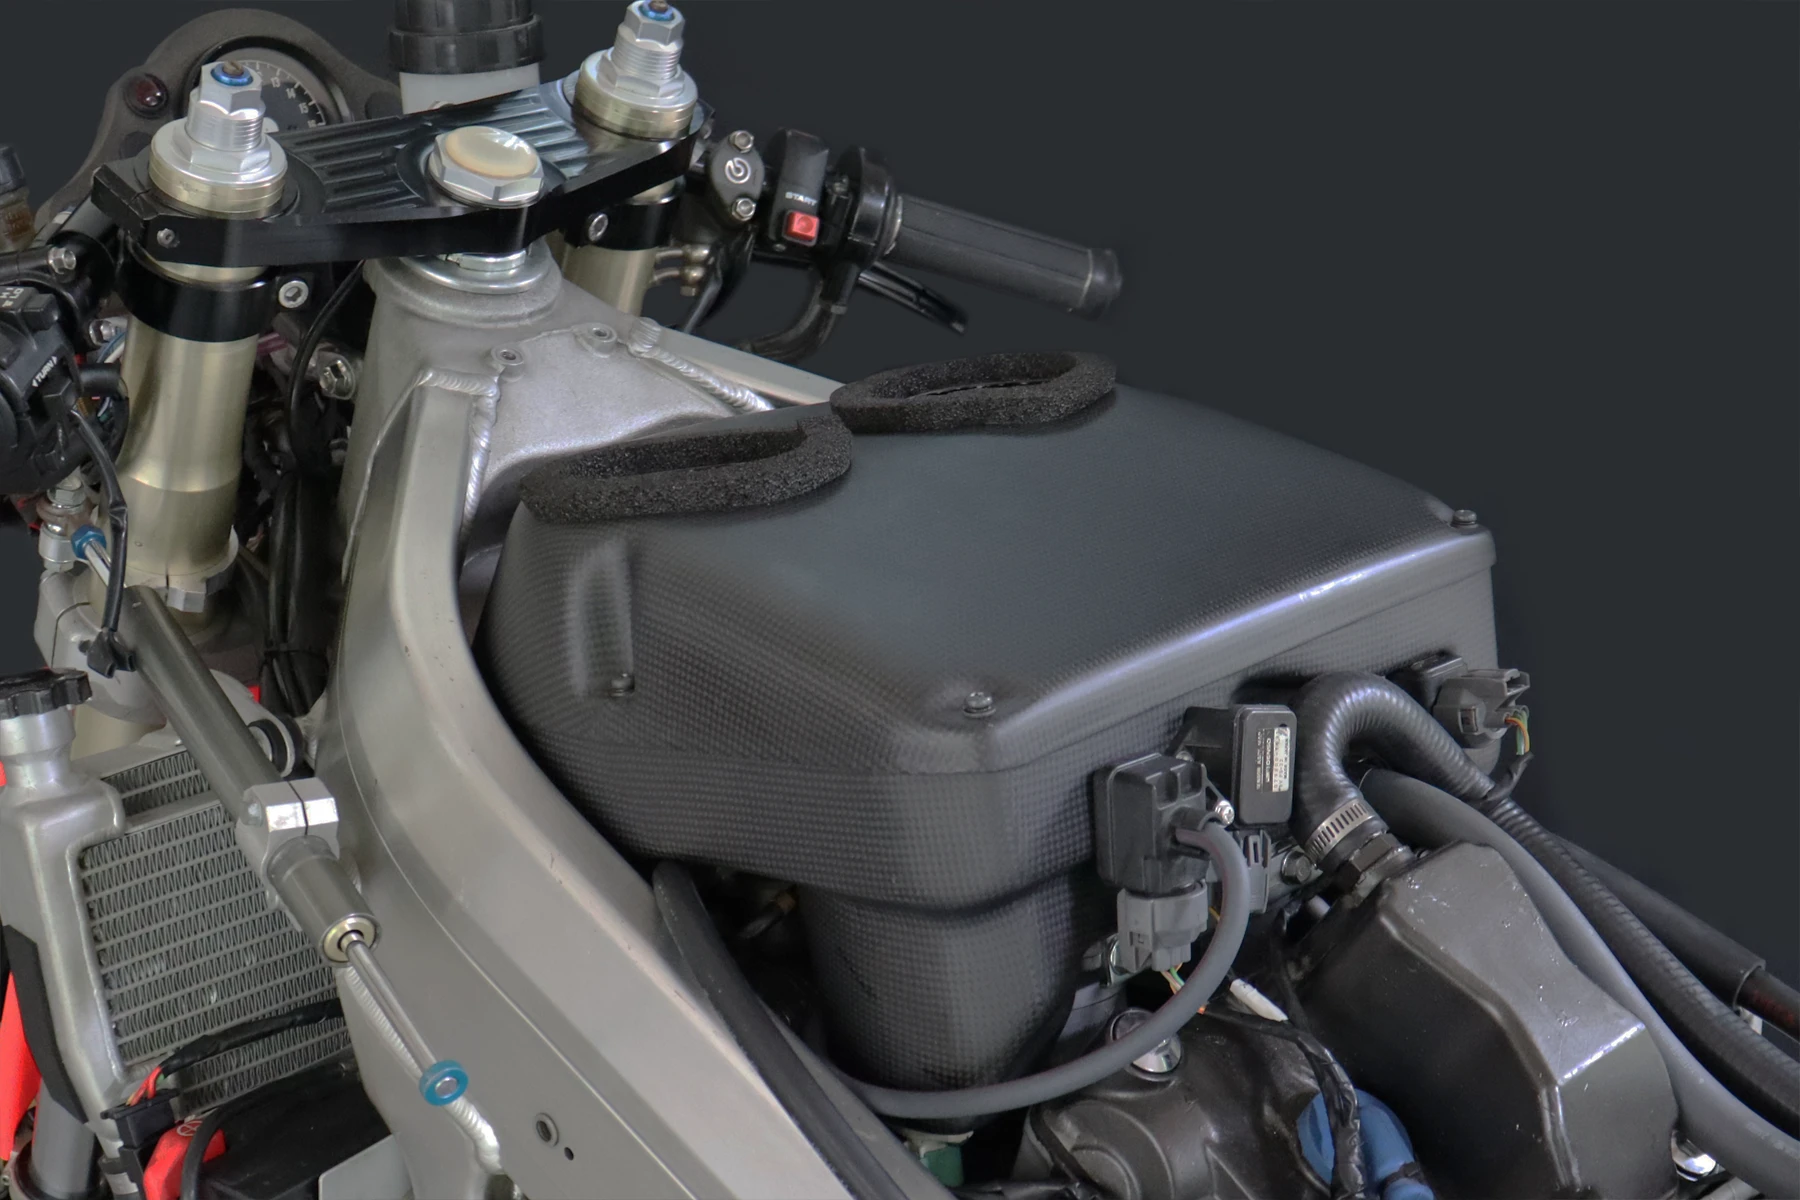
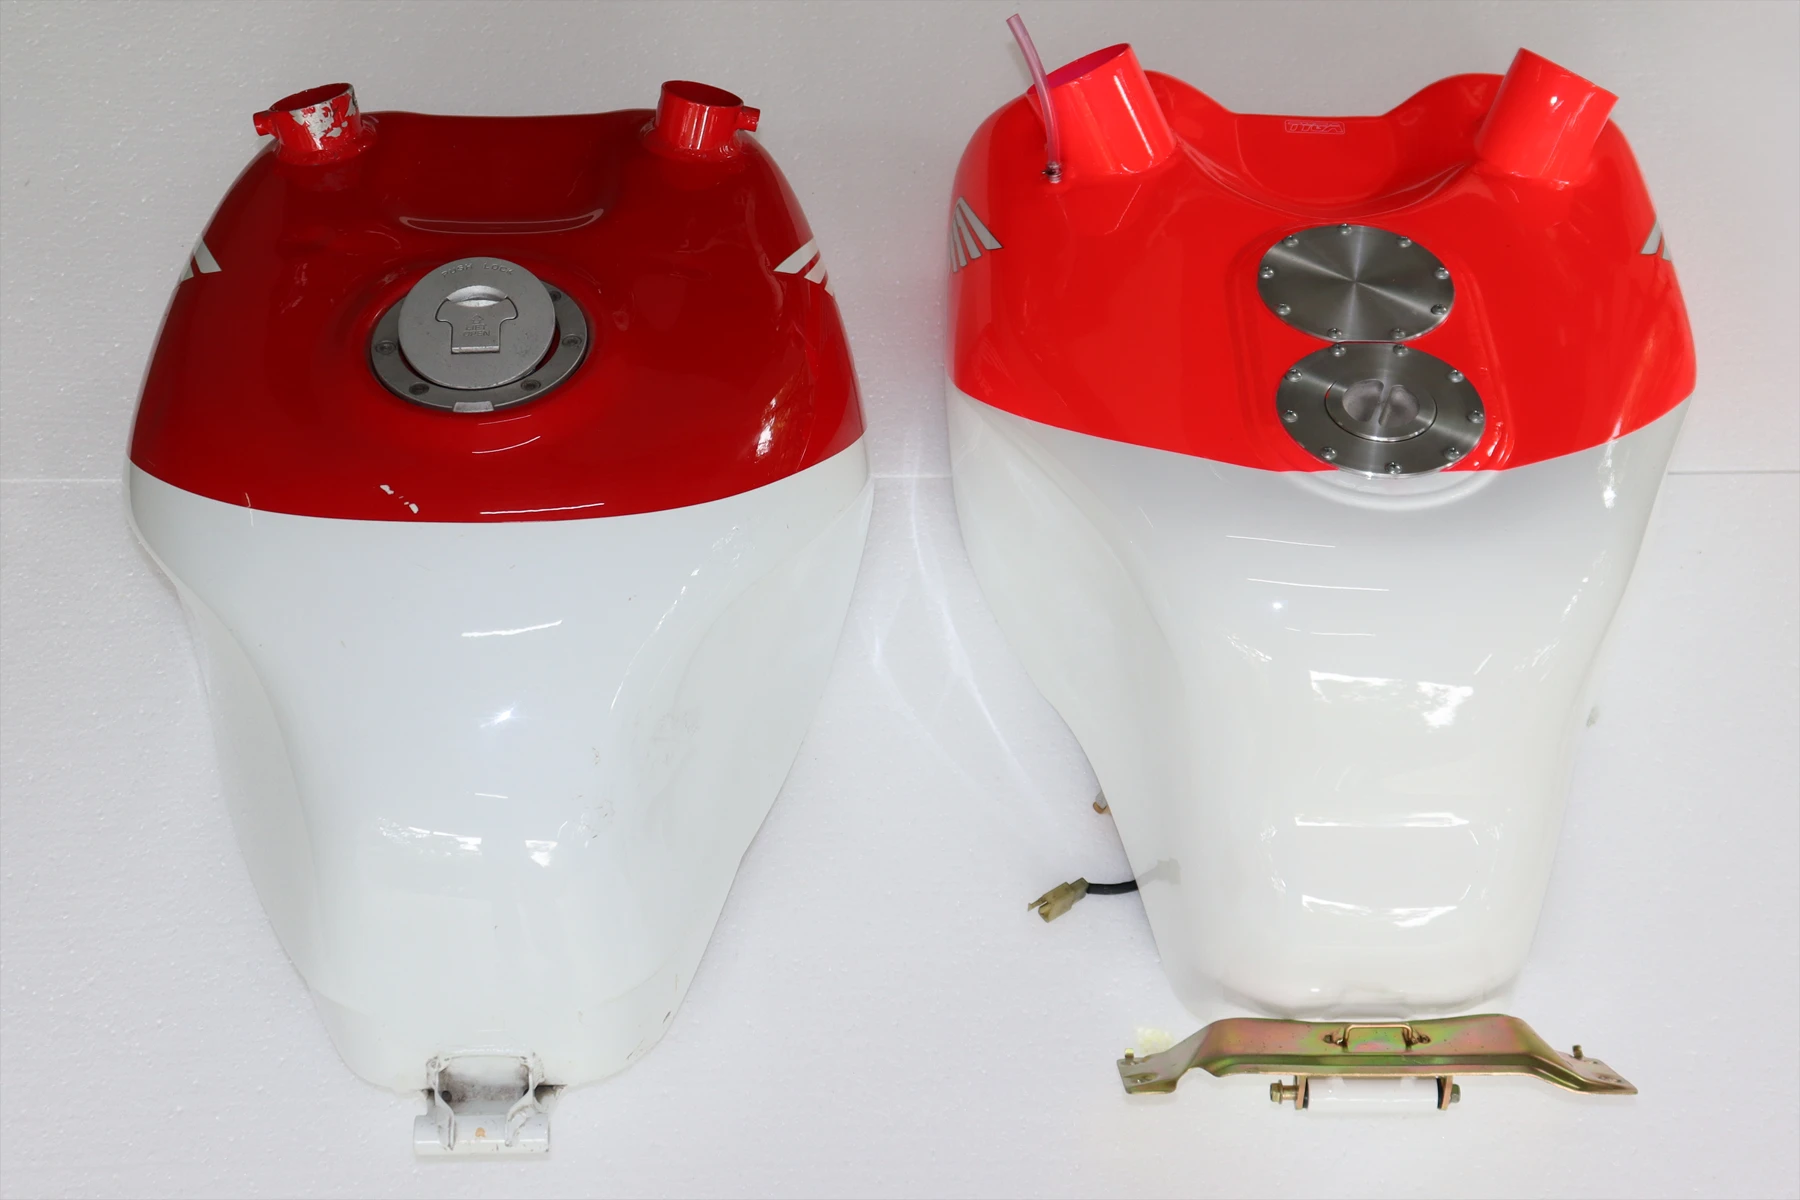
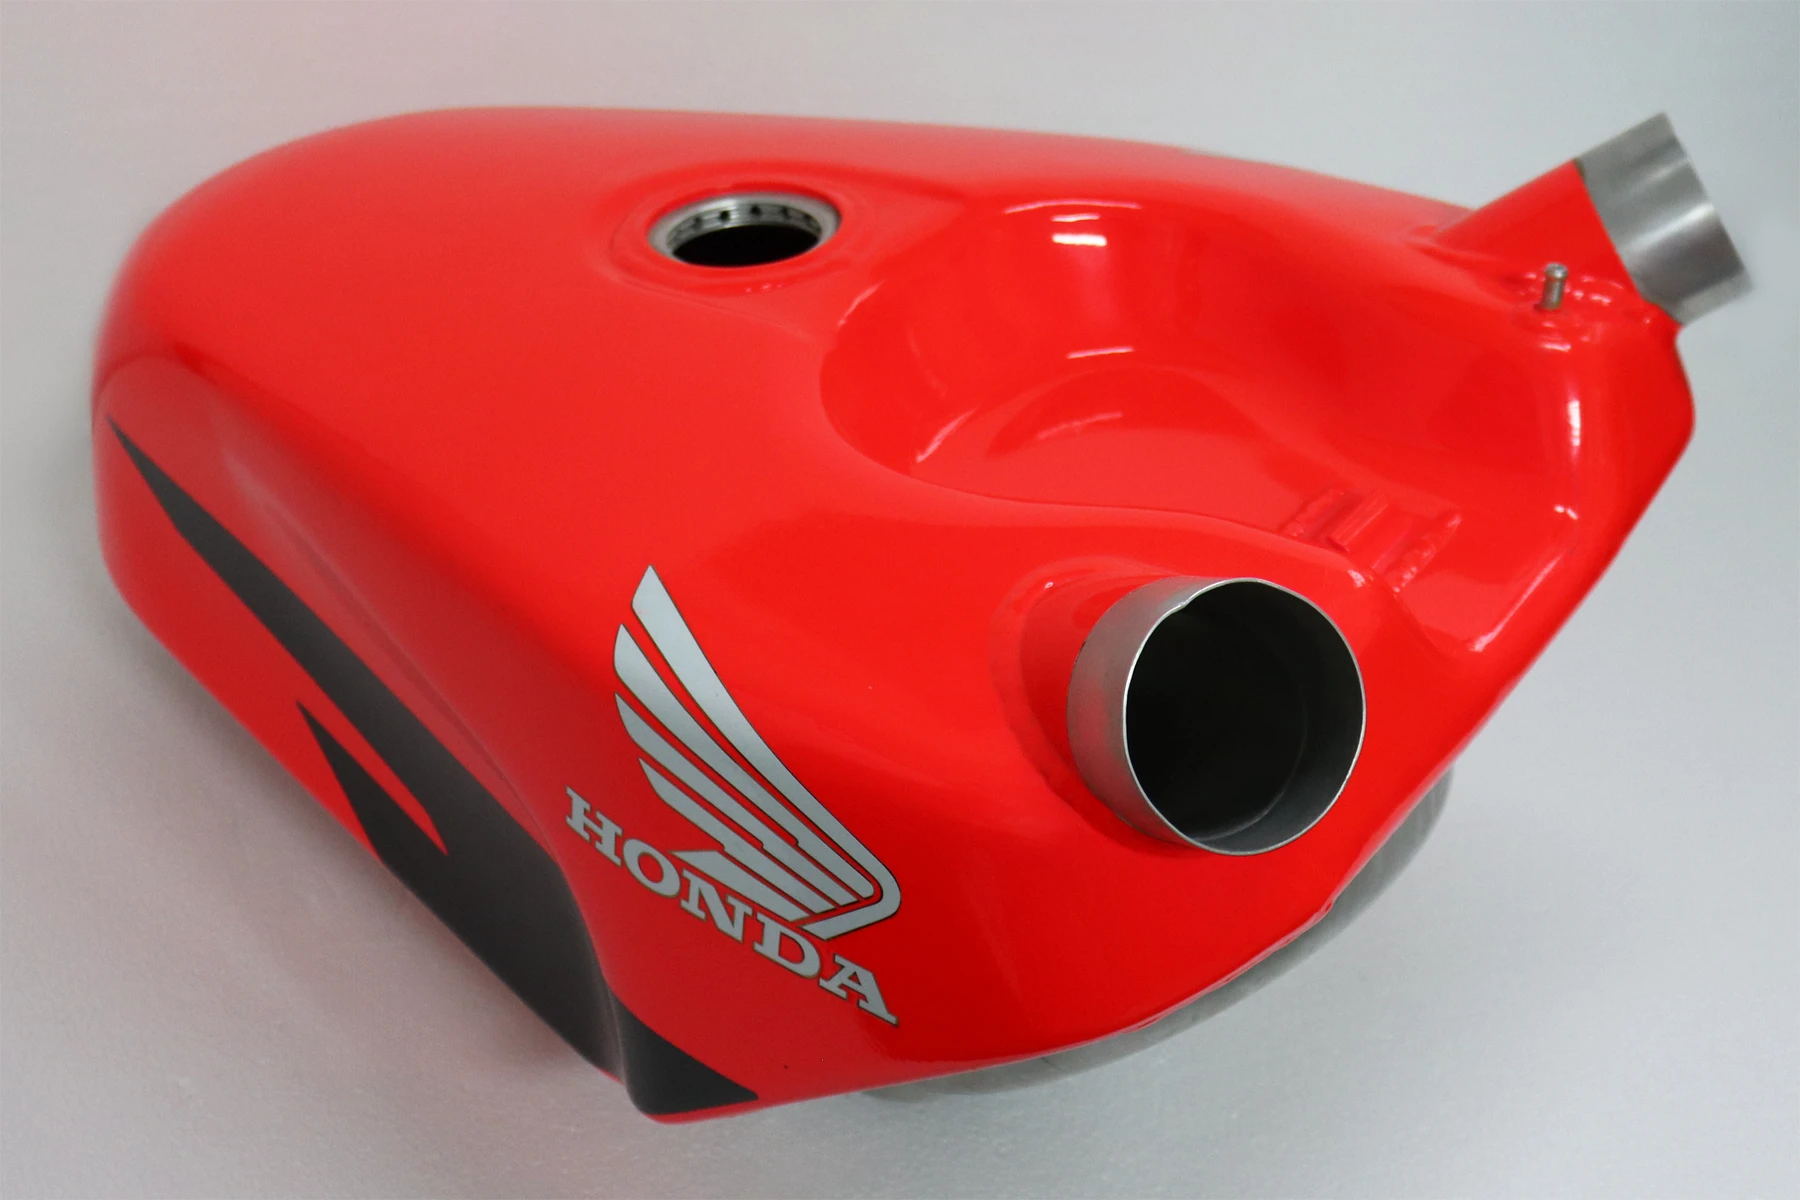
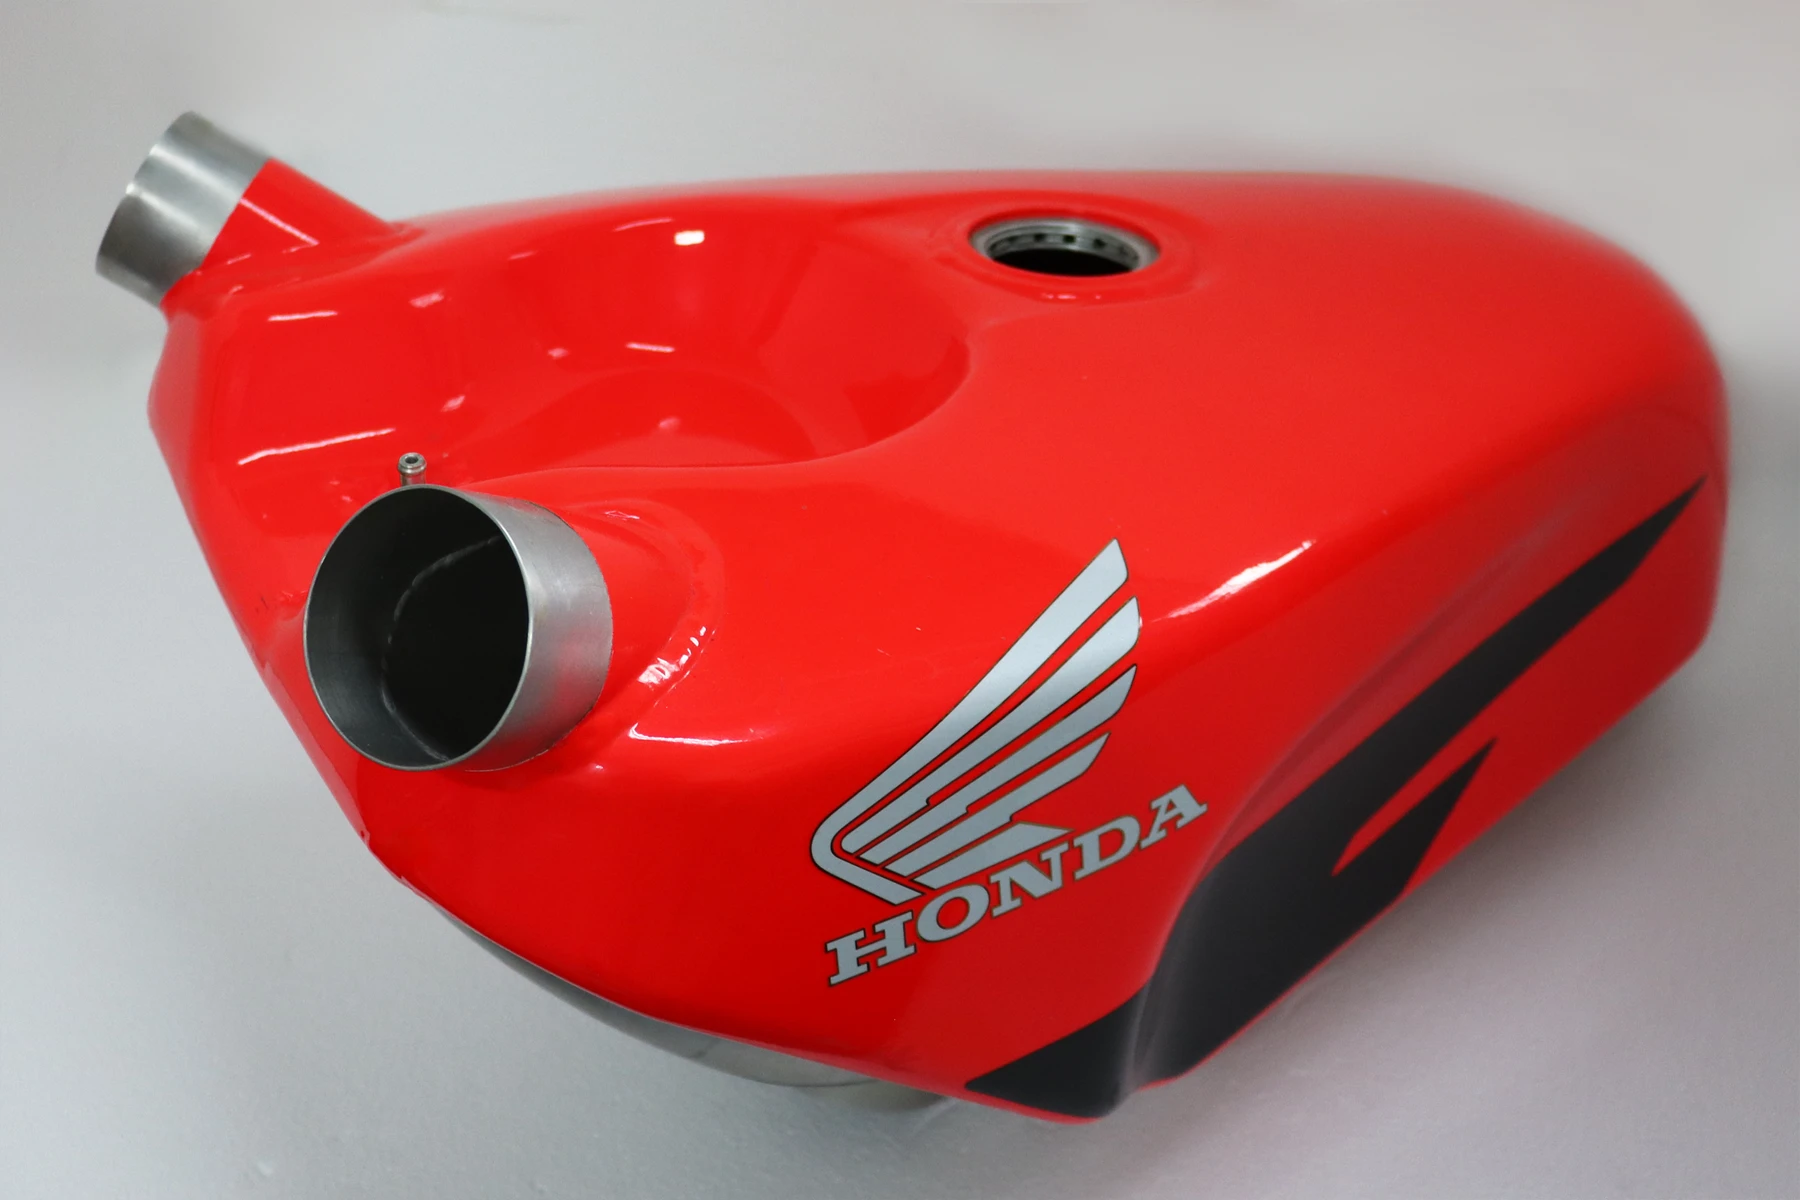
The fuel tank issue had still not been resolved at this point, although we were confident we had a solution. One of my routine tasks is to scour Yahoo Auctions for suitable components, and an endurance fuel tank popped up one week. I immediately placed a bid and won. Eventually, after many months of transit, it arrived at our shop—and its condition was not at all what I had hoped. Not only had a very poor repair been carried out on the side with a mountain of filler and terrible welding, but the underside had also been heavily modified to fit some completely different motorcycle model.
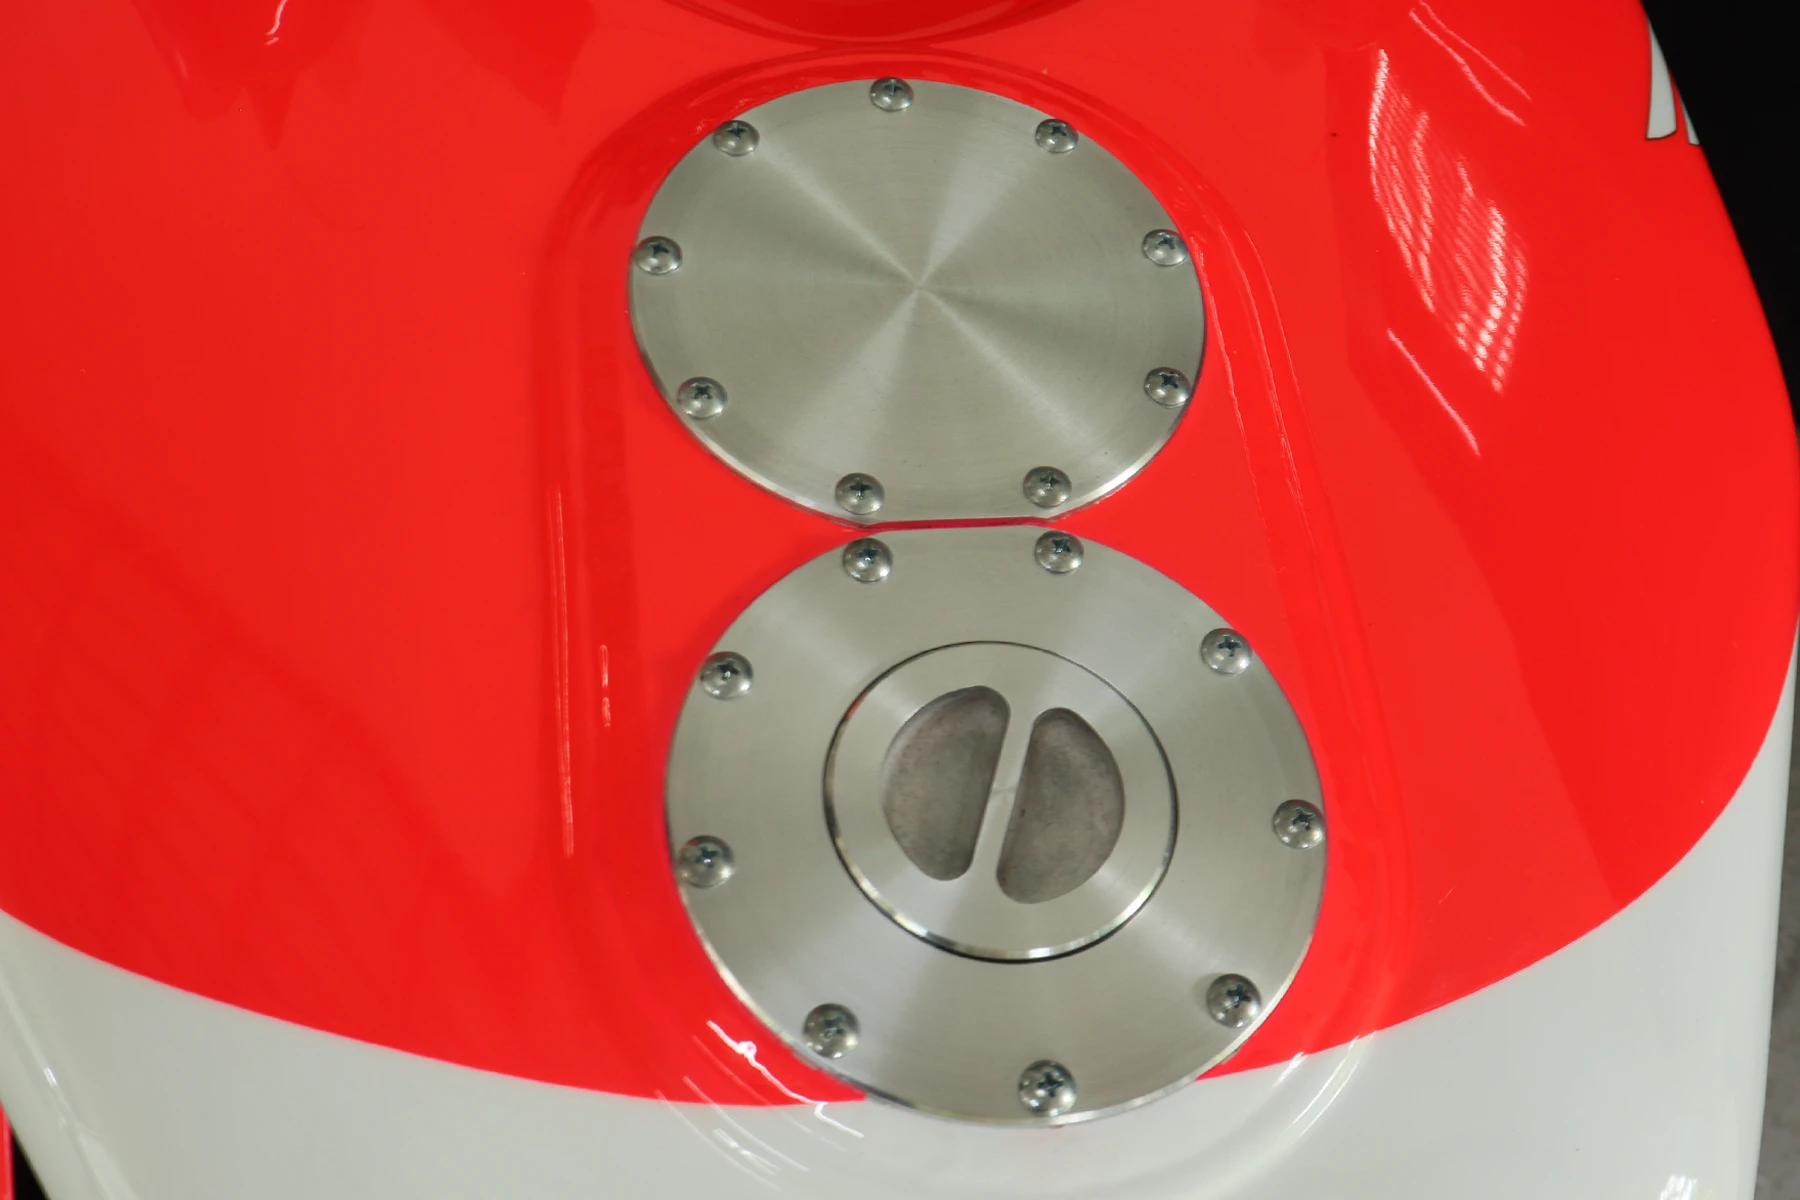
Seeing the mess, our fabricators couldn’t wait to get stuck in. Matt led them as a special task force to fabricate entirely new sections, while repositioning the fuel pump and air ducts on the underside. It was quite a challenge, especially making sure the welds and repairs wouldn’t leak. By the time they were finished, about half of the tank had been completely refabricated—including the fuel return tube at the bottom, which had been facing the wrong way. We ran multiple leak tests, but just for good measure, we coated the inside with our fuel tank sealer and left it sitting with fuel for a few days to be absolutely sure. A final touch was adding the genuine HRC filler cap and blanking piece that we received from iconicmotomarket.com. Thanks Adam!
Once we were satisfied that it was completely sealed, we took it to K. Pong, our painter. His face was a picture when he saw this patchwork jigsaw puzzle of a fuel tank, especially when we insisted that we didn’t want it caked in filler, demanding only the bare minimum be used. Like the rest of the team, he rose to the challenge and worked absolute miracles.
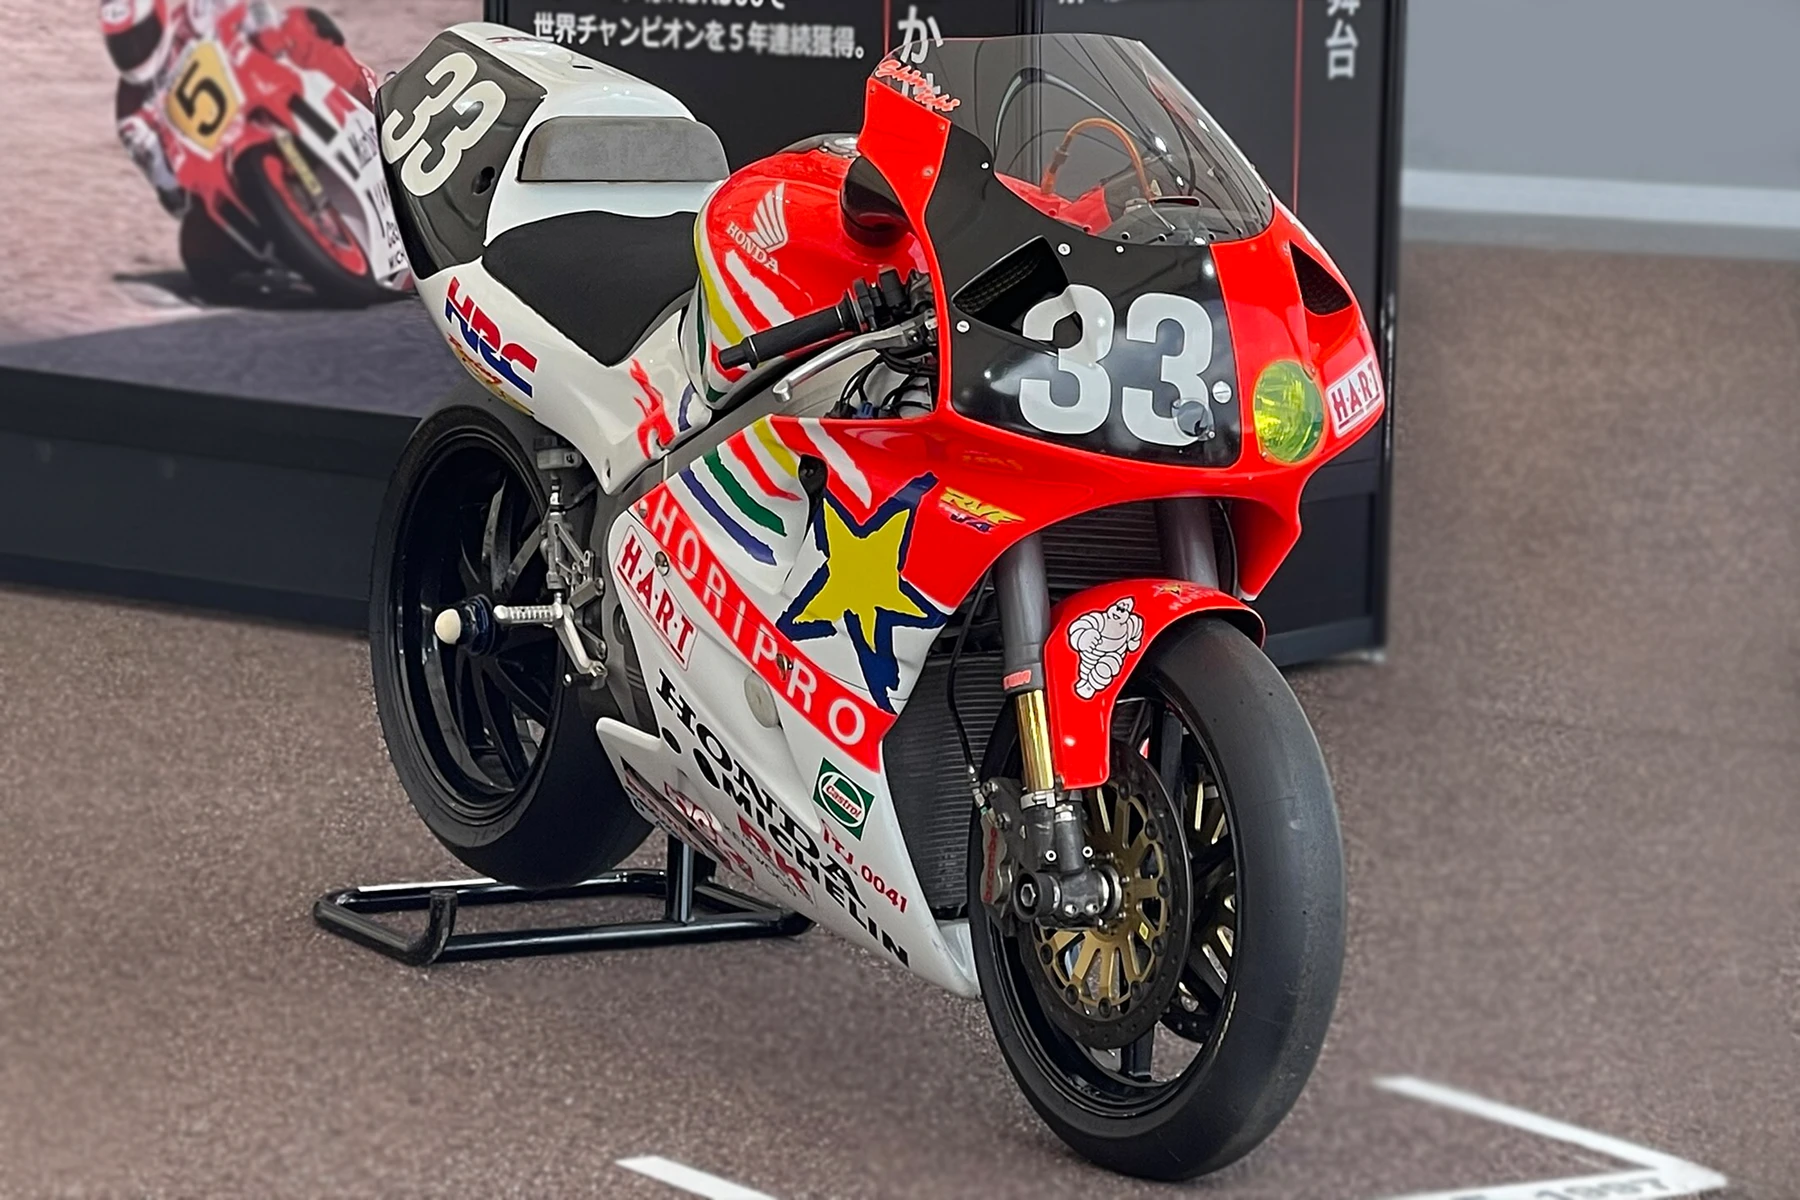
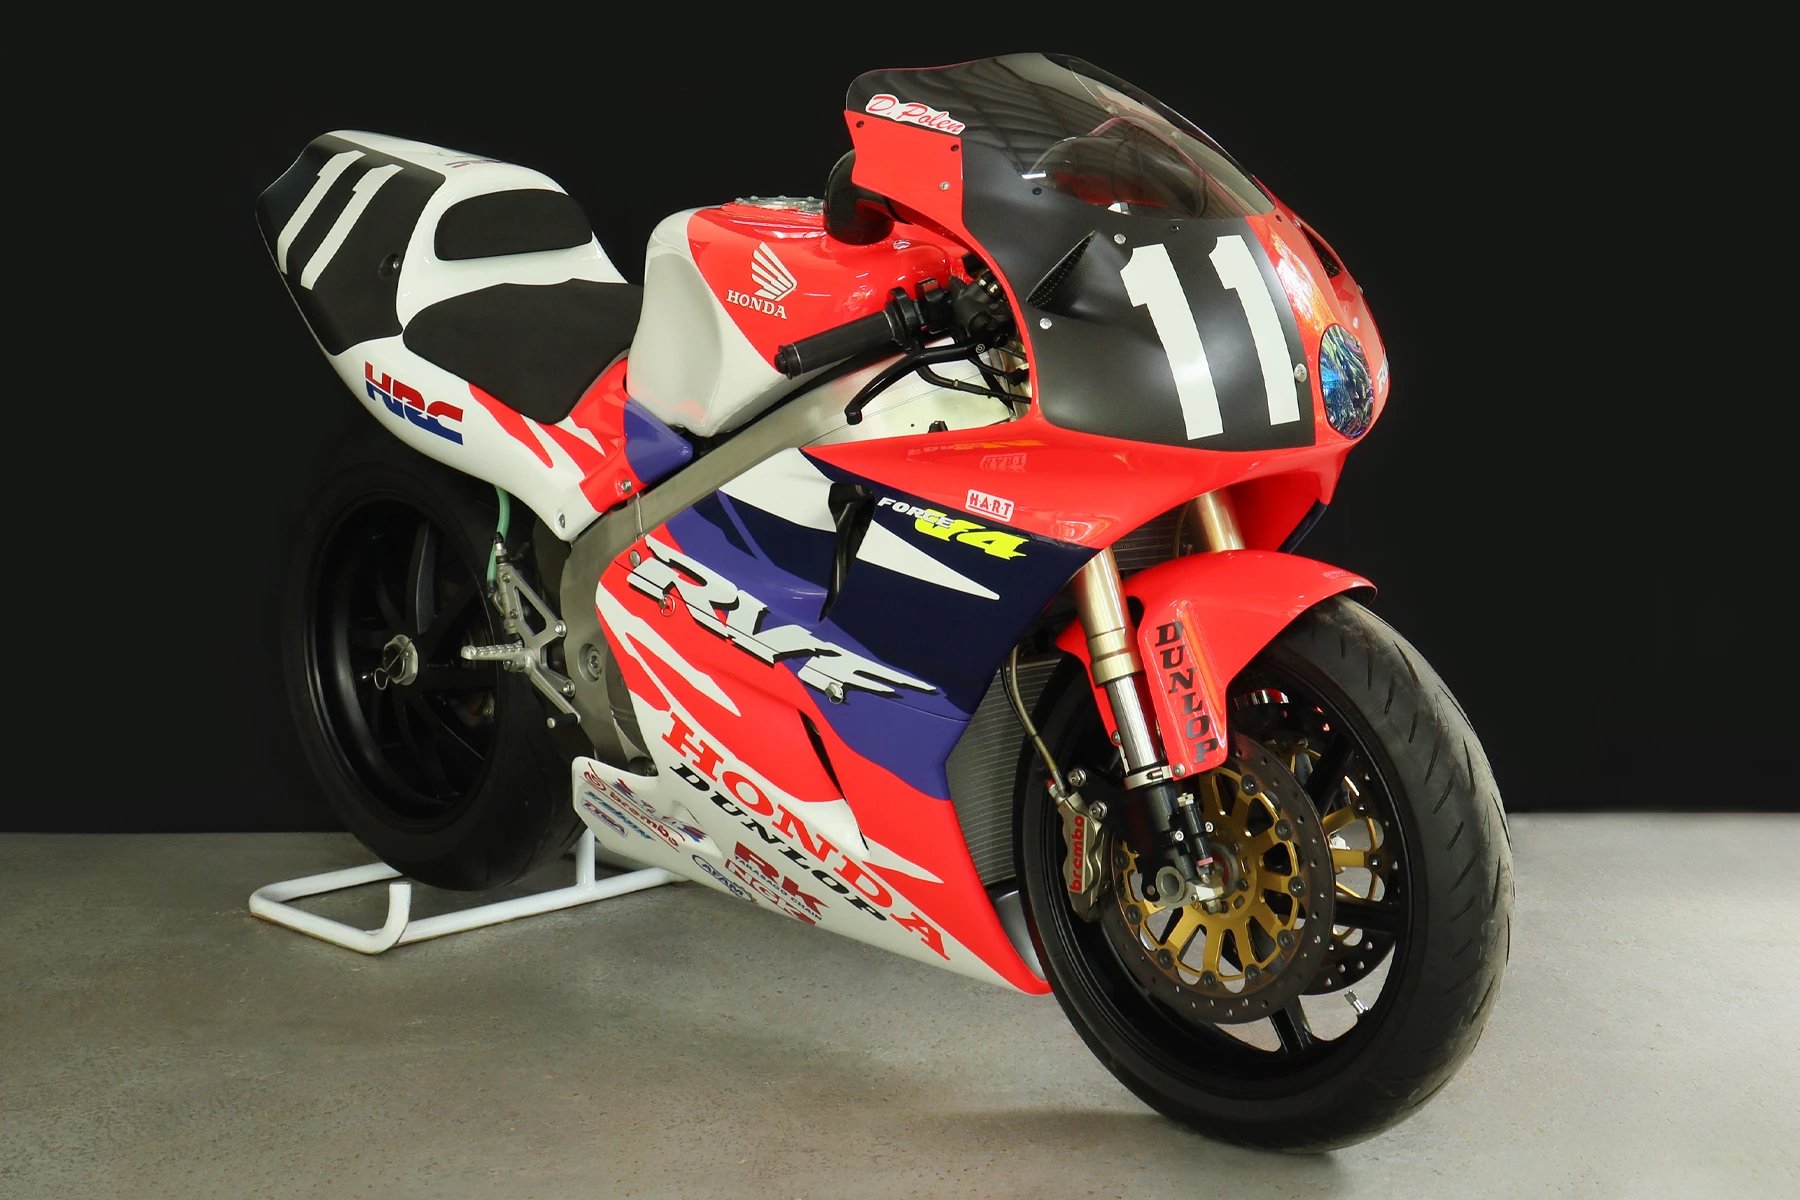
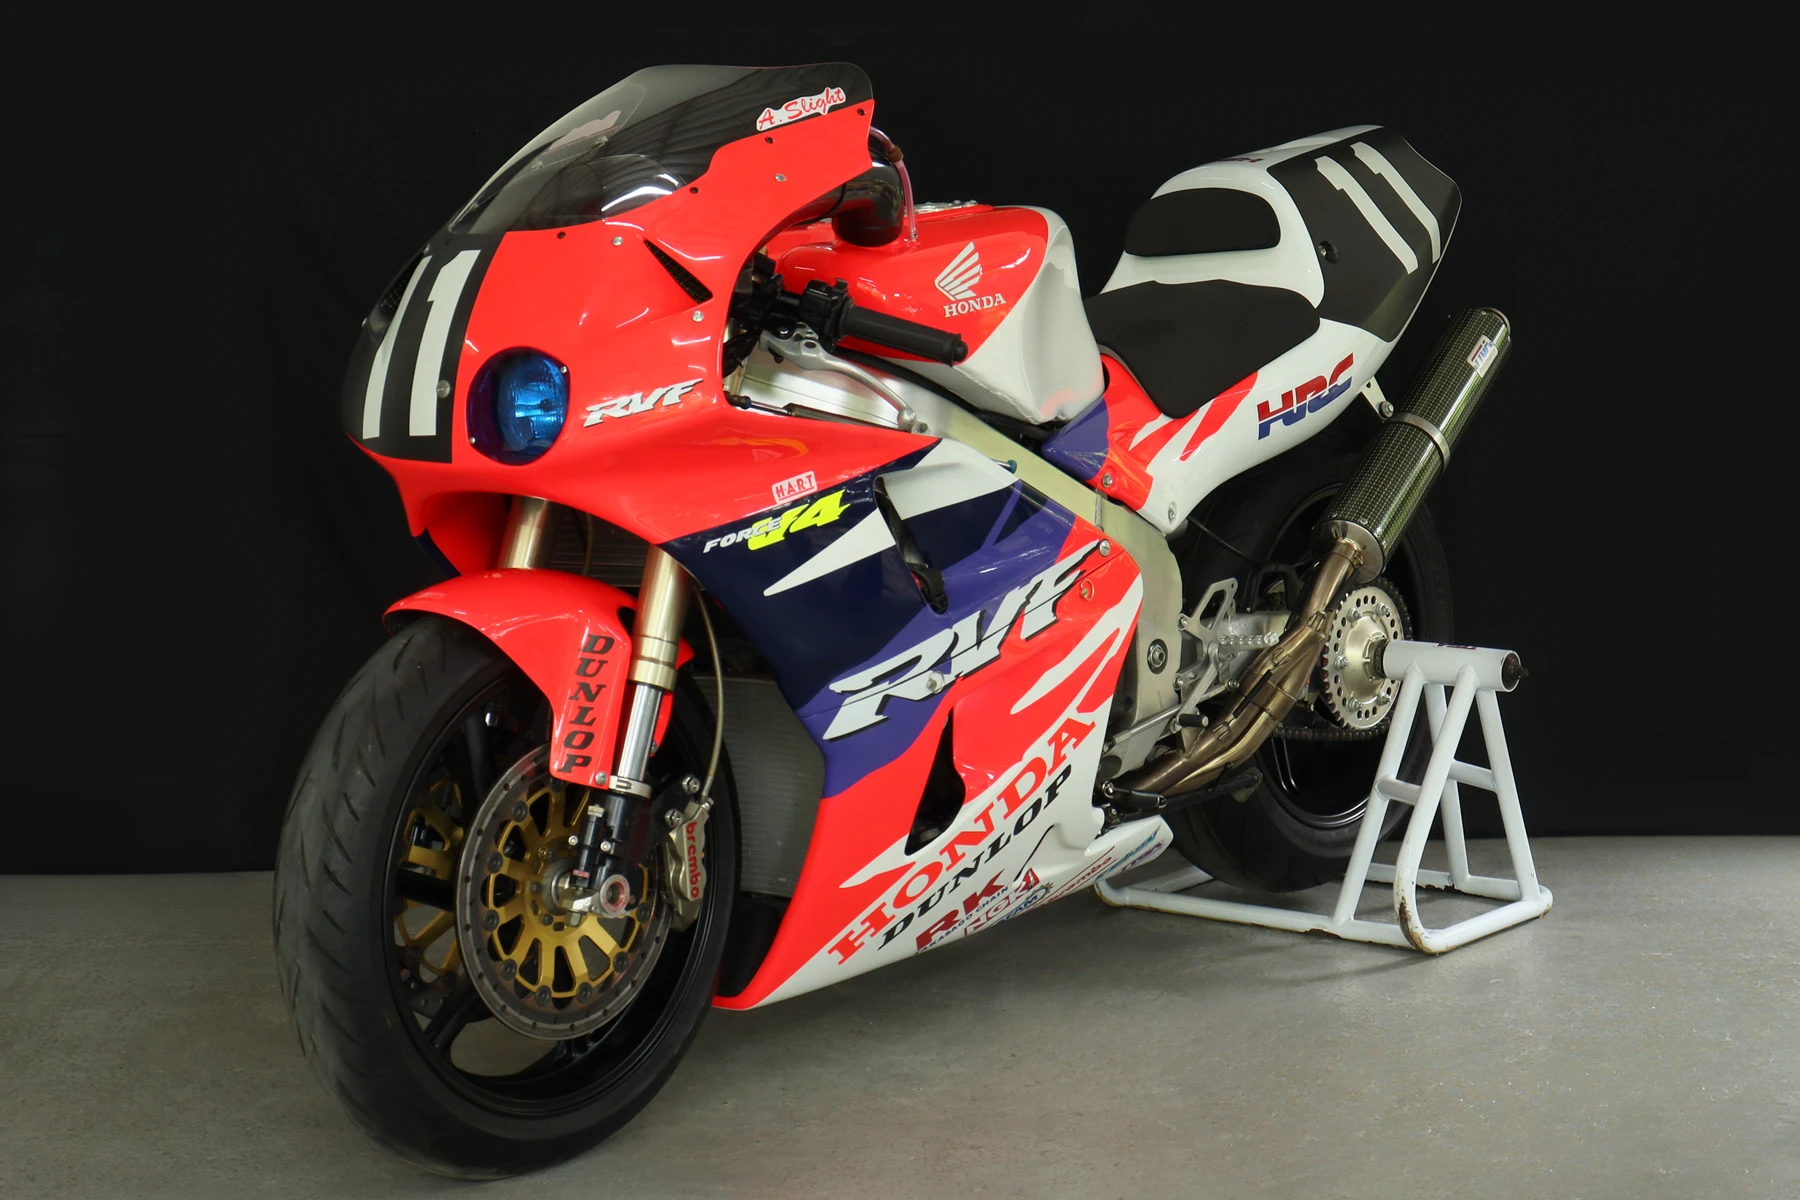
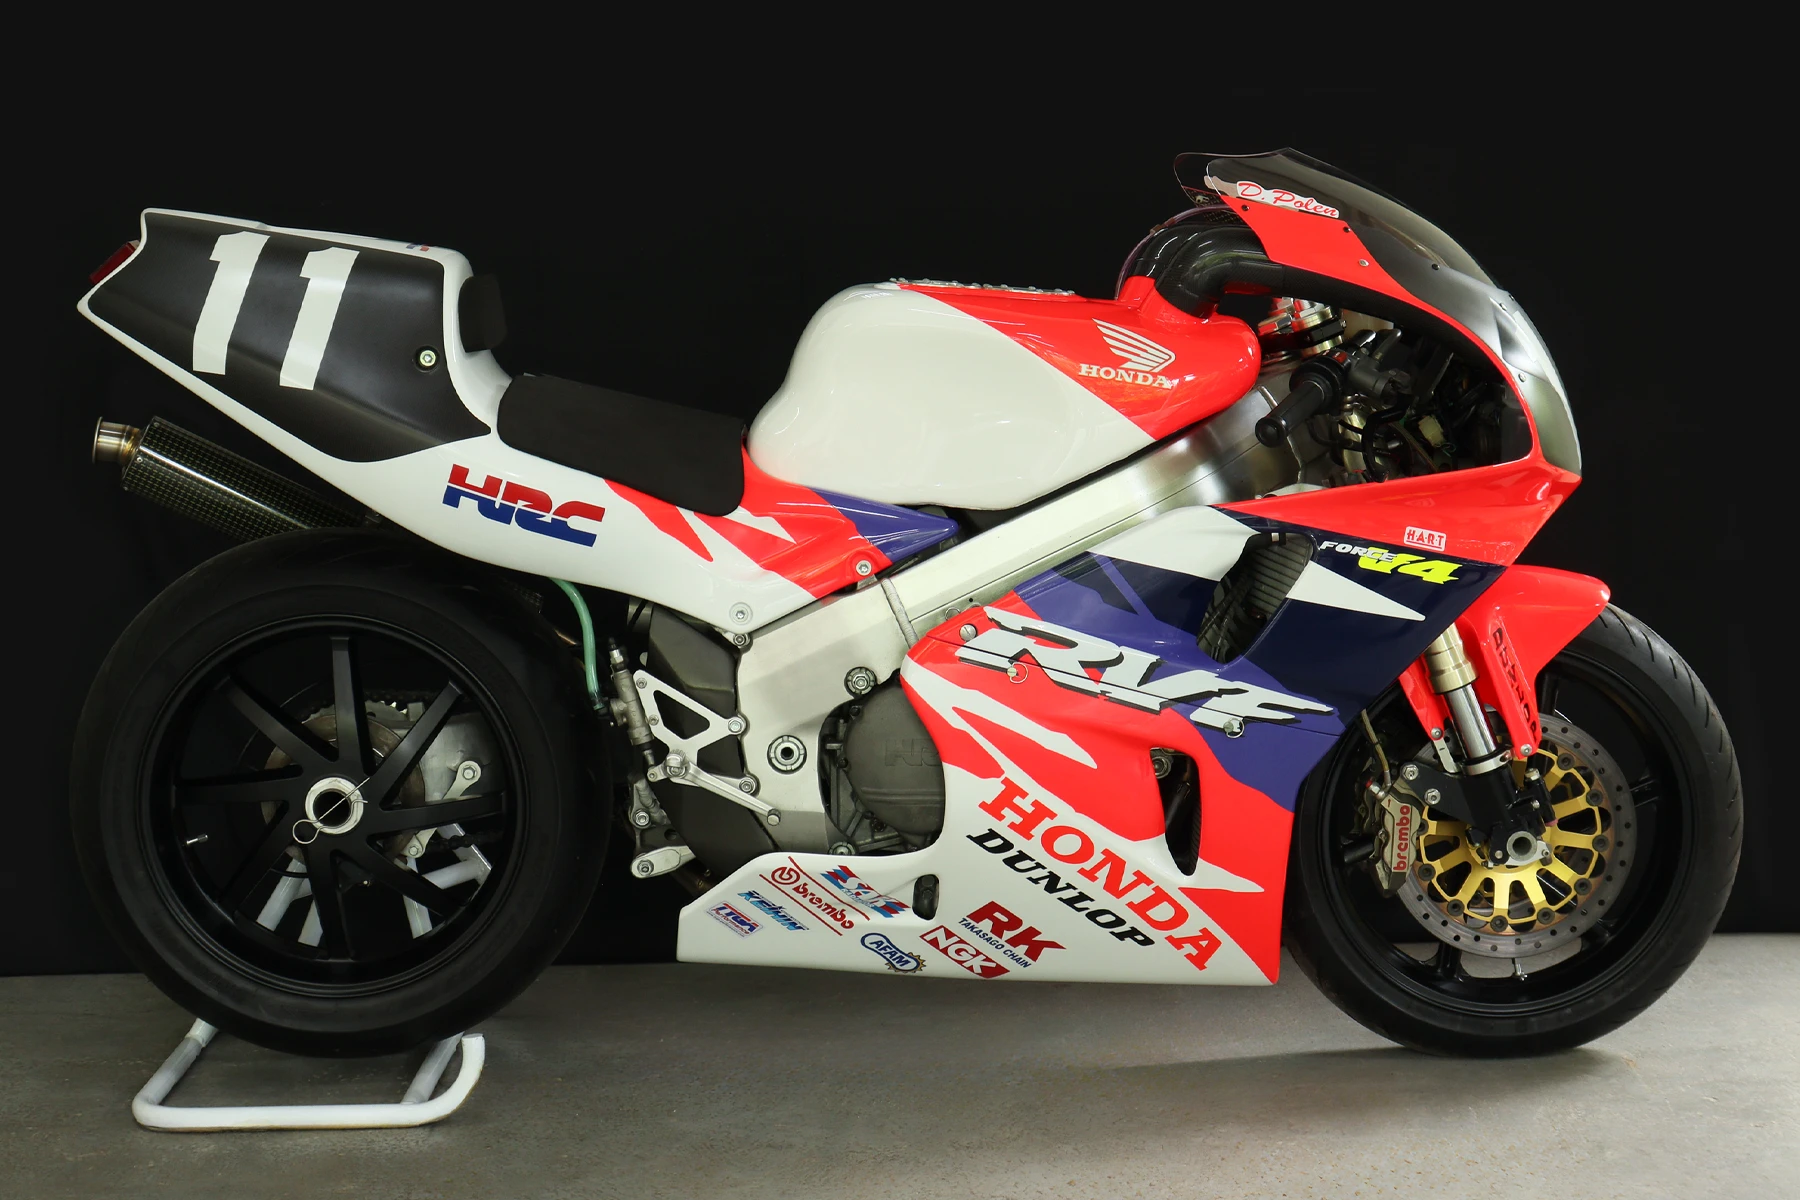
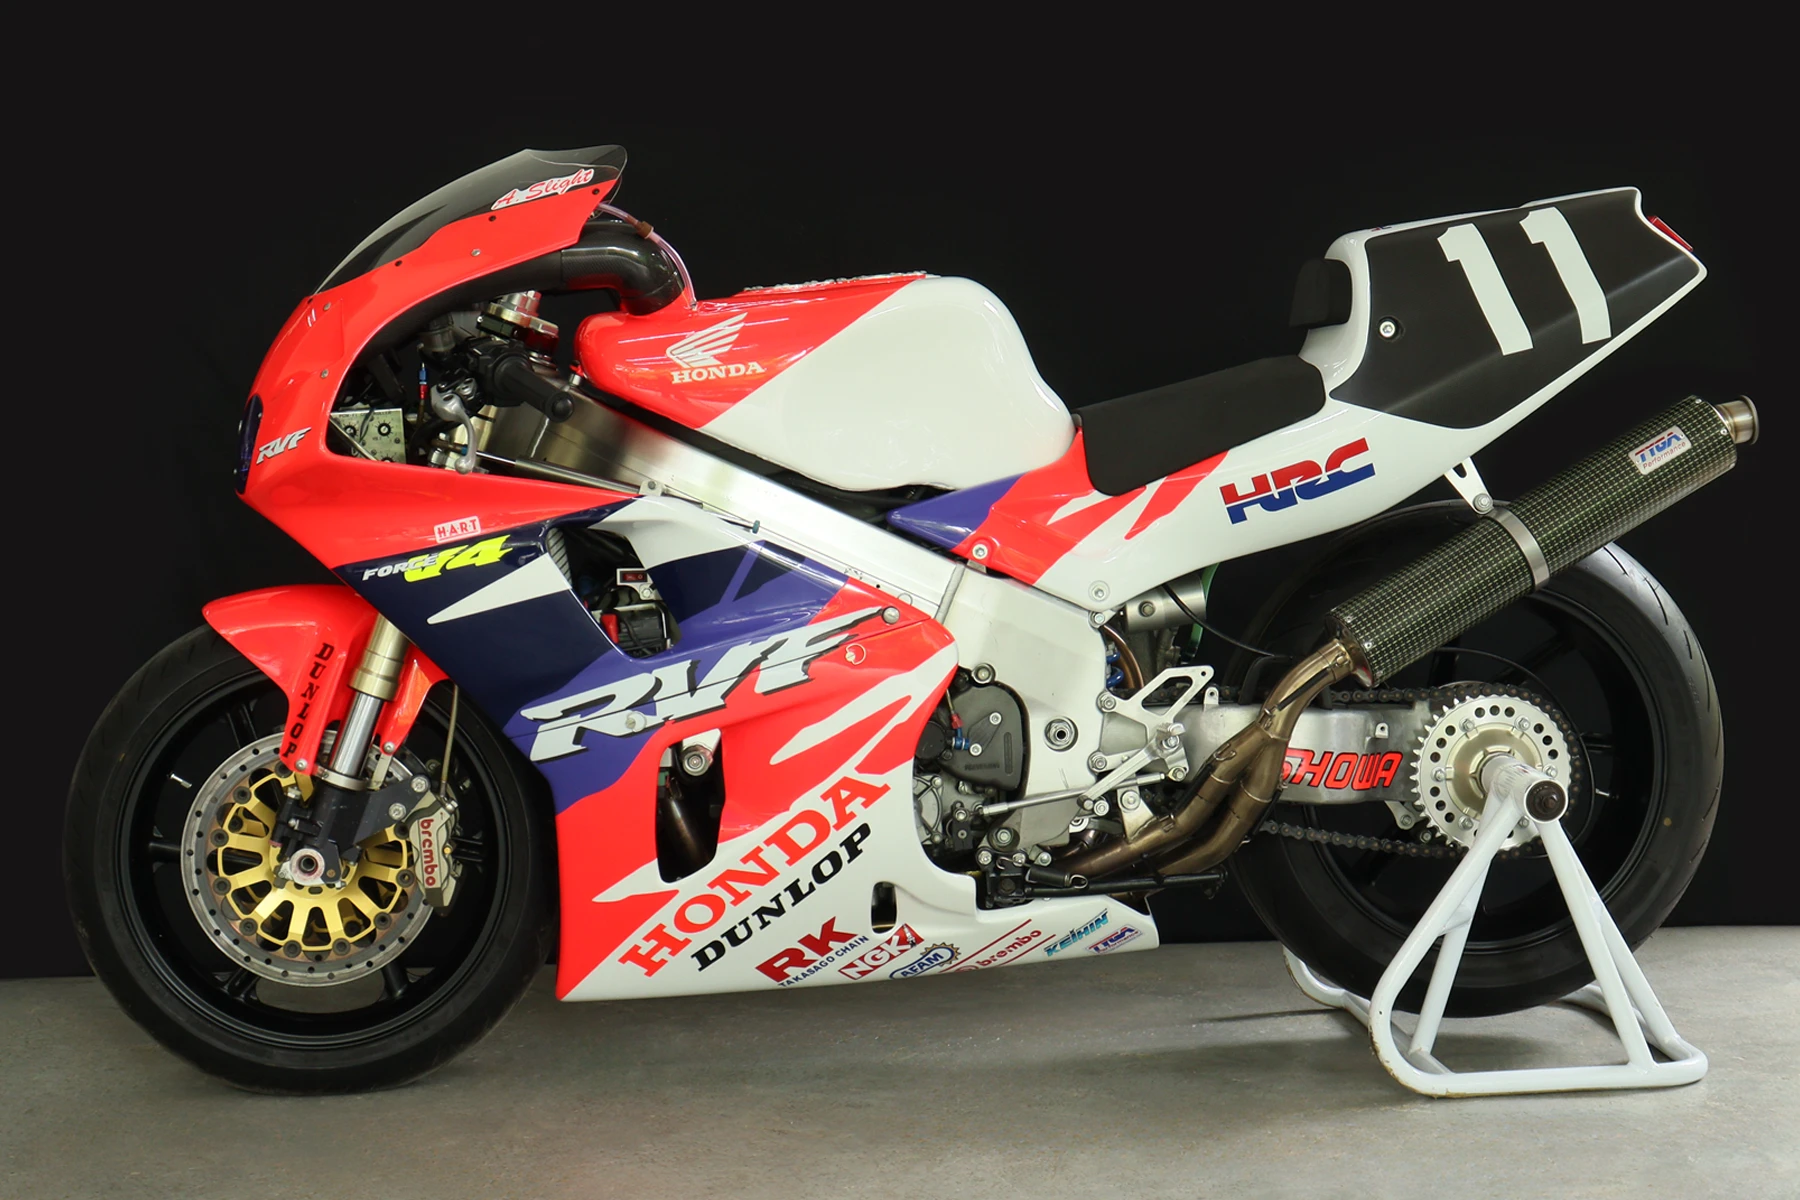
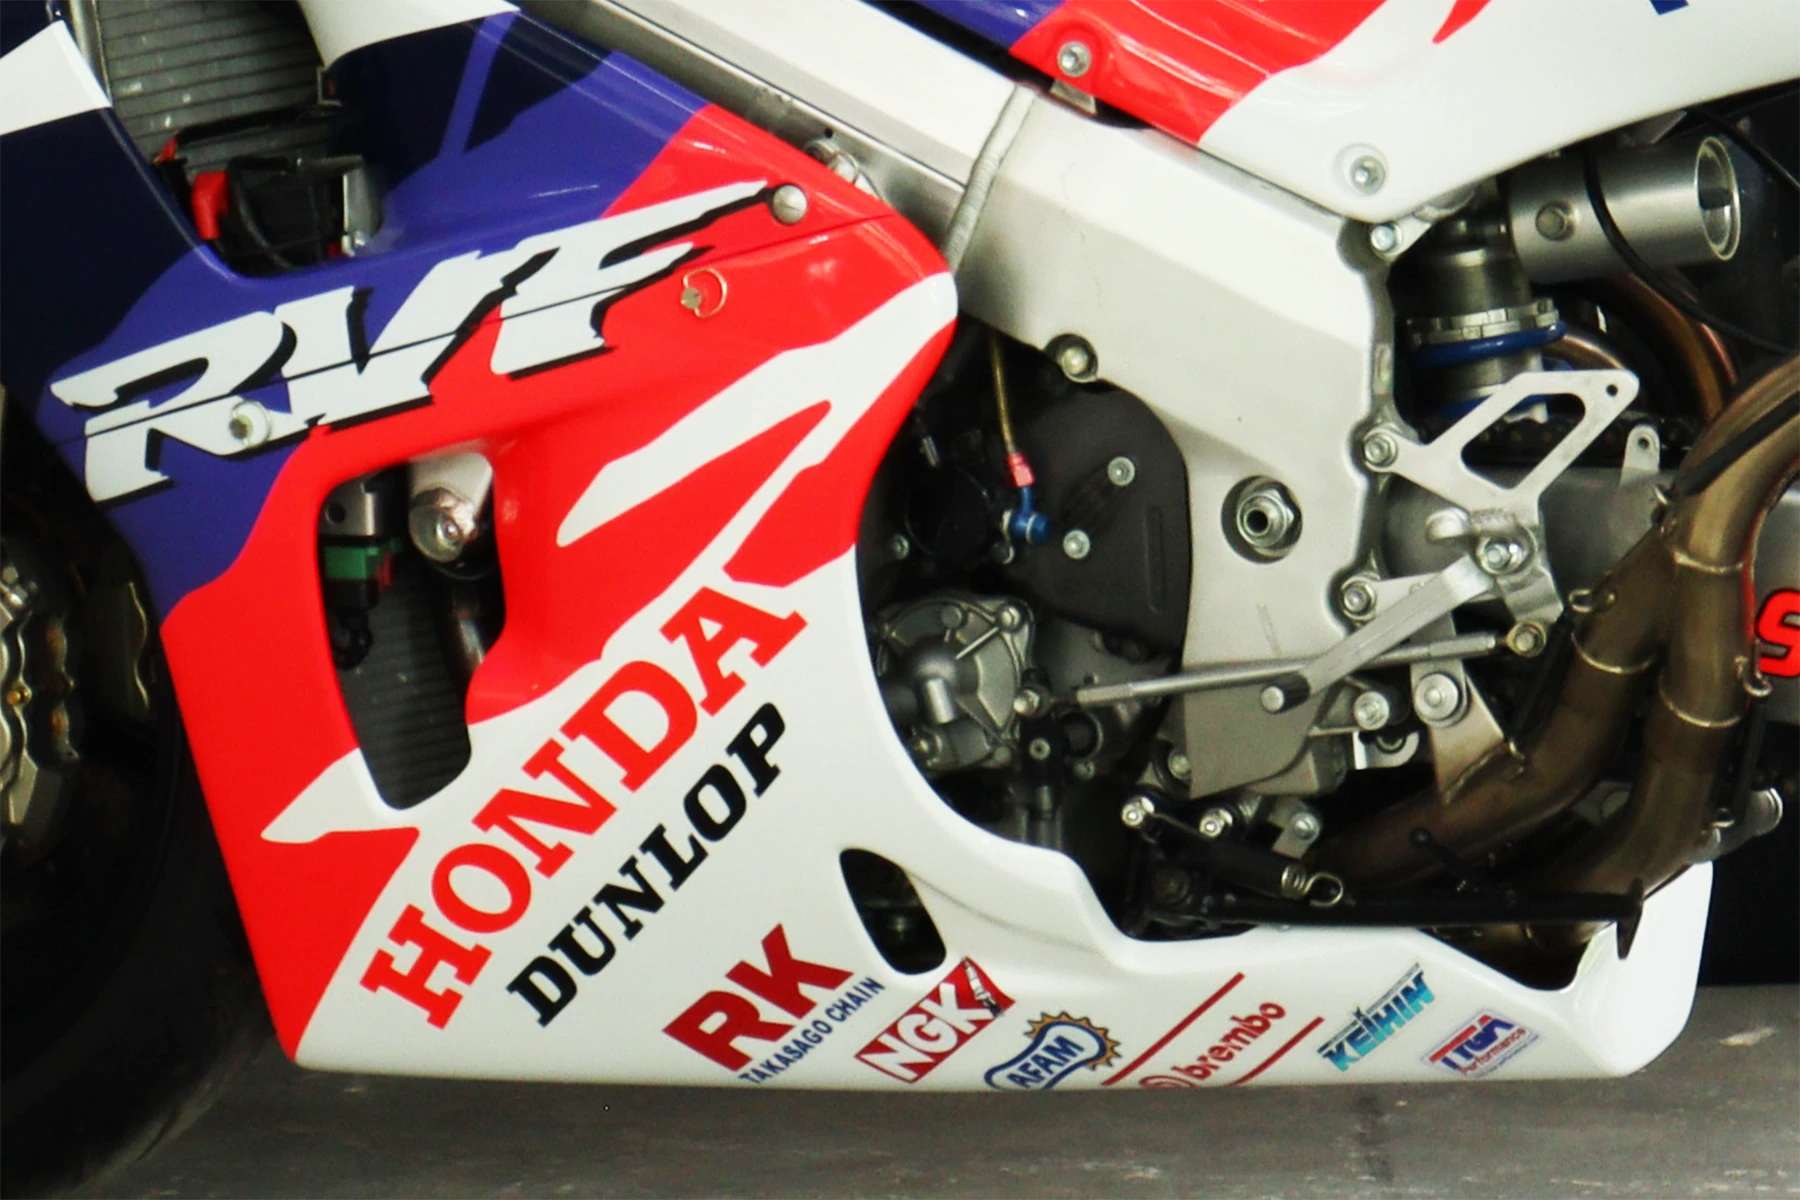
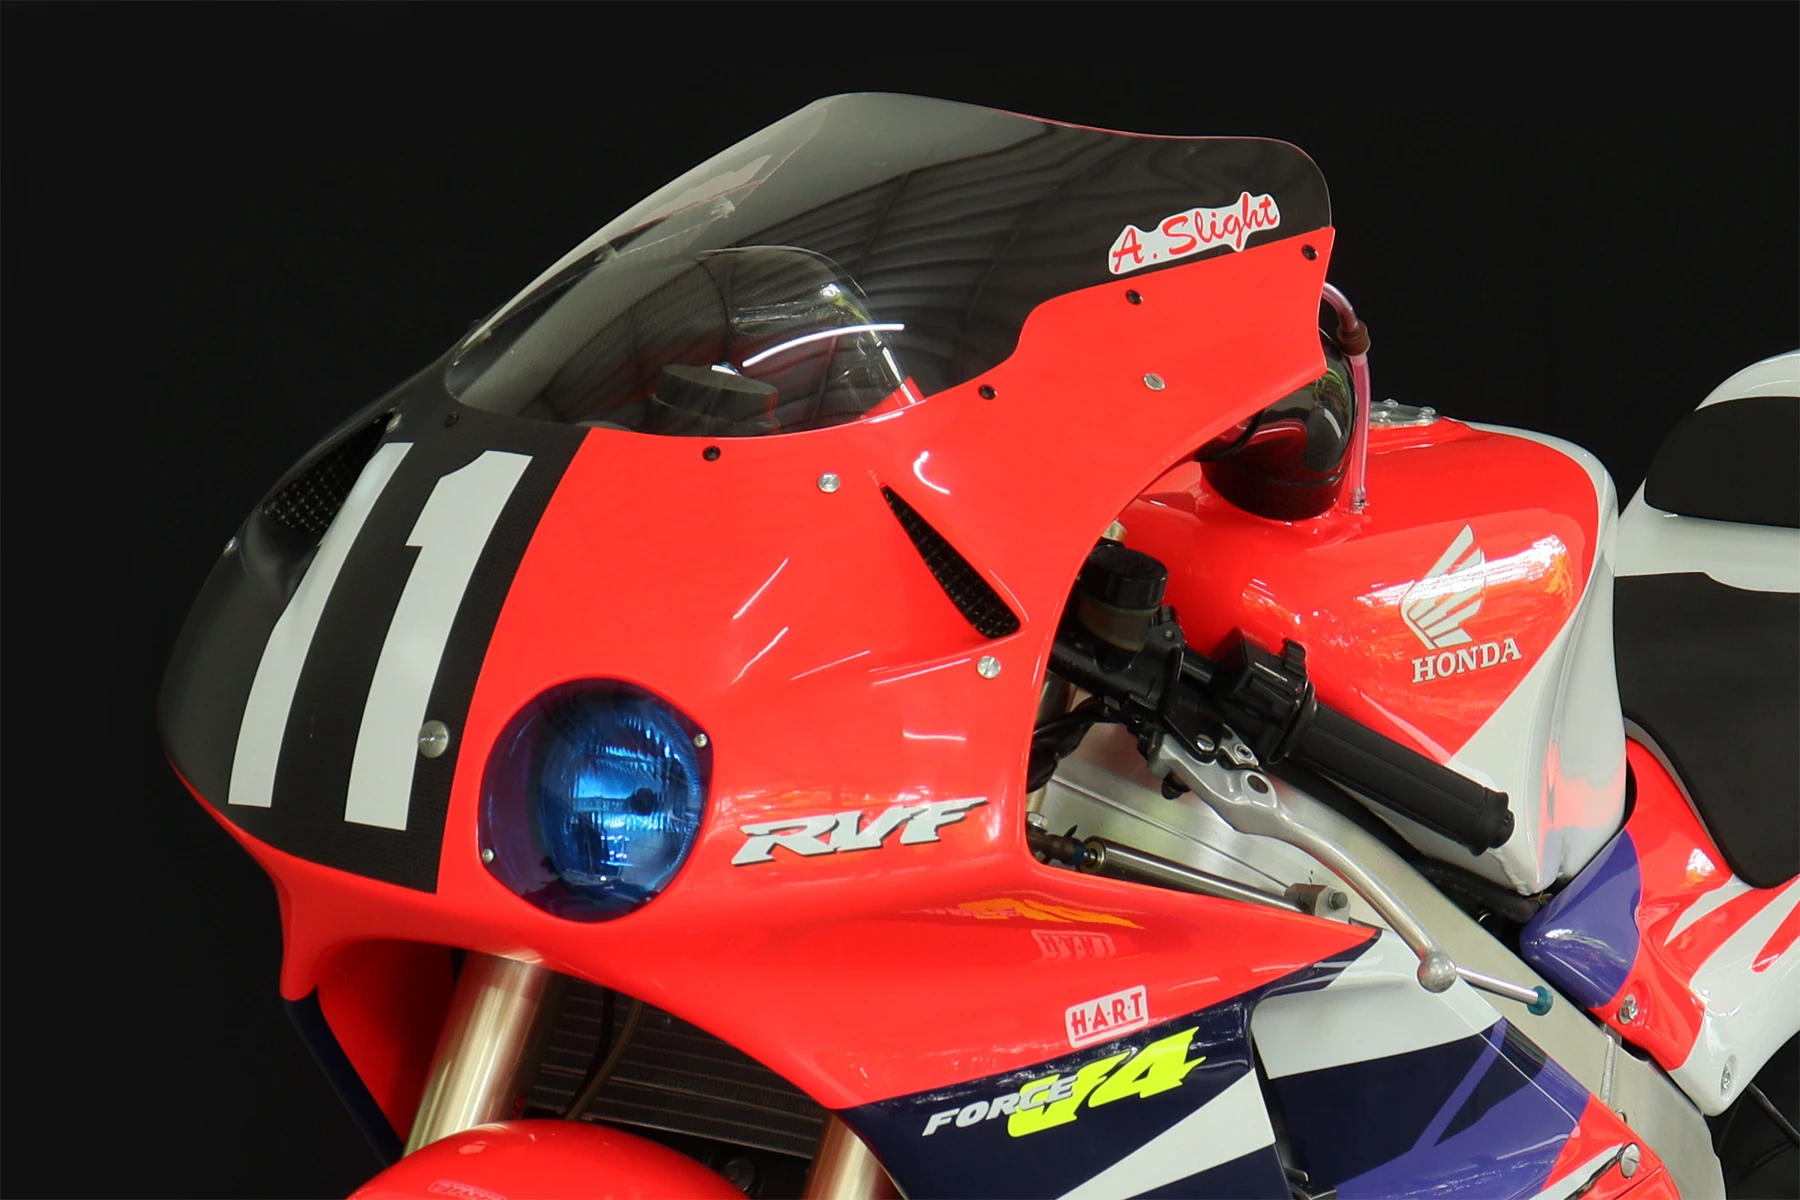
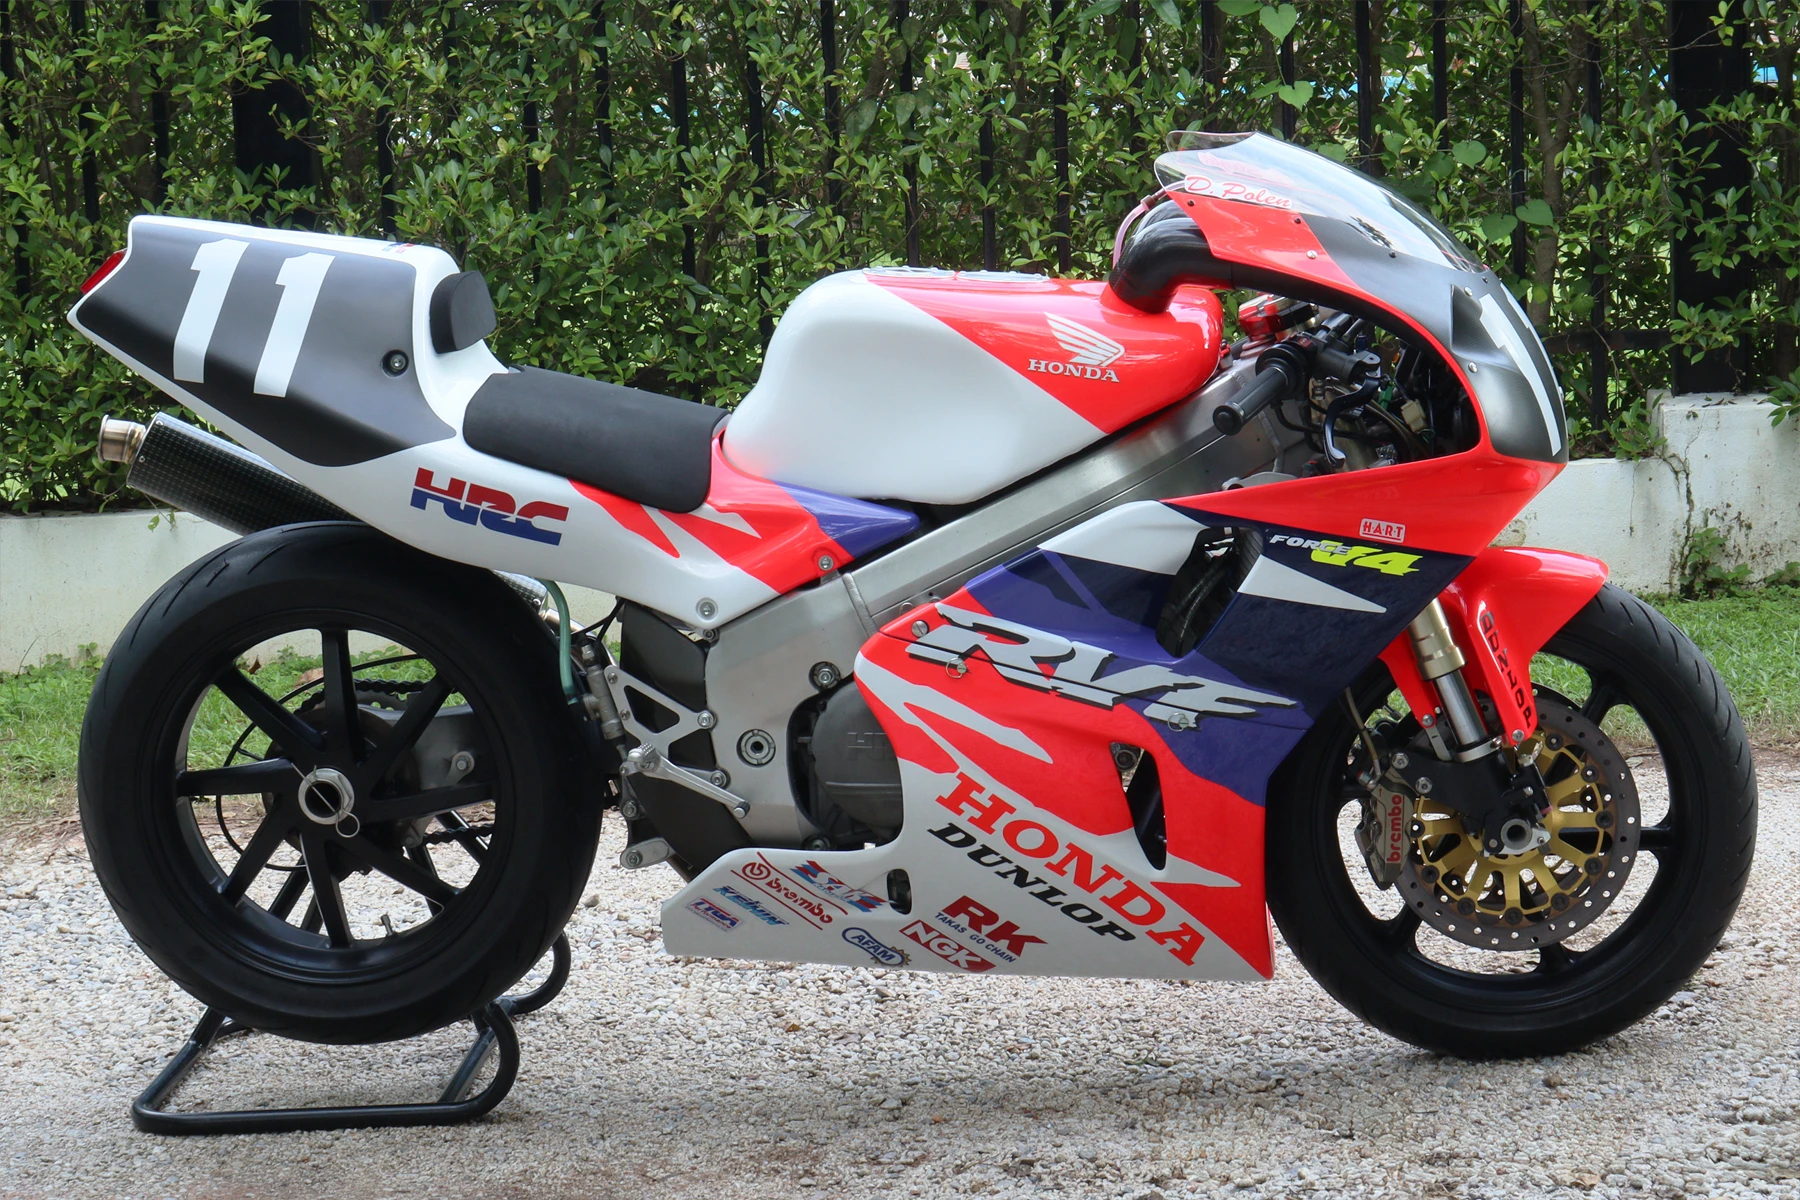
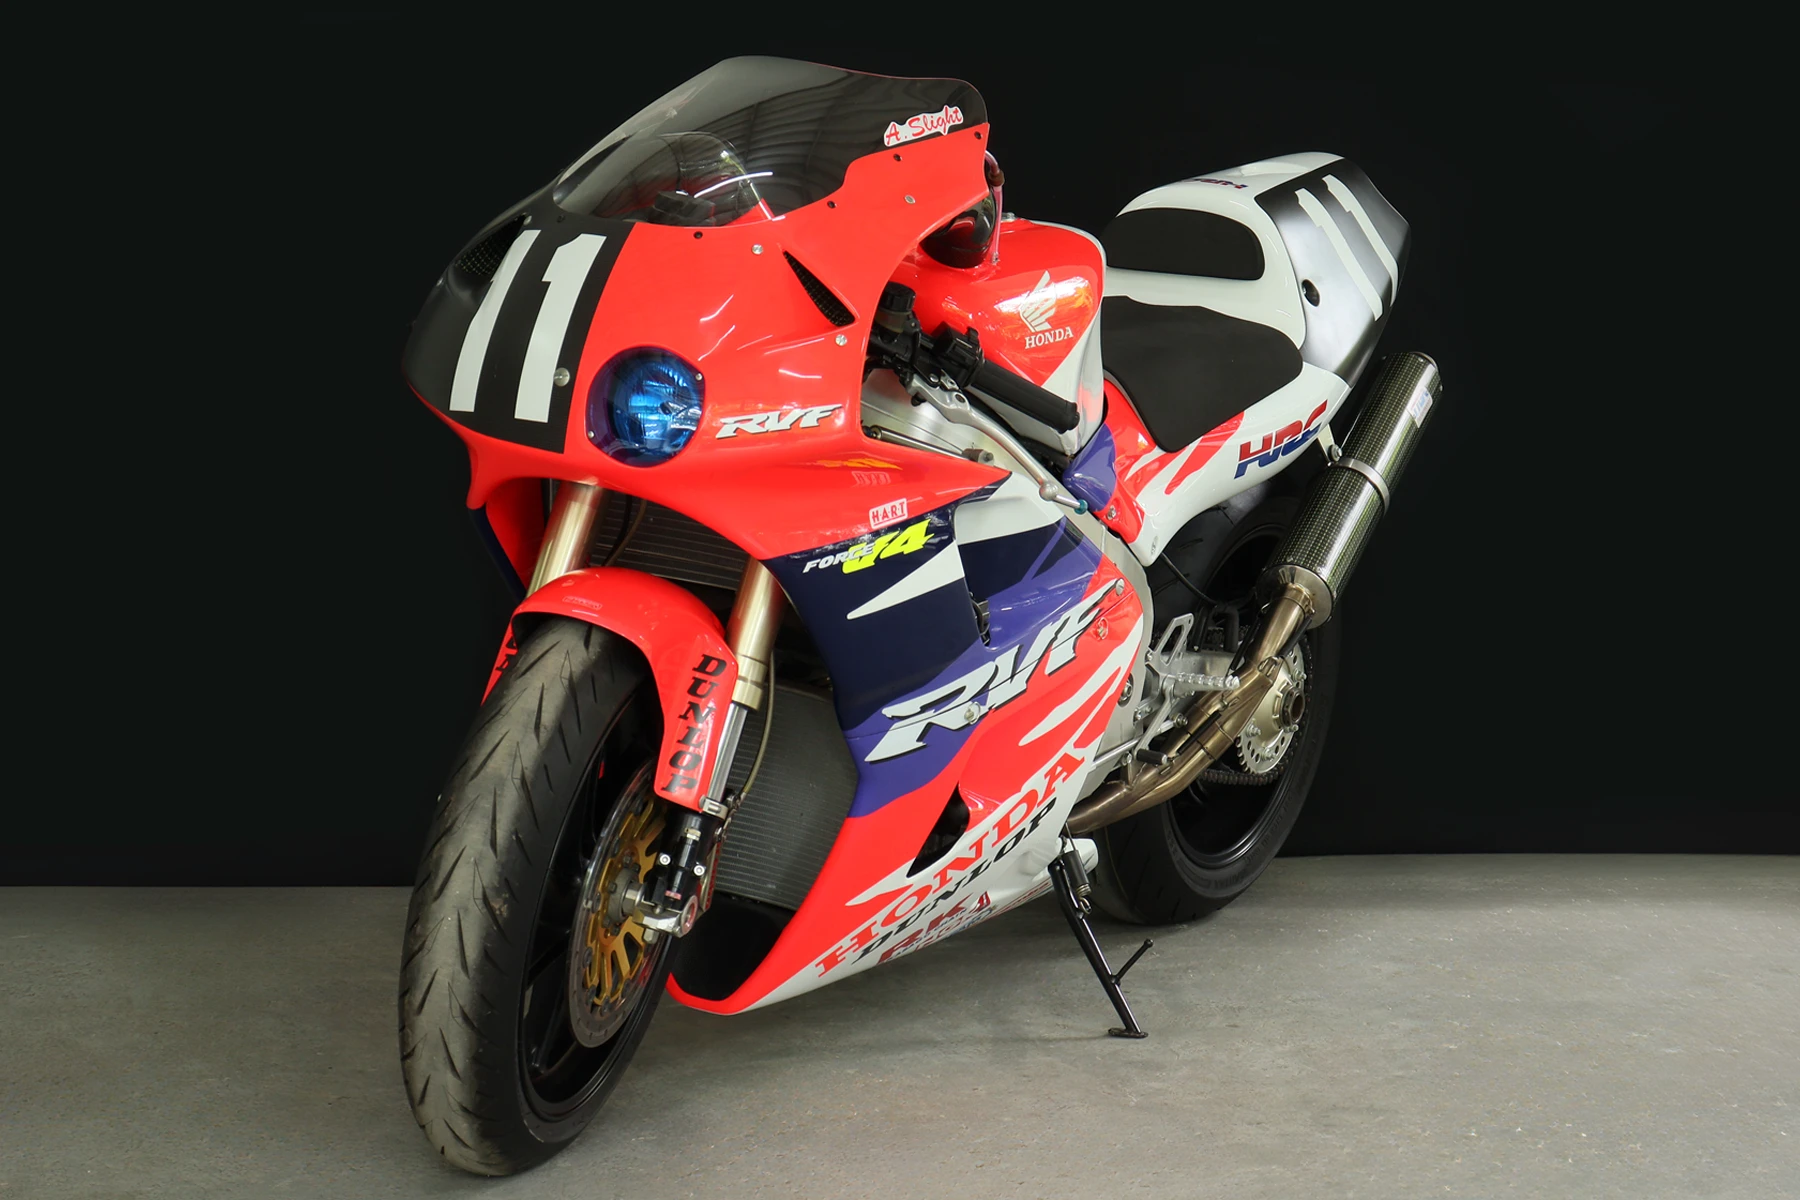
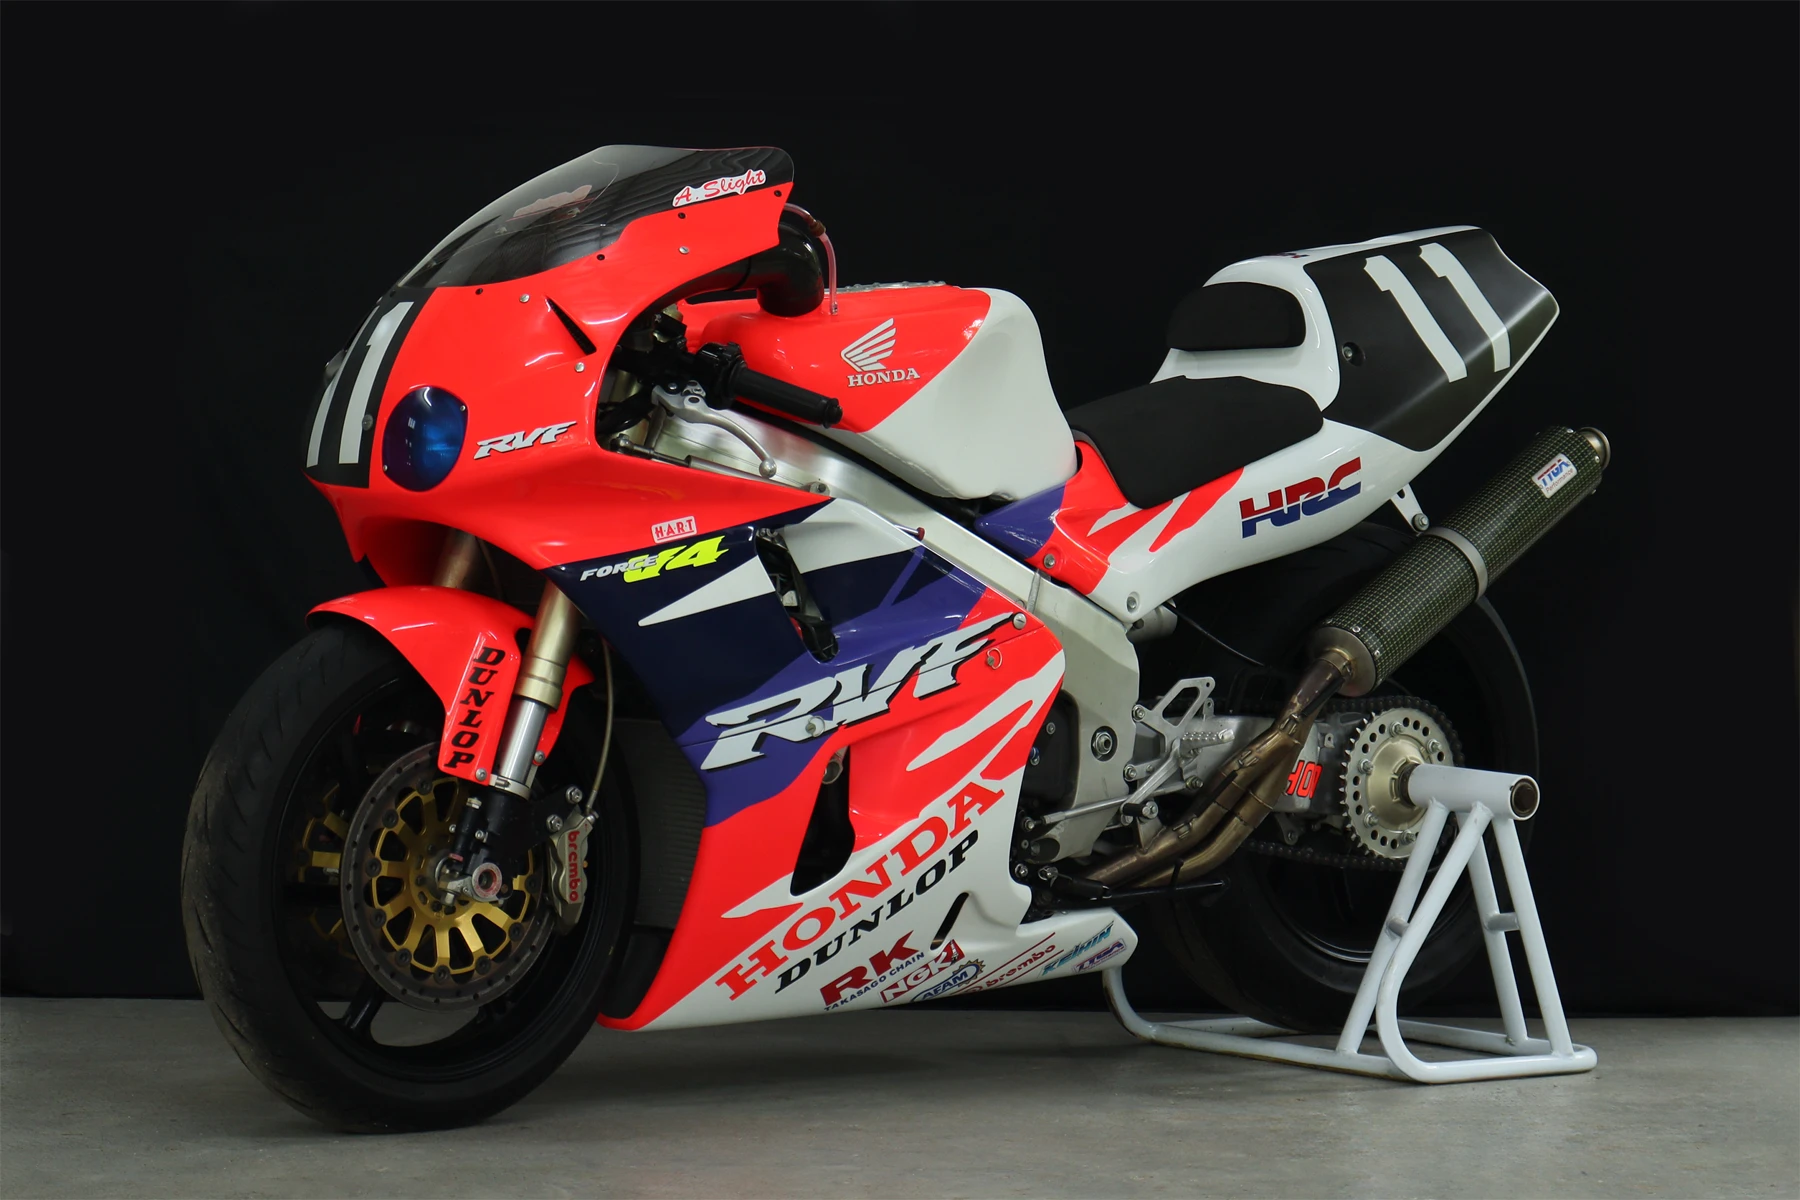
We should talk about the paintwork next. As I mentioned earlier, there are so many iconic paint schemes for these RVFs. I don’t know why, but the 1990s seemed to have more than their fair share of timeless liveries that remain as popular today as ever. There were the Lucky Strike, Rothmans, OKI, and Horipro RVFs. We love them all and have actually had RVF400s painted in each of those colours over the years. However, for this build, I felt that the original launch colours raced by the factory at Suzuka in 1994—which were also used on the production road bike—would be the most fitting tribute.
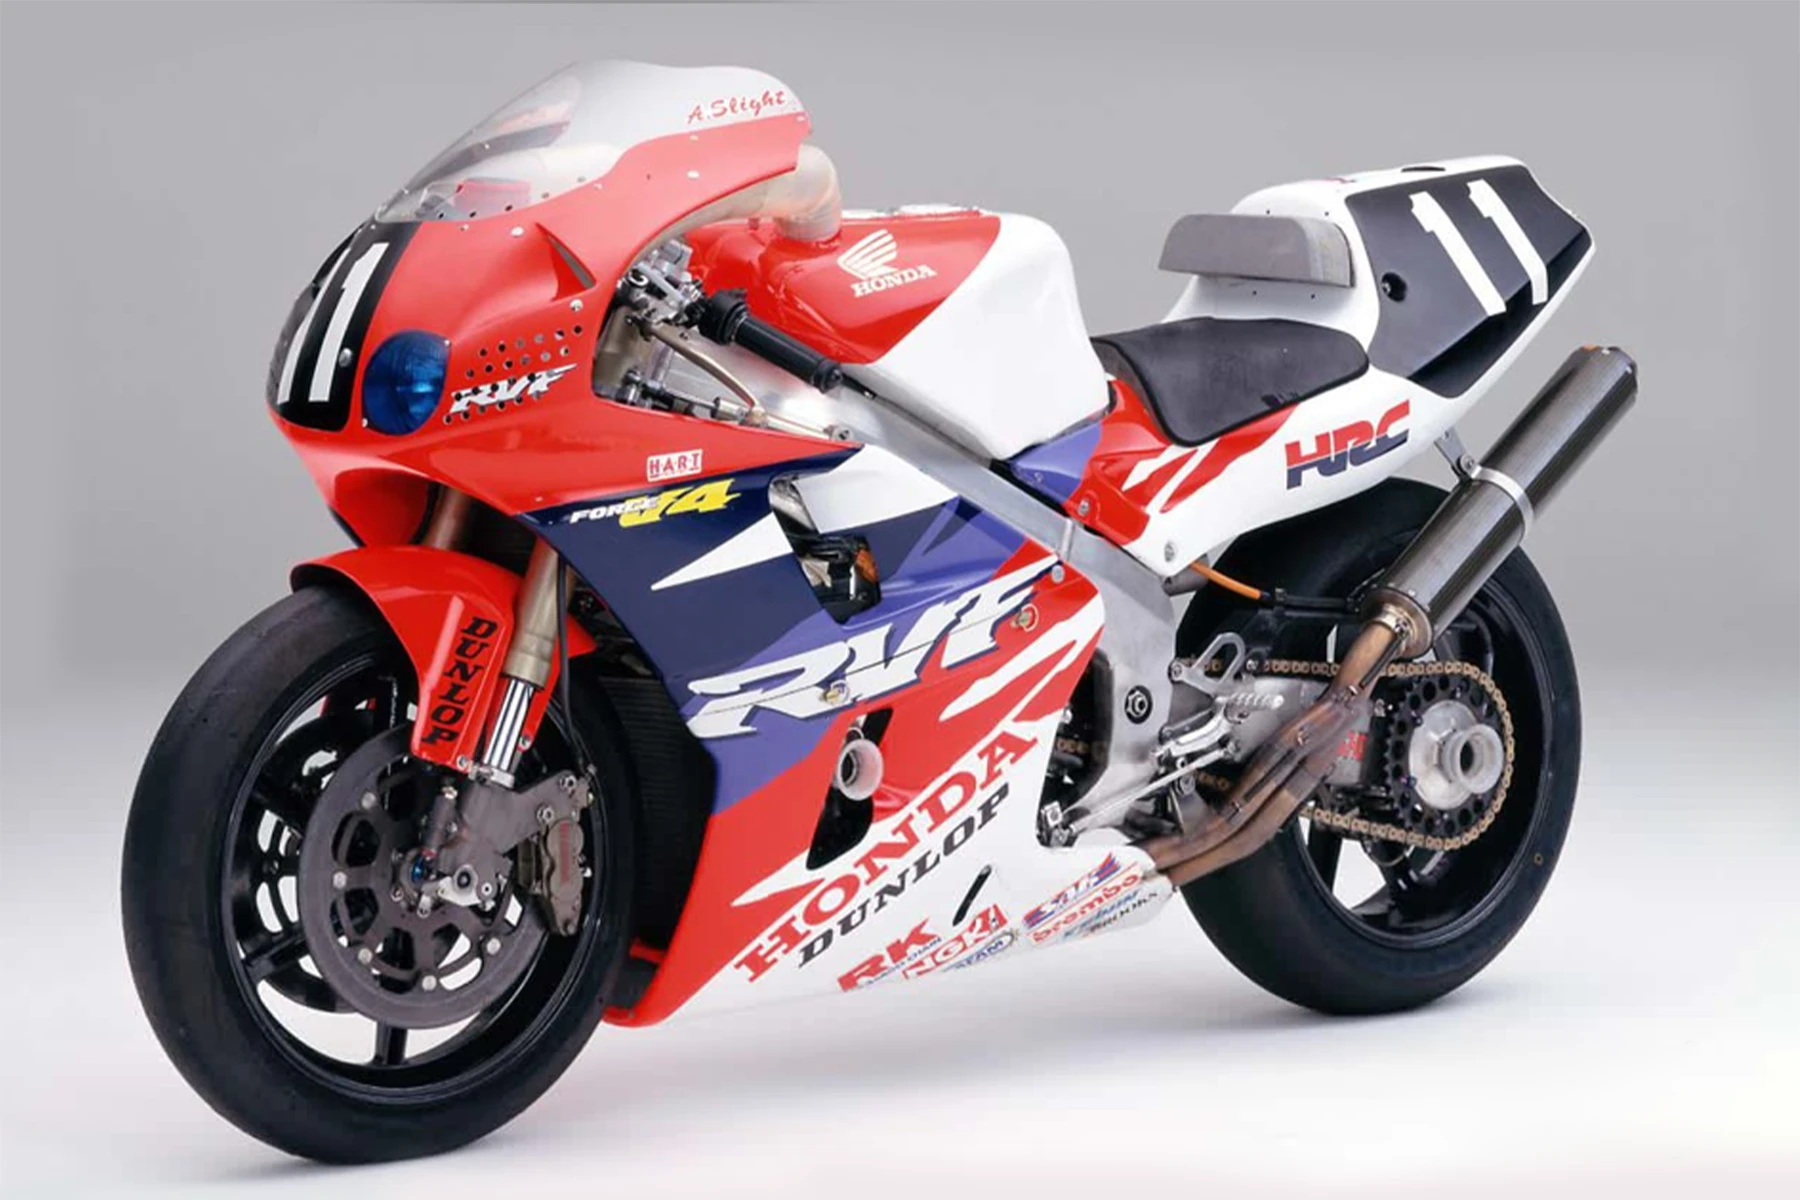
That said, the red had to be the exact correct shade, which threw a massive challenge into an otherwise routine paint job for K. Pong to spray. Previously on other builds, we had settled on a fluorescent orange-red. While that looks great, once you see the real machine in person at Motegi, you realize it is just not quite right. The problem then becomes: how do you replicate the exact factory colour? You can pick up some rattle cans and try mixing pink and orange-red fluorescents until they look close, but chances are it won’t be the exact shade. In any case, without an original reference piece right in front of you, how can you ever be truly confident?
This is where you need a bit of luck. For us, that luck came in the form of a friend with deep connections to European race teams. A few years back, he sold us a genuine, factory NSR250 fuel tank from 1994 or 1995. Originally, I just wanted the tank as a reference to help us manufacture a similar unit for the NX5, but what made it incredibly valuable now was that it was finished in the original HRC factory colours. It possessed the exact “pink-red” hue I was looking for.
You would think it would be easy from that point on, but this specific paint is notoriously difficult to match across different lighting conditions and viewing angles. Eventually, K. Pong cracked the formula and we were in business. Even then, it was no easy proposition; he had to lay down six precise coats just to get the correct coverage and depth.
The decals were another massive challenge. K. Pong’s sticker man—who had always been our go-to guy when it came to producing vinyl graphics—decided to retire at this exact moment. I am not sure if he got so much business from TYGA that he saved up enough to retire to Bermuda, or if our absolute insistence on accuracy gave him a nervous breakdown. I will let you guess, but in any case, it left us in a bit of a mess!
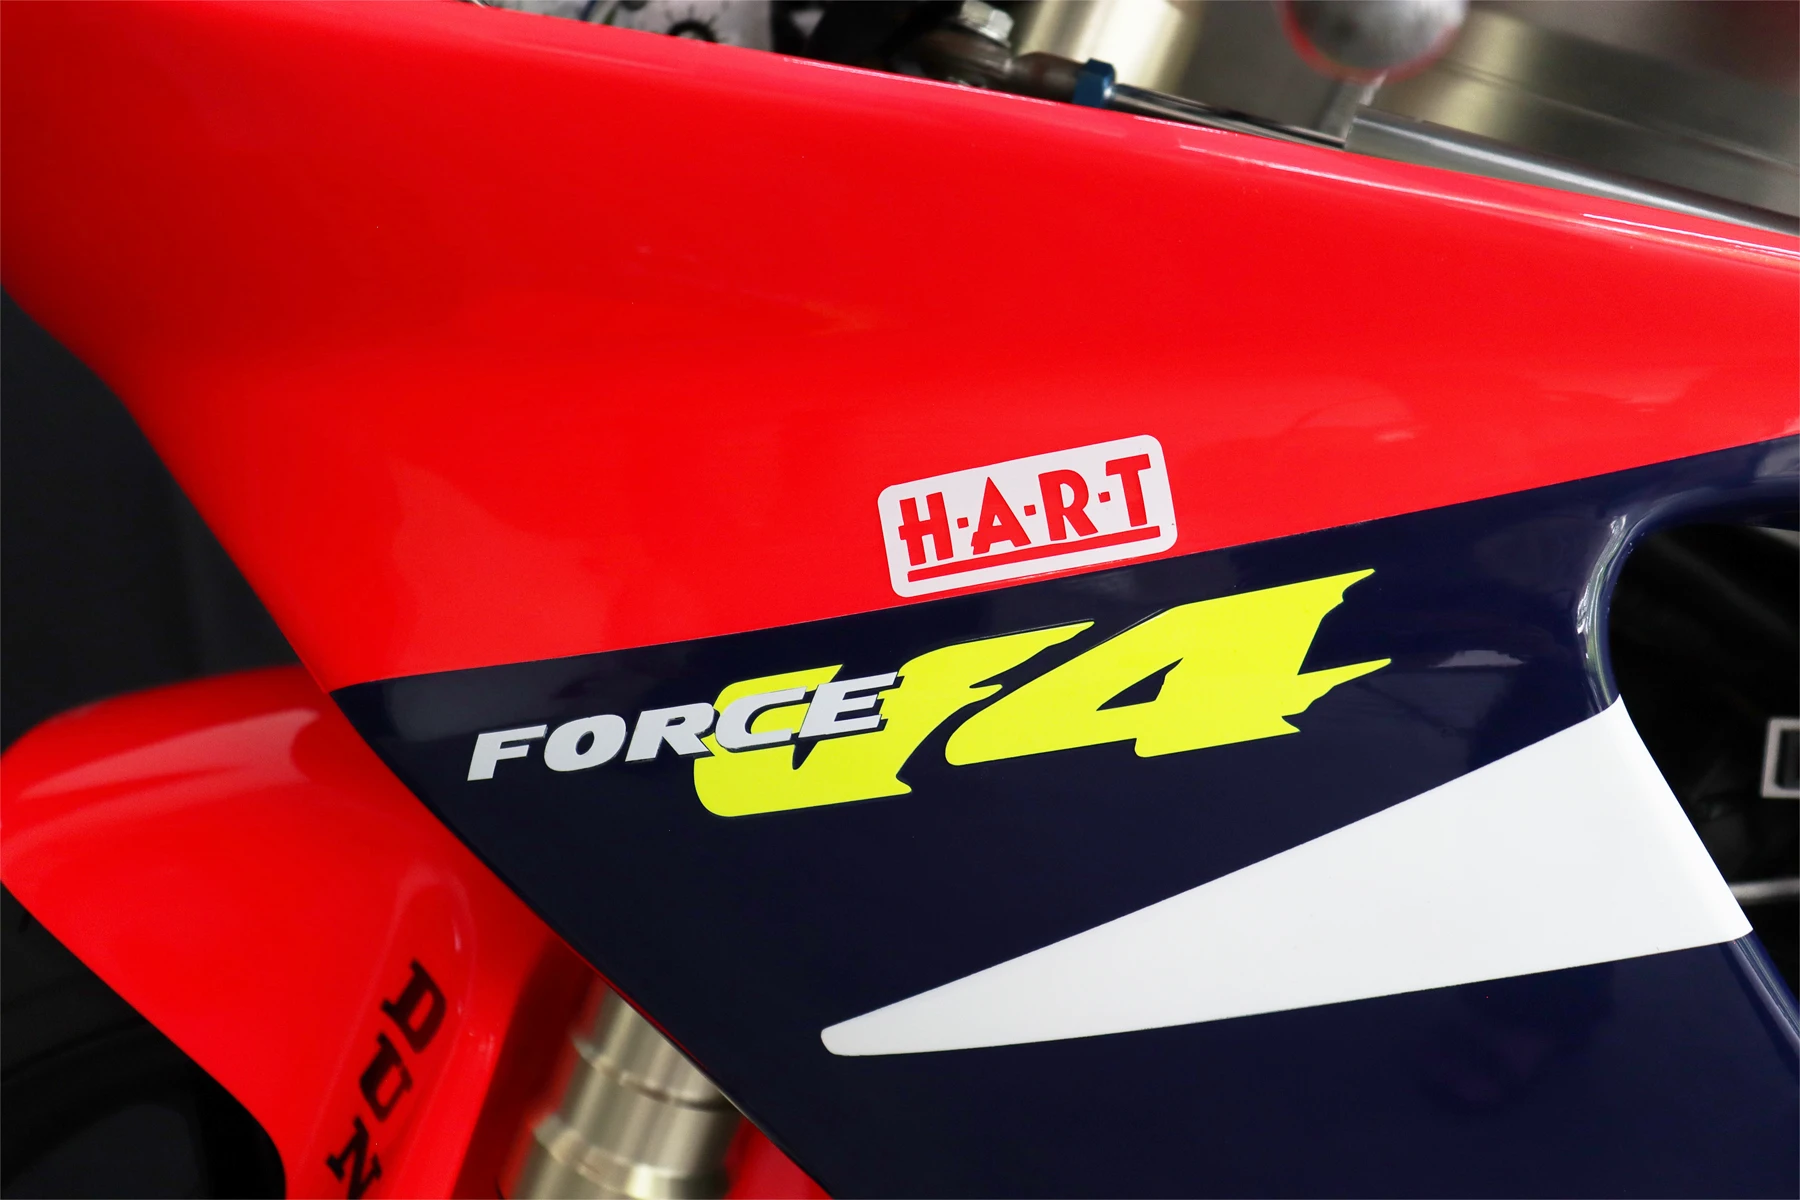
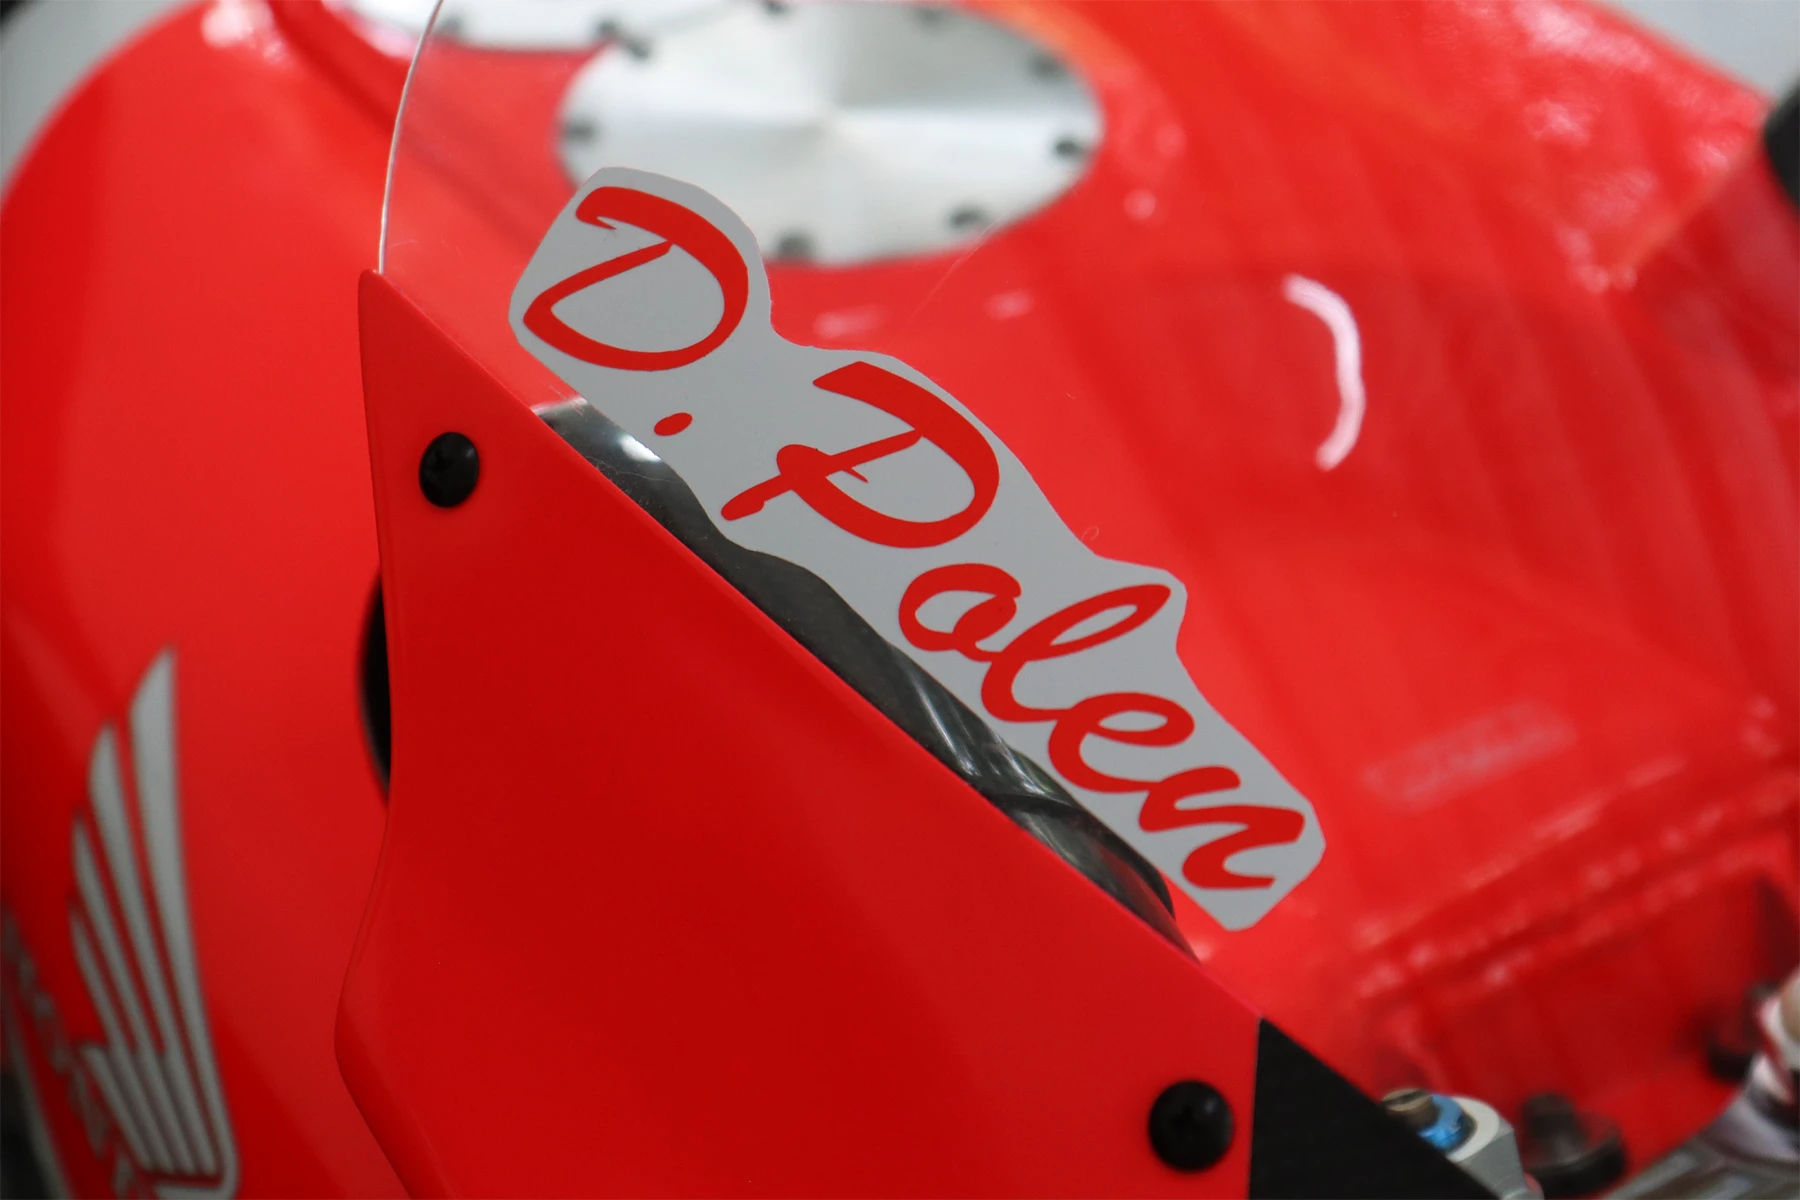
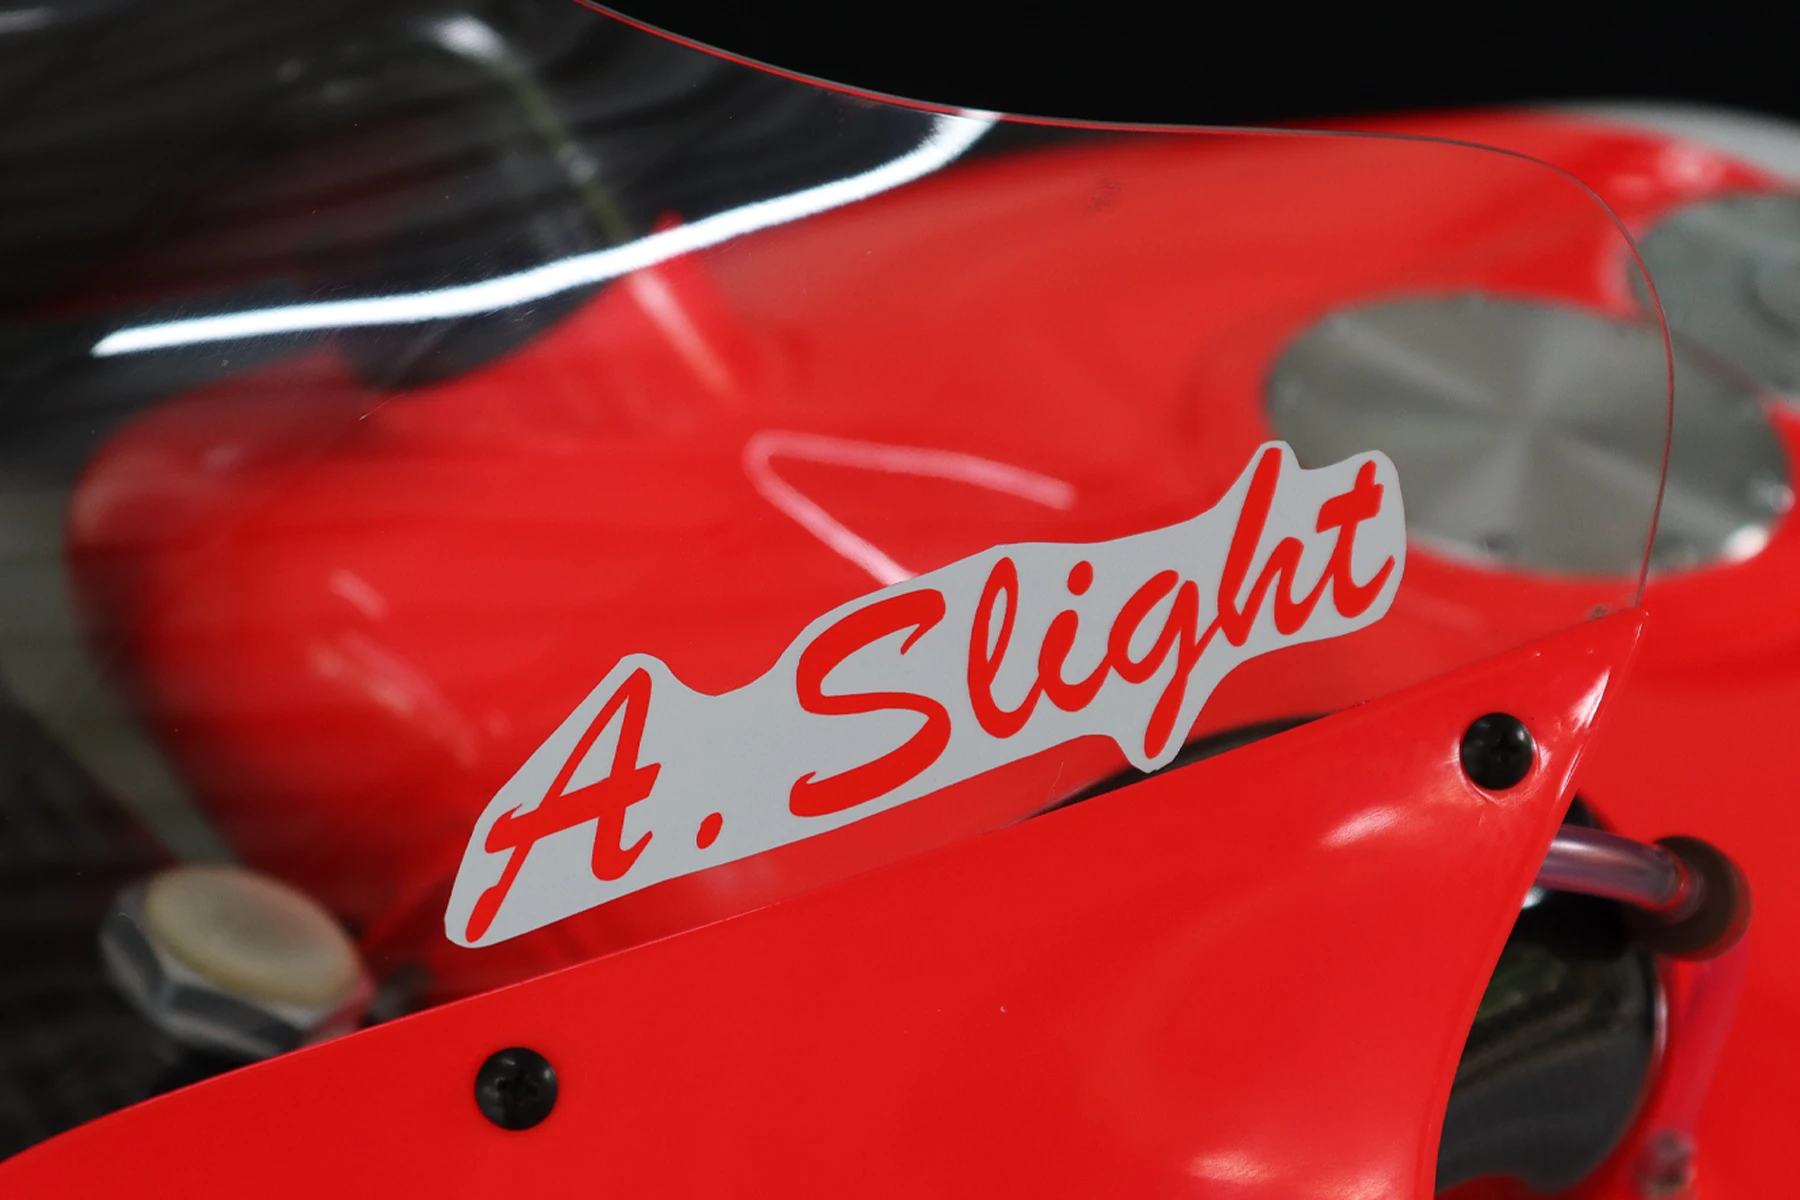
Luckily, he offered to sell his sticker business to us for a reasonable sum and even threw in a training session for our staff. Overnight, our stock and office team became part-time graphic designers, and they successfully managed to produce the full suite of decals you see here including one that wasn’t there on the original bike; can you guess? We even managed to make a reasonable attempt at replicating the windscreen stickers. I couldn’t find a completely clear photo of the originals, so I used the closest font I could find and we cut them from that. If anyone out there has a better reference, we would love to see it.
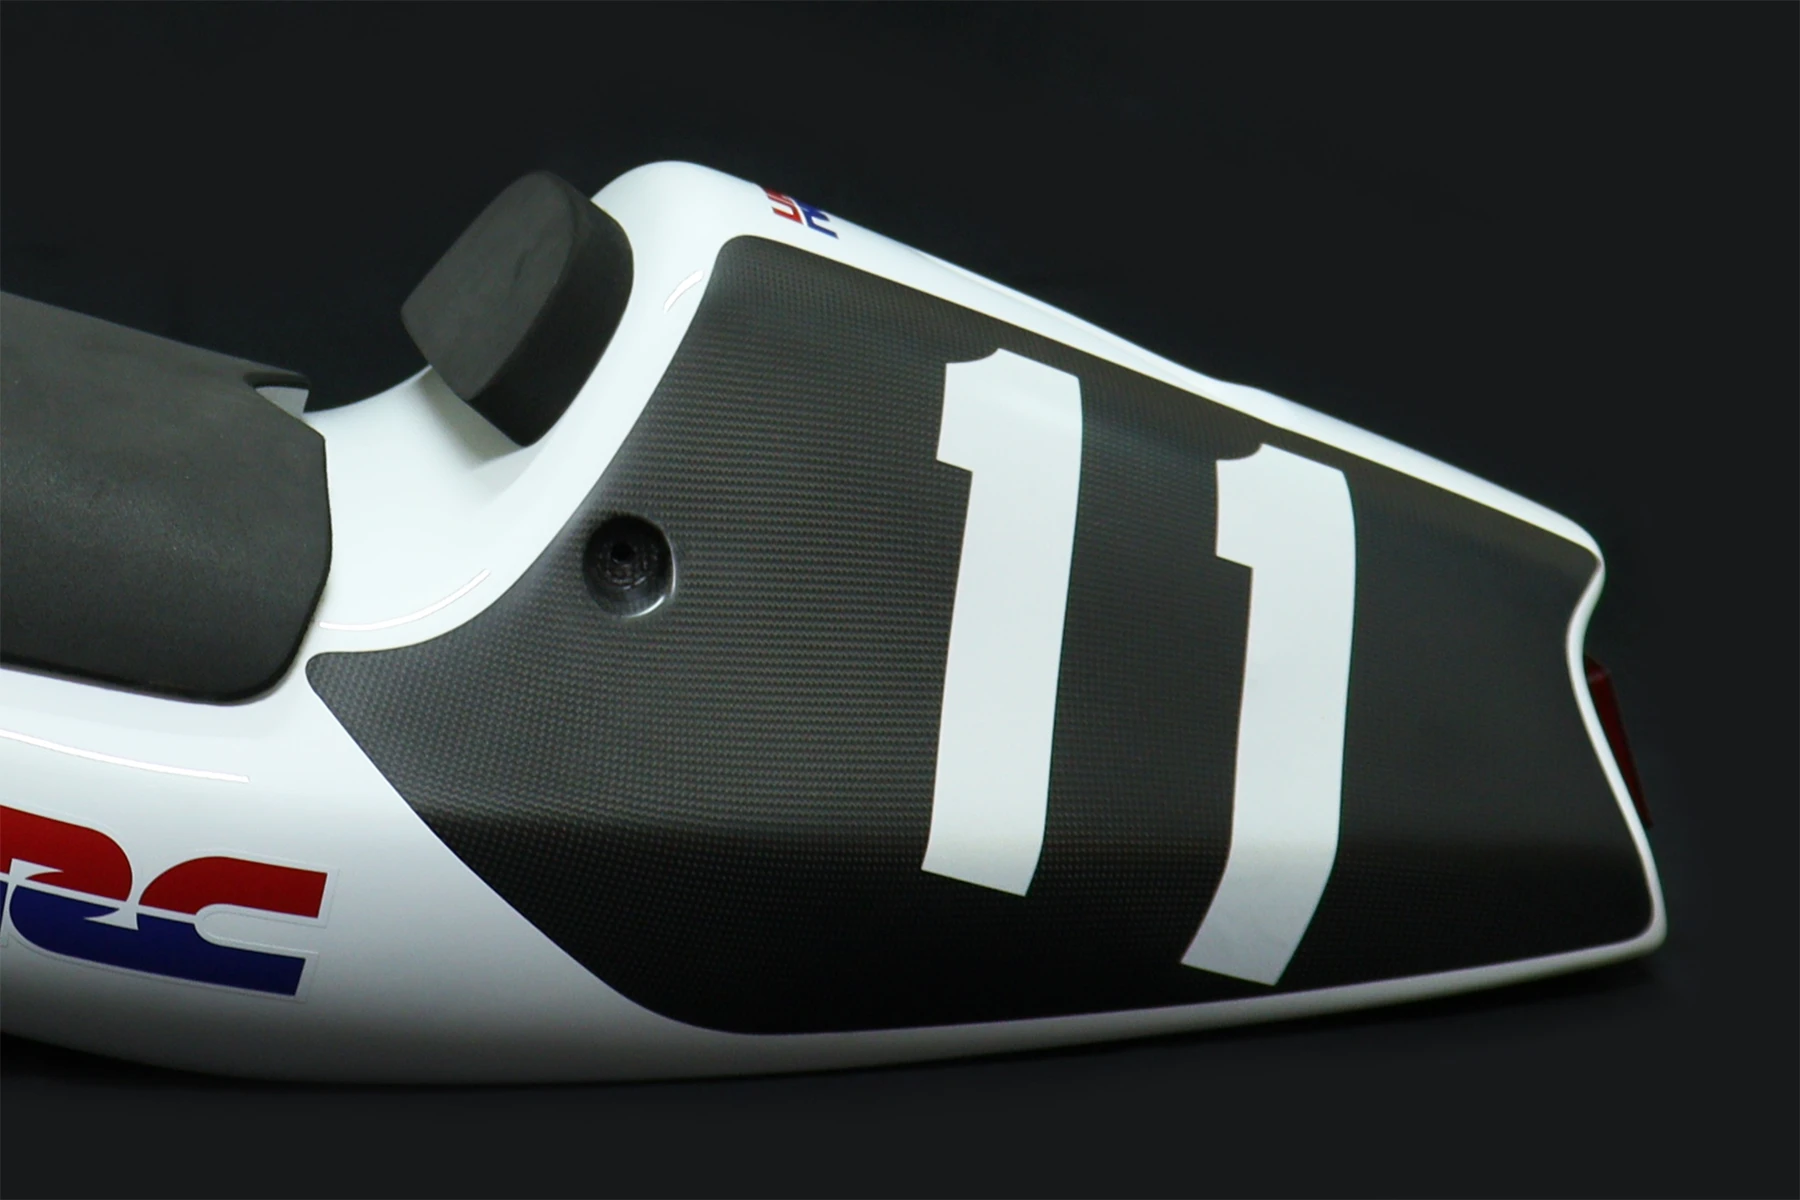
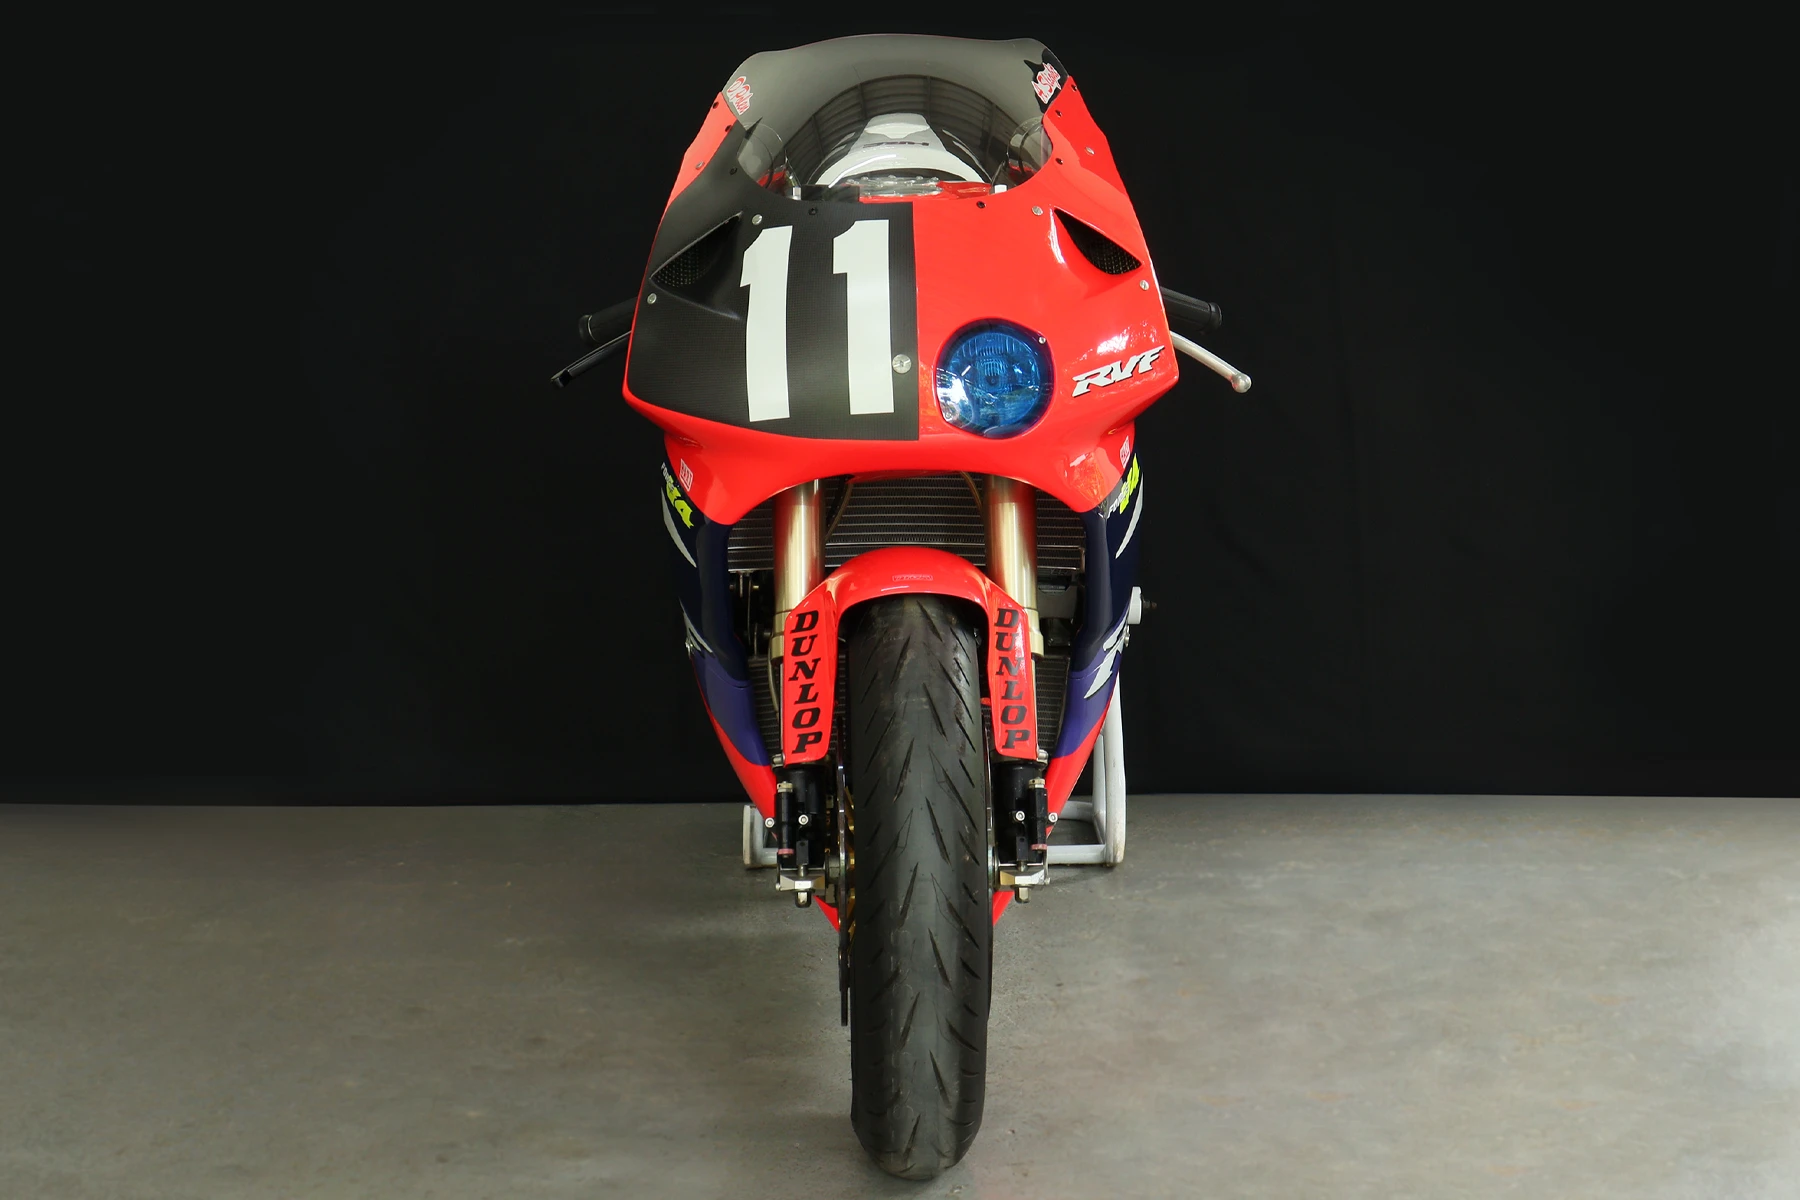
Another thing worth mentioning about the paintwork is that the black number boards are actually laid in satin carbon fibre for a subtle, classy look. Just like on similar projects, the decals are representative rather than an exact, stitch-for-stitch copy of the actual race bike. For instance, there was an obvious clearance issue where the sidestand rests against the lower fairing, and I must admit one or two of the other graphics aren’t absolutely perfect—but I think you will agree she looks incredibly pretty.
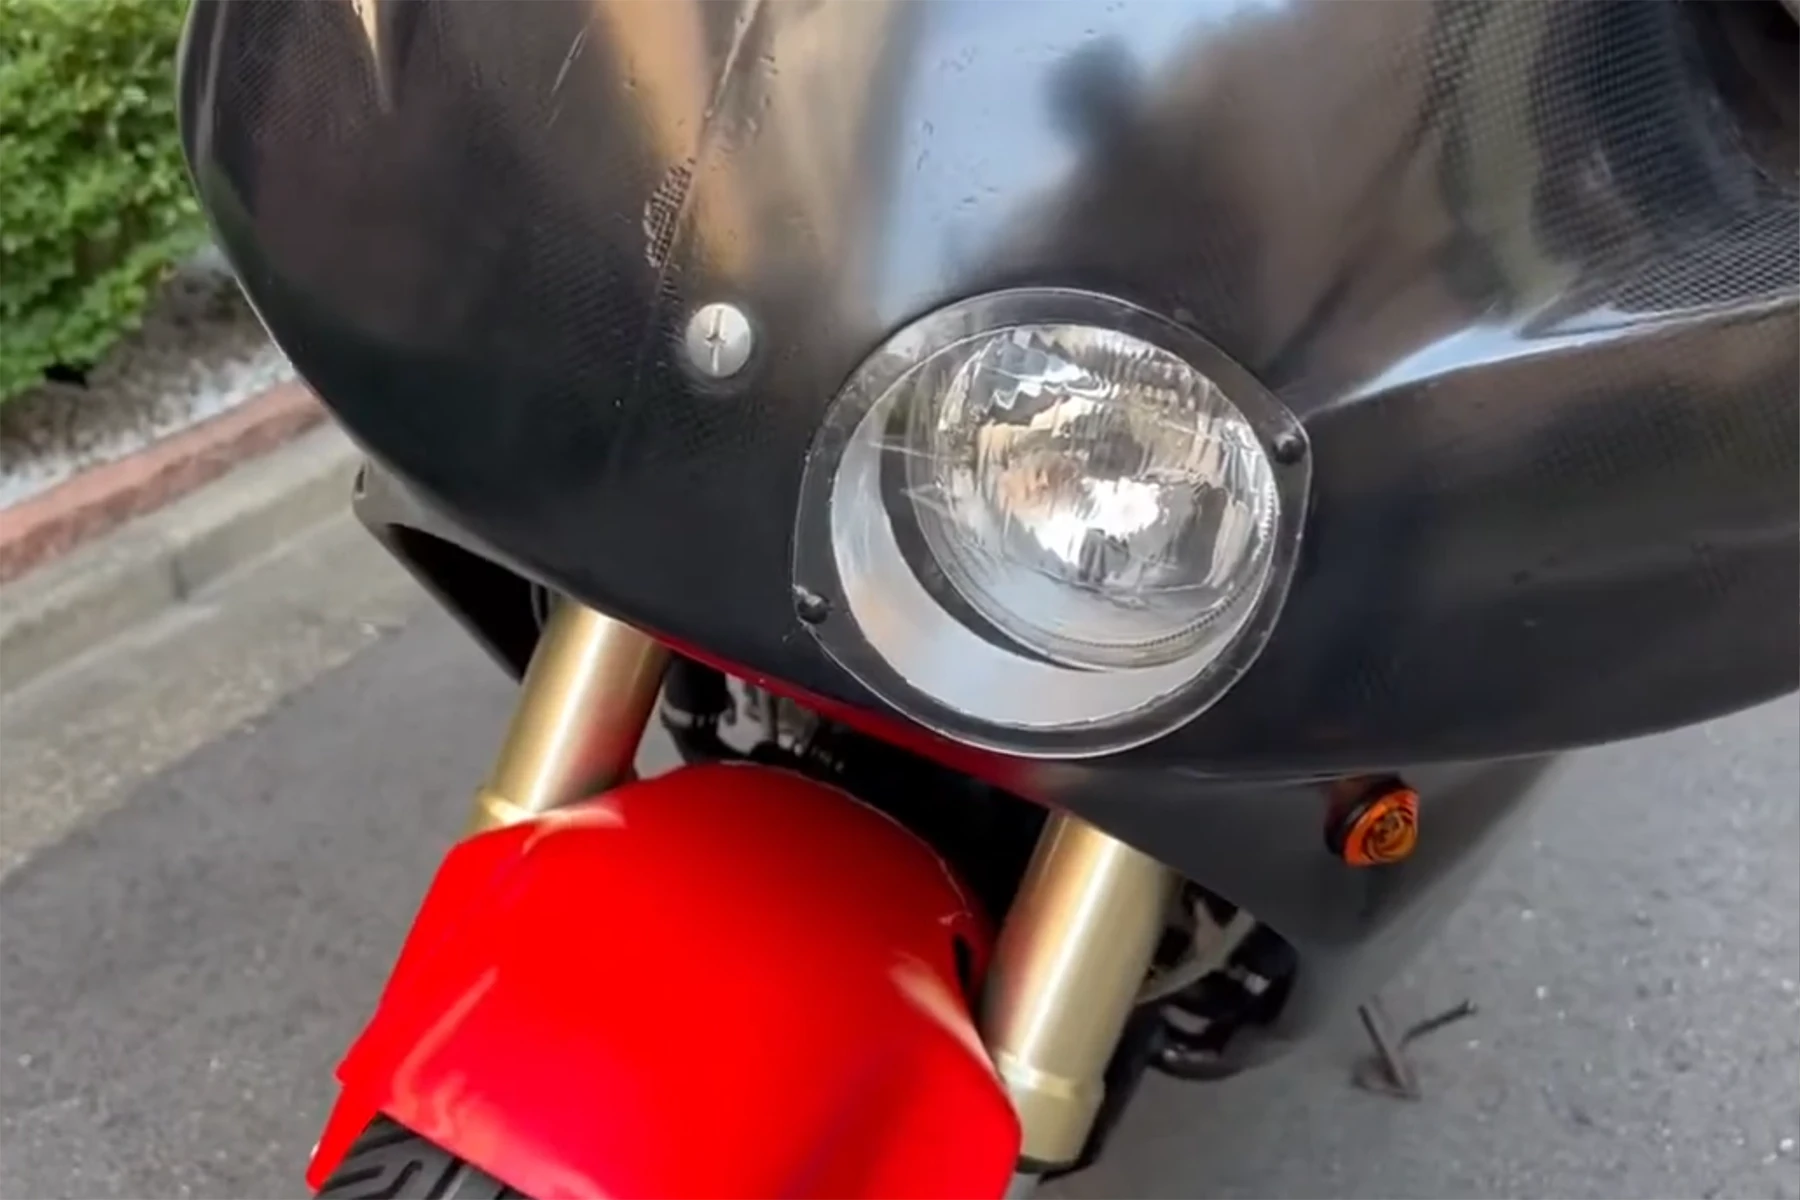
To finish off the authentic look of the Suzuka machine, we had a special blue headlight cover made. On the actual race bikes, these were used for quick pit-lane identification (the sister bike in the same livery ran a yellow headlight cover). When the headlight is actually illuminated, it shines through almost completely clear, so I don’t think any traffic regulations are being broken!
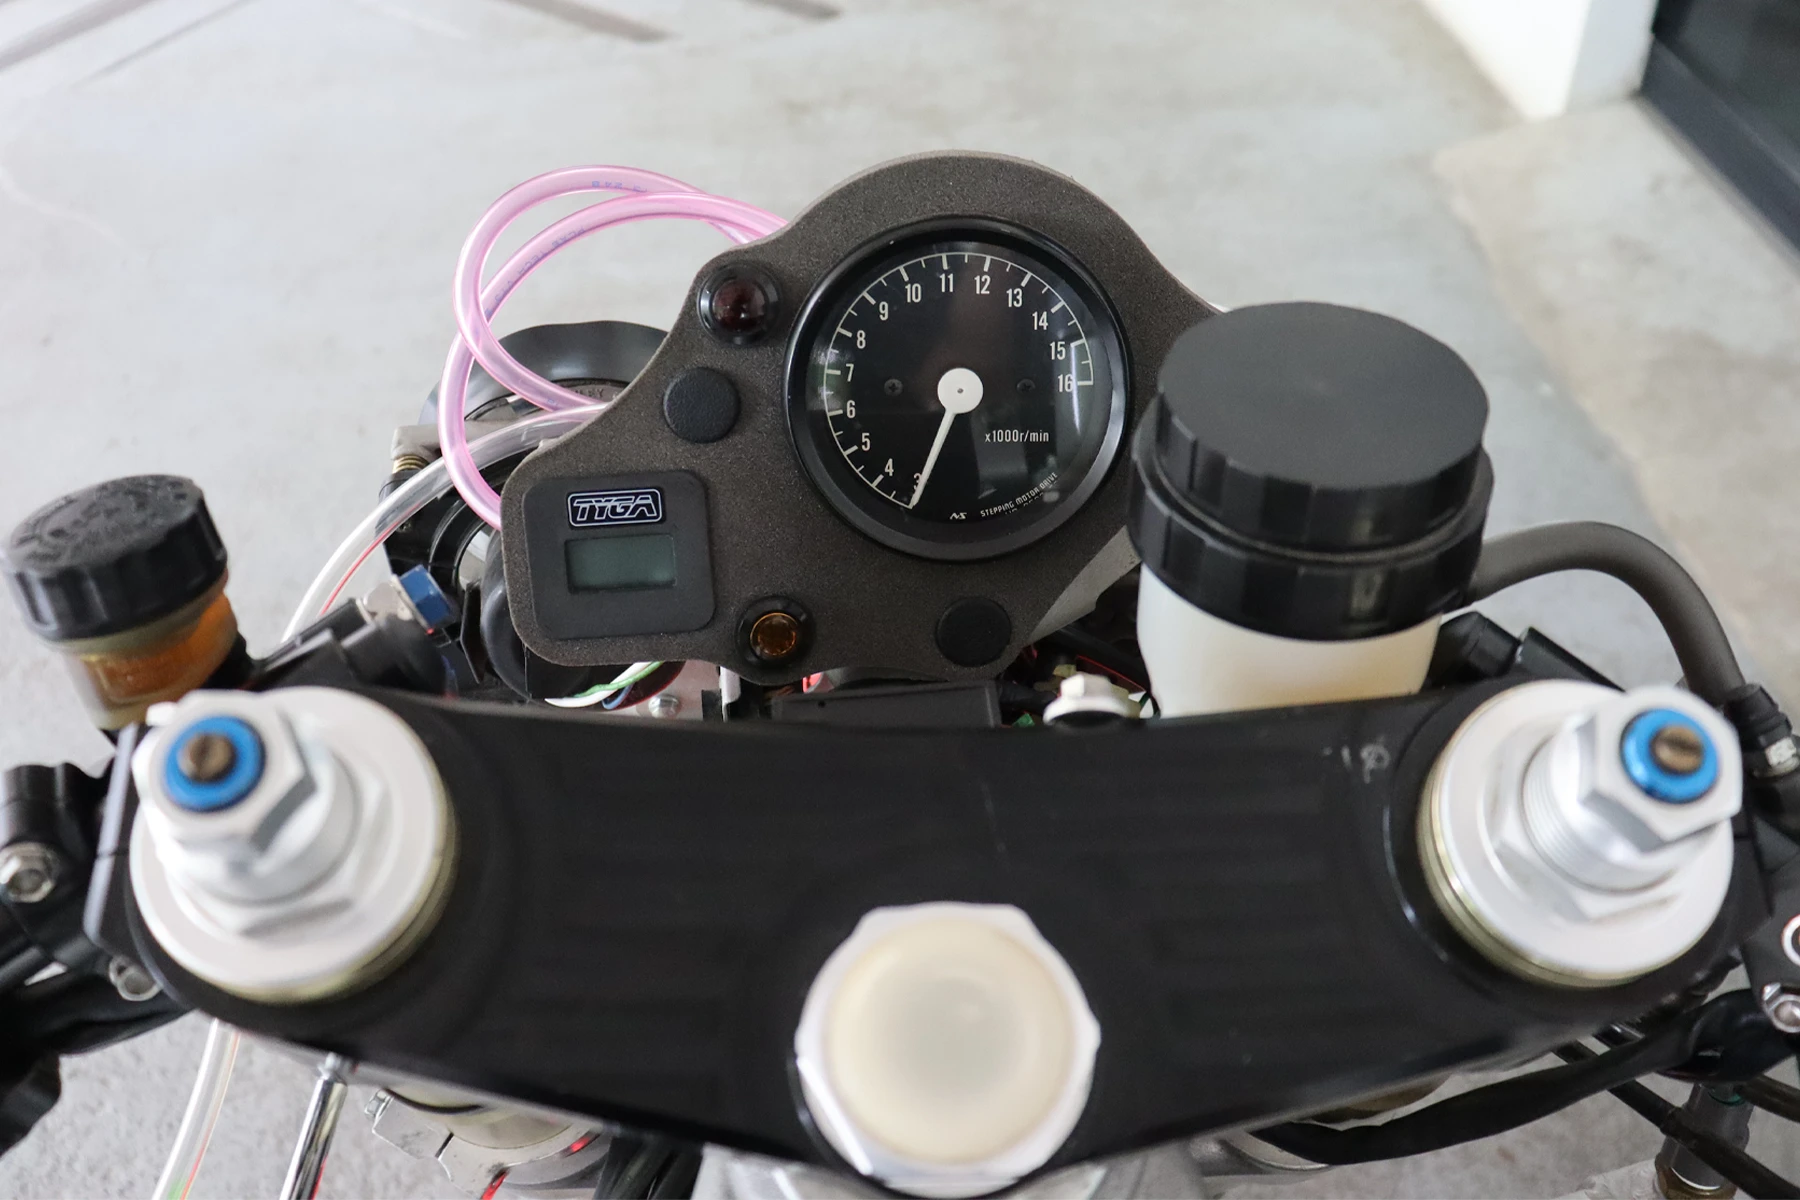
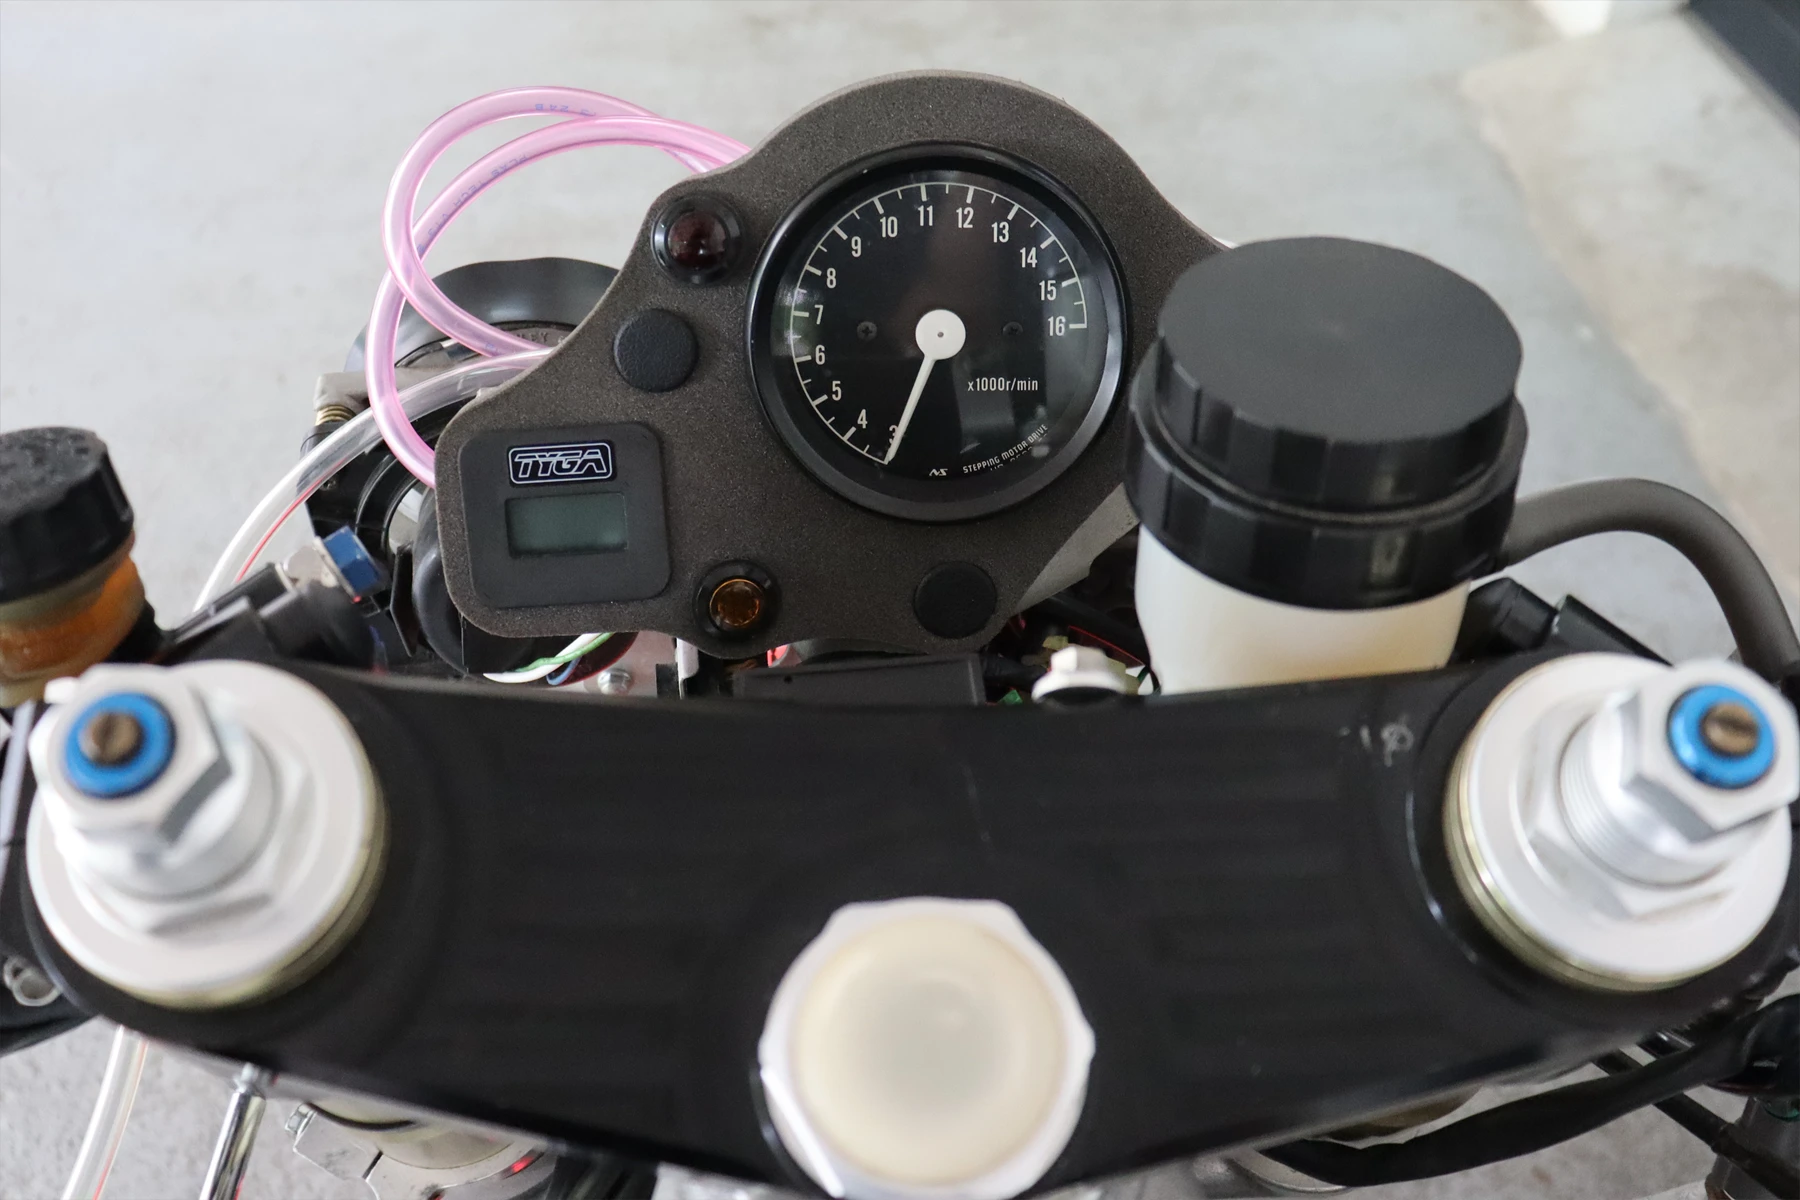
This brings us to the next subject. We went back and forth on a major question: is this strictly an endurance racer, or is it a street bike? If it’s the latter, it will need turn signals, a horn, and mirrors. Matt kindly went through the electrics and was able to adapt the HRC harness to accept the street gear. He even fitted a stock RC45 light/horn handlebar switch. Because the HRC rev counter is backlit, and Matt’s own custom-designed temperature gauge is also backlit, the bike can technically be configured for night time street riding.
The deciding factor came when I mentioned to K. Pong that I was planning to drill through his fresh paintwork to mount turn signals, and he was not at all happy with the idea. I dared not even mention mirrors—especially because I know I deeply upset him when I drilled into and installed them on our Rothmans NSR300 project! So, that was it. The bike currently features a horn, a brake light, and a concealed electric ignition switch, but as it sits right now, there are no mirrors and no turn signals.
We are finally getting close to the end of this long story—feel free to fast-forward if you are getting bored! Having waited an appropriate amount of time for K. Pong to complete the paintwork (measured in weeks instead of months for a change!), the bike was finally ready for its first test ride. It fired right up on the button every single time and sounded incredibly smooth. In fact, it was almost too smooth for a race bike. True, the exhaust note is heavily baritone and there is a deeply satisfying induction roar echoing through the air tubes, but the motor itself sounds very tight and quiet. Very Honda.
Unfortunately, the inaugural ride did not go to plan at all. Every time the bike was clicked into gear and the clutch let out, it popped, banged, and ground to a sudden halt. No amount of twiddling with the HRC volume dials made it any better. After a few futile hours of head-scratching, we gave up for the day
We decided to pull off as many of the likely culprits as possible and try again. Matt replaced the spark plugs, cleaned the injectors, and went through the wiring harness with a fine-tooth comb but it behaved exactly the same. I wondered if the mix of HRC-spec parts was throwing the ignition timing out somewhere, so we investigated that avenue, but everything checked out fine with NL5 parts utilized throughout. There was, however, a noticeable wavering of the rev counter needle, which pointed toward an underlying electrical problem.
We had to admit temporary defeat. More research was required, and through some sage advice from Fabrizio Bass, alongside AI doing what it does best (telling us some useful stuff mixed in with a whole load of made-up twaddle), we came to the conclusion that the fuel pressure regulator was the most likely culprit. Being old-fashioned two-stroke folk who are much more accustomed to carburettors, we had completely missed that possibility entirely!
Matt rigged up a fuel pressure measuring apparatus, and sure enough, it read just 2.5 bar. Stock specification is 3.0 bar, while the HRC setup demands 3.5 bar. AI had confidently informed us that we could source an aftermarket Honda Civic regulator that would work perfectly, but no local shop had one on hand, and we were in a massive hurry to find out if this was indeed our issue.
Naturally, as most people do, we happened to have a spare NR750 engine and throttle body assembly sitting in the shed, which just so happened to have a fuel pressure regulator installed. When we measured it, it read exactly to the NR’s correct specification of 2.9 bar. We figured that was close enough and well worth a try. Sure enough, the RVF fired right up, and this time, it took off cleanly without a single hint of hesitation. The bike was totally transformed! The only lingering issue was that wavering rev counter needle, which we quickly traced to a loose plug inside the ignition unit. Finally, we got there!
Our good friends over at Iconic Motorbikes in the USA did us a great deal on a genuine, new-old-stock NL5 regulator, which is currently on its way to us as I write this. Once it arrives, we will install it and put the NR750 regulator right back where it belongs and Matt will hopefully have a successful test ride. See below for more on that.
Matt’s Honda RVF75R RC45 NL5 Impressions
I’ll start by saying that when the RC45 first arrived in the TYGA factory, it certainly showed potential but was a bit of a mess to be honest, and as I’m far from an RC45 expert, it was a little daunting!
I won’t dwell on each point as that’ll be documented elsewhere, but eventually, with the help of our great friend Steve A’lee from GT performance, we eventually had a running bike.
We then spent a while cleaning things up, fabricating parts and getting the messy wiring in order so that the lights, indicators (if it needs them) and horn all worked. That took a bit of figuring out, but got it sorted without blowing a fuse 😊
We had a bit of an issue with the first shakedown test with bad running. It seemed to work fine revving it up on the stand but wasn’t keen on running under load on the street.
This bad running was traced to a dodgy fuel pump regulator (big thanks to Nick Winthrope here for his expert Fi advice).
Paul sourced a genuine NL5 regulator. I did some quick back yard engineering and built a pressure test rig, which the new (new old stock) regulator passed at a solid 3.5 bar and was duly fitted to the bike.
In the background, the bodywork had been done and was on the bike, and it’s fair to say that it looked stunning, so I was hoping that road shakedown part two went without drama.
Just firing the bike up with the new regulator was very encouraging. It sounded more angry right off the bat. So, I threw on my helmet and gloves and gingerly took it for a quick spin around the block.
I knew that all the bits and pieces were nice and tight as we’d done several spanner checks and bolt fettling, so the ‘quick run around the block’ turned into a tad more than that.
My initial feeling as I pulled out onto the main road and short shifted through the lower gears was that this thing had a huge chunk of bottom end torque. Pulling like a tractor. My immediate thoughts were comparing this to both the RC30 and the NR750, and honestly, this beast makes them both feel rather wheezy!
The first real issue I had was negotiating the U-turn a few kms down the road. The ‘wrist breaker’ Suzuka 8hr fuel tank means that the steering angle is somewhat limited, and I was very conscious of this as I lined up for the U-turn. I then made double sure that the road was very clear before tiptoeing my way through the 180° and heading back to base.
Well, the road ahead was dead straight and clear of vehicles so it seemed rude not to give it the berries.
Wow……I wasn’t expecting that. This (almost) NL5 spec RC45 is brutally fast for a 750cc, and the power is absolutely seamless. I just kept hooking a new gear at a shade over 12,000rpm until I was doing a maximum of no more than 90km/h (your honour). The bike felt as steady as a rock and just surged forward with no lag whatsoever. Very impressed.
Finally, it was time to hit the anchors and come back up the lane to the factory. That was a bit of a laugh as the high gearing means that you’ve blipped your way down into first gear, but you’re still doing exactly 90km/h (your honour).
In the lane, first gear at super slow speeds showed quite clearly that this is a racer at heart and not a street friendly bike. At low rpm, on and off the throttle trying to dodge stray dogs, stray people and old ladies wobbling along on their beaten up step thru’s, my wrists started aching and there was a bit of snatchiness (is that a word?) right off the bottom of the rev range. Not that enjoyable to be honest. I’m sure that a tweak of the HRC volume controls could clean that up a tad, but this was essentially the first real road test so haven’t got that far yet.
In summary, the bike looks fantastic, sounds incredible when revved to the max, and feel just like a race bike, albeit quite a big and chunky race bike.
It’s nothing like an RC30 or NR, where you sit ‘in’ the bike, and it’s all very comfy and ergonomic. This is a racer. You’re perched on top of a solid seat pad and you’d better hang on cos this old boiler has attitude!
If you’ve had the pleasure of riding a Honda NSR500V NX6 then you may get a very brief flash of Déjà vu when you first jump onboard the 45. Basically because of the fat seat and racing position, but that feeling soon disappears when you get a taste of the weight of the four stroke between your thighs. The 500V is a featherweight by comparison.
All in all, in this particular guise, this RC45 is not a good street bike. It does OK when the roads are clear and you don’t have to negotiate slow tight turns. But it honestly should just be taken to the race track and thrashed, just as HRC intended.
Cheers,
Matt
Watch this space for track riding next!
Credits
A special thanks should go to the following people and businesses:
Gecko Motorcycles – various NL5 parts
Hisashi Kadomasu – titanium bolts, literature, inspiration
Iconic Motorbikes – various NL5 parts
Kurvy Girl – fasteners
Mick Laughlin – various NL5 parts
Nick Withrope – technical help
Red Baron, Bangkok – hoses
Steve A’Lee at GT Performance Engineering- technical help
Tom Hofton – fuel tank
Also, a big shout out to the various members of the TYGA family. It was a real team effort this one!
K Champ – laser cutting and brake lines
K Da and K Fha – decals
K Golf – welding
K Joop – windscreen and headlight cover
K Mey – photography
K Na – electronics
K Oil – silencer fabrication
K Pla – welding and fabrication
K Pong – paintwork
K Pricha – dust cover
K Ri – fabrication and detailing
K Thanet – mold and design
K Wattana and team – composite production
Products used on this bike
For all TYGA-Performance products for the Honda RVF750R RC45 click here.